Local Businesses Blog in Texas

Tag: Garage Floor Chandler AZ

How Does Epoxy Flooring Compare To Other Garage Floor Coating Options In Terms Of Cost Andperformance – Alachua Door Company

Garage Floor Chandler AZ  stands out as a popular choice due to its durability, versatility, and aesthetic appeal.

Epoxy Flooring vs. Other Garage Floor Coating Options
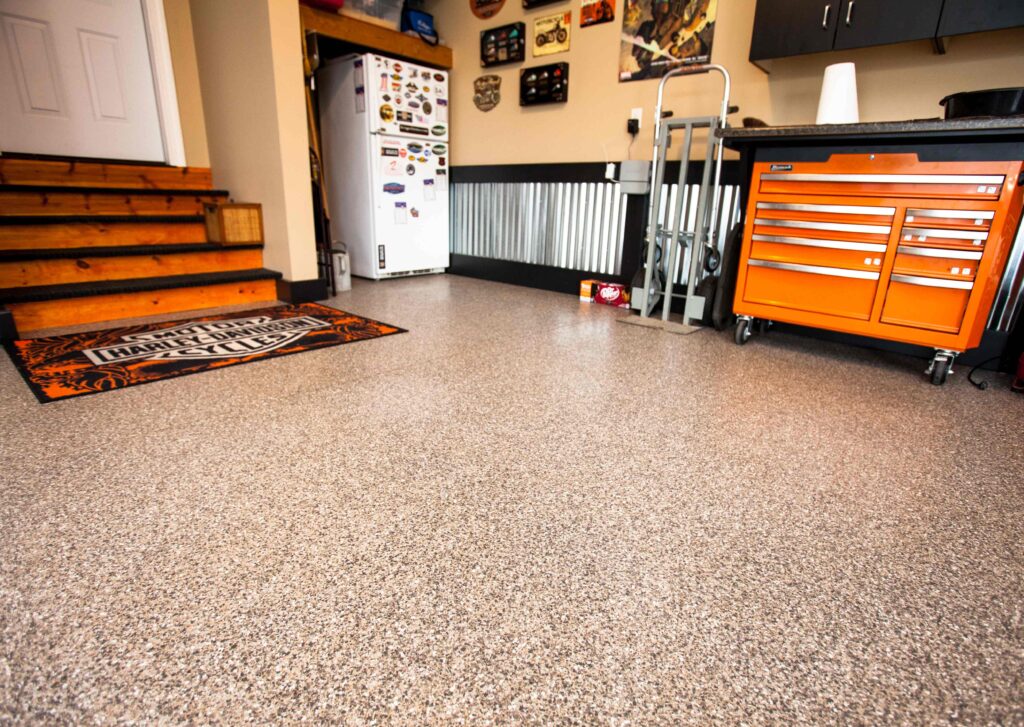
1. Epoxy Flooring

  • Cost: Epoxy flooring typically ranges from $3 to $12 per square foot, depending on factors such as the quality of materials, surface preparation requirements, and customization options (e.g., decorative flakes, metallic pigments). While initial installation costs may be higher compared to other options, epoxy flooring offers long-term value due to its durability and longevity.
  • Durability: Epoxy flooring is highly durable, resistant to stains, chemicals, abrasion, and impact. It forms a thick, seamless surface that protects the underlying concrete from moisture, oil, and other contaminants, extending the lifespan of the garage floor.
  • Maintenance: Epoxy flooring is relatively low maintenance and easy to clean. Regular sweeping and occasional mopping with a mild detergent are usually sufficient to keep the surface looking new. Periodic reapplication of a topcoat may be necessary to maintain its appearance and protective properties.

2. Concrete Sealers

  • Cost: Concrete sealers are one of the most cost-effective garage floor coating options, typically ranging from $0.50 to $2 per square foot. However, they offer minimal aesthetic enhancement and limited protection compared to epoxy flooring.
  • Durability: Concrete sealers provide basic protection against moisture, stains, and mild abrasion. While they can help extend the life of the concrete by reducing surface porosity, they may require more frequent reapplication compared to epoxy flooring.
  • Maintenance: Maintenance requirements for concrete sealers are minimal, similar to epoxy flooring. Regular cleaning with a mild detergent and reapplication of sealer every 1-3 years, depending on usage and exposure, are recommended to maintain effectiveness.

3. Paint

  • Cost: Paint is the most affordable garage floor coating option, with costs ranging from $0.50 to $3 per square foot. While inexpensive, paint offers limited durability and may require frequent touch-ups and recoating.
  • Durability: Paint provides a thin, decorative layer that offers minimal protection against stains, chemicals, and abrasion. It is prone to chipping, peeling, and fading over time, especially in high-traffic areas.
  • Maintenance: Painted garage floors require regular maintenance, including cleaning, touch-ups, and recoating every 1-3 years, depending on usage and wear.

4. Polyurea Coatings

  • Cost: Polyurea coatings are more expensive than epoxy flooring, with costs ranging from $5 to $20 per square foot. However, they offer superior durability and faster curing times, making them a popular choice for high-traffic areas.
  • Durability: Polyurea coatings are highly durable, resistant to chemicals, abrasion, and UV exposure. They form a flexible, seamless membrane that can withstand heavy use and extreme temperatures, making them ideal for garage floors.
  • Maintenance: Maintenance requirements for polyurea coatings are similar to epoxy flooring, with periodic cleaning and occasional recoating to maintain appearance and performance.

Factors to Consider When Choosing a Garage Floor Coating

  1. Budget: Consider your budget constraints and long-term investment goals when selecting a garage floor coating option.
  2. Performance Requirements: Assess the level of protection and durability needed based on the garage’s use, climate conditions, and anticipated wear and tear.
  3. Aesthetic Preferences: Choose a coating that complements your garage’s design and enhances its overall appearance.
  4. Installation Complexity: Consider the complexity of installation and whether professional assistance is required for surface preparation and application.

Final Considerations

While epoxy flooring offers significant advantages in terms of durability, longevity, and aesthetics compared to other garage floor coating options, it’s essential to weigh the pros and cons of each option based on your specific needs and preferences. By considering factors such as cost-effectiveness, durability, maintenance requirements, and overall performance, you can make an informed decision and select the garage floor coating option that best suits your requirements and budget. Whether you choose epoxy flooring, concrete sealers, paint, or polyurea coatings, investing in proper surface preparation and professional installation will ensure optimal results and long-lasting protection for your garage floor.

The Garage Floor Company Arizona

2300 W Pecos Rd #126, Chandler, AZ 85224, United States

1-480-405-1661

How Do I Prepare My Garage Floor For Coating Or Tiling – The Garage Floor Company Arizona


Garage Floor Chandler AZ  Here’s a detailed guide on how to prepare your garage floor for coating or tiling:

Concrete Garage Floor Coatings

1. Clear the Space: Start by clearing out the garage space and removing any items, vehicles, or obstacles from the floor. This will provide you with a clean and open workspace to work efficiently and effectively.

2. Sweep and Vacuum: Sweep the garage floor to remove any loose dirt, dust, and debris. Use a vacuum cleaner with a brush attachment to ensure thorough cleaning, especially in corners and along edges where dirt may accumulate.

3. Degrease the Surface: Use a degreaser or concrete cleaner to remove any oil, grease, or other stains from the garage floor. Apply the degreaser according to the manufacturer’s instructions and scrub the surface with a stiff-bristled brush or broom. Rinse the floor thoroughly with water and allow it to dry completely before proceeding.

4. Repair Cracks and Holes: Inspect the garage floor for any cracks, pits, or holes, and repair them using a concrete patching compound or epoxy filler. Follow the manufacturer’s instructions for mixing and applying the patching material, and use a trowel or putty knife to smooth the surface. Allow the patched areas to cure completely before continuing with the preparation process.

5. Remove Old Coatings or Sealers: If the garage floor has previously been coated or sealed, it may be necessary to remove the old coating or sealer before applying a new one. Use a chemical stripper or mechanical grinder to remove the old coating, following the manufacturer’s instructions and safety precautions. Thoroughly clean the floor after removing the old coating to ensure proper adhesion of the new coating or tiles.

6. Etch or Profile the Surface: Etching or profiling the garage floor surface is essential to promote adhesion and ensure proper bonding of the coating or tiles. Use a concrete etching solution or mechanical grinder to etch the surface, creating a rough texture that allows the coating or adhesive to penetrate and bond effectively. Rinse the floor thoroughly with water to remove any residue and allow it to dry completely.

7. Test for Moisture: Before proceeding with coating or tiling, it’s essential to test the garage floor for moisture to prevent issues such as delamination or mold growth. Tape a plastic sheet or piece of plastic film to the floor and seal the edges with duct tape. Leave the plastic in place for 24 to 48 hours, then check for condensation or moisture buildup underneath. If moisture is present, it may be necessary to address the underlying cause before proceeding with the flooring installation.

8. Sand or Grind High Spots: If the garage floor has any high spots or uneven areas, use a concrete grinder or sander to smooth them out. Grinding or sanding the surface will ensure a level substrate for the coating or tiles and prevent any imperfections from showing through.

9. Clean and Vacuum Again: Once the surface preparation is complete, thoroughly clean the garage floor again to remove any dust, debris, or residue from the preparation process. Use a mop or shop vac to remove any remaining dirt or dust, and allow the floor to dry completely before applying the coating or tiles.

10. Apply Primer (If Necessary): Depending on the type of coating or tiles you’re using, it may be necessary to apply a primer to the garage floor before installation. Follow the manufacturer’s instructions for mixing and applying the primer, and allow it to dry completely before proceeding with the next steps.

11. Follow Manufacturer’s Instructions: Finally, carefully read and follow the manufacturer’s instructions for applying the coating or tiles to the garage floor. Whether you’re applying epoxy coatings, interlocking tiles, rubber mats, or another flooring material, following the manufacturer’s recommendations for surface preparation, application techniques, and curing times will ensure optimal results and long-lasting performance.

Garage Floor Chandler AZ  Proper preparation is essential for achieving professional-quality results and maximizing the lifespan of your garage flooring investment.

The Garage Floor Company Arizona

2300 W Pecos Rd #126, Chandler, AZ 85224, United States

1-480-405-1661

How To Install Garage Floor Tiles – The Garage Floor Company Arizona


Garage Floor Chandler AZ  Whether you’re looking to create a durable, attractive surface for parking vehicles, working on projects, or simply organizing your belongings, garage floor tiles offer a versatile and customizable solution.

Here’s a step-by-step guide on how to install garage floor tiles:

1. Gather Materials and Tools:

Before you begin, gather all the materials and tools you’ll need for the installation process. This typically includes garage floor tiles, transition edges or ramps (if needed), a rubber mallet or hammer, a tape measure, a straightedge or chalk line, a utility knife or saw, and any adhesive or connectors required for the specific tile system you’re using.

2. Prepare the Subfloor:

Start by preparing the subfloor surface to ensure a clean, level, and stable foundation for the tiles. Sweep or vacuum the floor to remove any dust, dirt, or debris, and then use a degreaser or cleaner to remove any oil, grease, or other contaminants. Repair any cracks or uneven areas in the concrete subfloor using a concrete patching compound, and allow it to dry completely before proceeding.

3. Plan the Layout:

Before installing the tiles, plan the layout of the garage floor to ensure a proper fit and alignment of the tiles. Start by determining the center point of the garage floor and work outward from there, using a tape measure and chalk line to mark guidelines for tile placement. Consider any obstacles such as garage doors, support columns, or built-in cabinets, and plan the layout accordingly to minimize cuts and waste.

4. Install Edge Pieces and Ramps:

If your garage floor tiles require edge pieces or ramps for a finished look and smooth transition to the surrounding floor, install these pieces first. Place the edge pieces along the perimeter of the garage floor and secure them in place using adhesive or connectors as recommended by the manufacturer. Install transition ramps at garage door thresholds or entryways to provide a smooth transition from the floor to the tiles.

5. Lay the Tiles:

With the perimeter and transition pieces in place, begin laying the garage floor tiles according to your planned layout. Start in one corner of the garage and work your way outward, interlocking the tiles together using the manufacturer’s recommended installation method. Use a rubber mallet or hammer to gently tap the tiles into place and ensure a snug fit. Check periodically with a straightedge or level to maintain a flat, even surface.

6. Cut Tiles as Needed:

As you reach the edges and corners of the garage floor, you may need to cut tiles to fit around obstacles or along walls. Measure and mark the tiles carefully, and use a utility knife, jigsaw, or tile cutter to make clean, precise cuts. Take your time to ensure accurate measurements and cuts, and double-check the fit before installing the cut tiles.

7. Finish the Installation:

Once all the tiles are installed, go over the entire garage floor to ensure that each tile is securely locked in place and that the seams are tight and even. Make any necessary adjustments or repositioning of tiles as needed. Install any additional edge pieces or ramps to complete the perimeter of the floor, and ensure that all transitions are smooth and level.

8. Clean and Maintain:

After the installation is complete, clean the garage floor tiles with a mild detergent and water solution to remove any dust or debris. Allow the floor to dry completely before using the garage space. Regular maintenance of the tiles, such as sweeping or vacuuming to remove dirt and occasional mopping with a mild cleaner, will help keep them looking new and prolong their lifespan.

9. Enjoy Your New Garage Floor:

Once the installation is finished and the floor is clean and dry, you can begin using your newly transformed garage space. Whether you’re parking vehicles, working on projects, or organizing your belongings, garage floor tiles provide a durable, attractive surface that enhances the functionality and appearance of your garage.

Conclusion:

Garage Floor Chandler AZ  By following these step-by-step instructions and taking the time to plan, prepare, and install the tiles properly, you can create a durable, attractive, and functional surface that adds value to your home and enhances your daily life. With proper maintenance, your garage floor tiles will provide years of reliable performance and enjoyment.

The Garage Floor Company Arizona

2300 W Pecos Rd #126, Chandler, AZ 85224, United States

1-480-405-1661

Powered by WordPress & Theme by Anders Norén