Local Businesses Blog in Texas

Tag: garage door repair carlsbad ca

How To Disengage Garage Door – Denzel Garage Door Repair

Disengaging a Carlsbad Garage Door Repair is a crucial skill for homeowners, whether for routine maintenance, power outages, or manual operation.

In this comprehensive guide, I’ll provide a detailed, step-by-step process to safely and effectively disengage your garage door.

: Safety First

Before attempting any work on your garage door, prioritize safety. Clear the area around the door of any objects or obstructions. Additionally, unplug the garage door opener from its power source to prevent any accidental activations during the disengagement process.

: Identify Your Garage Door Opener Type

Garage door openers come in various types, including chain-driven, belt-driven, and screw-driven. The disengagement process may vary slightly depending on the type of opener. Consult your garage door opener’s manual to identify its type and find specific instructions tailored to your model.

: Locate the Emergency Release Cord

Most garage door openers feature an emergency release cord, usually colored red for easy identification. This cord is typically hanging down from the trolley on the garage door opener rail.

: Pull the Emergency Release Cord

With caution, pull down on the emergency release cord. This action disengages the trolley from the carriage on the opener rail, allowing the garage door to operate manually. You may hear a distinct clicking sound, indicating that the disengagement process is successful.

: Test Manual Operation

After pulling the emergency release cord, try manually lifting and lowering the garage door. It should move smoothly and without much resistance. If you encounter any difficulties or if the door feels unusually heavy, stop immediately and inspect for any obstructions or balance issues.

: Reconnecting the Garage Door to the Opener

When you’re ready to reconnect the garage door to the opener, manually lift the door until it’s fully open. Next, pull the emergency release cord toward the motor of the garage door opener. This action should engage the trolley back onto the carriage, restoring the connection between the door and the automatic opener.

: Test Automatic Operation

After reconnecting the door, test the automatic operation by activating the garage door opener. The door should move smoothly, and the opener should function as usual. If any issues arise, stop the operation immediately and investigate the cause.

: Reconnect Power

If you unplugged the garage door opener at the beginning of the process, now is the time to reconnect it to the power source. Ensure that the opener is functioning correctly in both manual and automatic modes.

: Regular Maintenance

Maintaining your garage door and opener is essential for long-term functionality. Perform regular maintenance, including lubricating moving parts, checking for worn-out components, and addressing any issues promptly.

Conclusion:

Disengaging a Carlsbad Garage Door Repair is a manageable task that provides flexibility and convenience for homeowners. Always prioritize safety by clearing the area and unplugging the opener before starting. If you encounter difficulties or are unsure about any step, consult your garage door opener’s manual or seek professional assistance. Regular maintenance is key to the longevity and efficient operation of your garage door system.

Denzel Garage Door Repair

2380 Camino Vida Roble, Carlsbad, CA 92011, United States

1-760-970-8179

Best Garage Door Materials for Durability – Denzel Garage Door Repair

As a homeowner on a quest for the perfect garage door, the journey led me to a realm of choices and considerations, particularly in the realm of materials. The durability of a garage door is not just a matter of resilience but a pivotal factor in the overall security and aesthetic appeal of a home.

In reference to Garage Door Repair, I share my insights into the best garage door materials for enduring durability, offering a comprehensive guide for fellow homeowners seeking a robust and long-lasting investment.

Understanding the Landscape: Common Garage Door Materials

Before delving into the specifics of durability, it’s essential to familiarize ourselves with the common materials used in garage door construction:

1. Steel:

  • Pros: Durable, low maintenance, and resistant to rust and decay.
  • Cons: Susceptible to dents and scratches, which may require repairs.
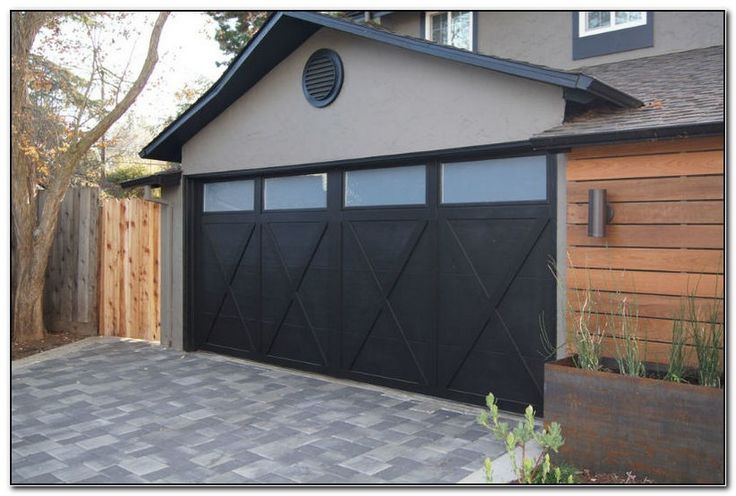
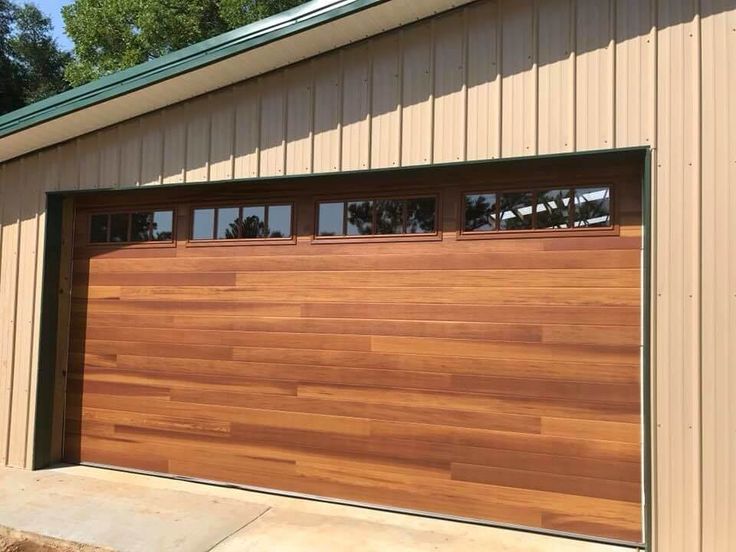
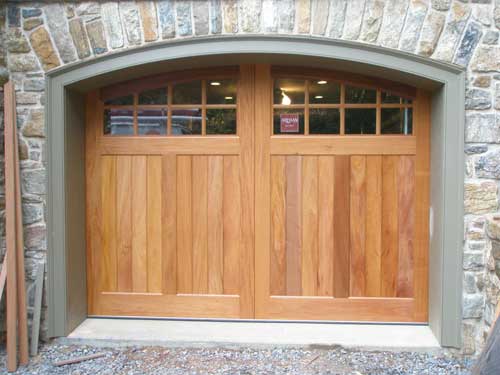
2. Wood:

  • Pros: Classic and aesthetically pleasing, customizable, and can enhance curb appeal.
  • Cons: Prone to warping, rotting, and requires regular maintenance.

3. Aluminum:

  • Pros: Lightweight, resistant to rust, and often comes with a protective finish.
  • Cons: Not as strong as steel, may dent easily.

4. Fiberglass:

  • Pros: Resistant to dents and rust, lightweight, and can mimic the look of wood.
  • Cons: Not as common, may become brittle over time.

5. Vinyl:

  • Pros: Durable, resistant to dents and rust, low maintenance, and customizable.
  • Cons: Limited design options compared to other materials.

Durability at the Forefront: The Best Materials Unveiled

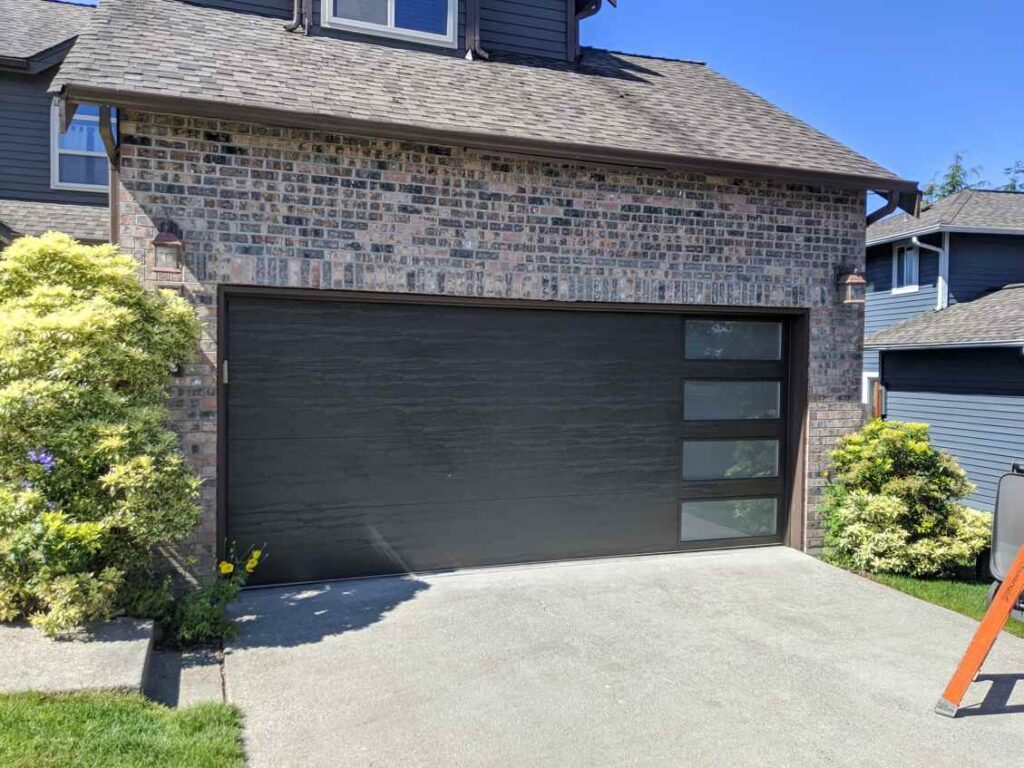
1. Steel: The Resilient Workhorse

Steel garage doors emerge as the undisputed workhorses when it comes to durability. The strength and sturdiness of steel make it an ideal choice for homeowners prioritizing longevity and minimal maintenance. With advancements in manufacturing techniques, steel doors are now available in various gauges, allowing homeowners to choose a thickness that aligns with their durability requirements.

Enhancements for Durability:

  • Galvanized Steel: Resistant to rust and corrosion, galvanized steel doors are well-suited for humid climates.
  • Polyurethane or Polystyrene Insulation: Enhances energy efficiency and adds an extra layer of durability.

2. Aluminum: The Lightweight Contender

While aluminum may not match the sheer strength of steel, it compensates with other favorable attributes. Aluminum garage doors are lightweight, resistant to rust, and often feature protective finishes that contribute to their durability. This material is an excellent choice for homeowners seeking durability without the weight that comes with steel.

Enhancements for Durability:

  • Powder Coating: Provides an additional layer of protection against the elements.
  • Thermal Breaks: Improves insulation and reinforces the structural integrity of the door.

3. Vinyl: The Low-Maintenance Champion

Vinyl garage doors step into the spotlight as low-maintenance champions, offering durability without the need for extensive care. These doors are resistant to dents, rust, and fading, making them an attractive option for homeowners seeking a durable and hassle-free solution.

Enhancements for Durability:

  • Reinforced Construction: Some vinyl doors come with reinforced frames for added strength.
  • UV-Resistant Finish: Protects against fading and discoloration caused by prolonged sun exposure.

4. Fiberglass: The Lightweight Resilience

Fiberglass garage doors combine the strength of certain materials with the lightweight nature of others, offering a unique blend of durability. While not as common as steel or vinyl, fiberglass doors are resistant to dents and rust, making them a compelling option for homeowners seeking durability with a touch of versatility.

Enhancements for Durability:

  • Polyurethane Core: Reinforces the structure and enhances insulation properties.
  • Impact Resistance Technology: Minimizes the risk of dents and damage.

Choosing the Right Material: Tailoring Durability to Your Needs

1. Climate Considerations:

The climate in your region plays a crucial role in determining the ideal garage door material. For humid climates, materials resistant to rust and decay, such as galvanized steel, are favorable. In areas with extreme temperature fluctuations, doors with enhanced insulation, like those with polyurethane cores, provide durability and energy efficiency.

2. Budgetary Constraints:

While durability is a key consideration, it’s essential to align your choice with budgetary constraints. Steel doors are often cost-effective, providing a durable solution without breaking the bank. Vinyl doors, while durable, may be slightly more expensive but offer long-term savings in terms of maintenance costs.

3. Aesthetic Preferences:

The durability of a garage door should not compromise its aesthetic appeal. Wood doors, despite requiring more maintenance, offer a classic and customizable aesthetic that enhances curb appeal. Homeowners seeking the warmth and charm of wood may find the trade-off in maintenance worthwhile.

4. Maintenance Tolerance:

Consider your tolerance for maintenance tasks when choosing a garage door material. Steel and vinyl doors are low-maintenance options, requiring minimal attention to stay in top condition. Wood, while timeless in appearance, demands regular upkeep to combat issues like warping and rotting.

5. Security Concerns:

Durability goes hand in hand with security. Steel doors, with their inherent strength, provide an added layer of security for homeowners concerned about potential intrusions. Coupled with advanced locking systems, a steel garage door becomes a formidable barrier.

My Personal Exploration: From Choices to Clarity

My exploration into the realm of garage door materials was initially a daunting task, given the myriad of options available. However, with each material presenting its unique set of advantages, I found clarity by aligning the key attributes of durability with my specific needs. Here are some insights from my personal journey:

1. Prioritizing Low Maintenance:

While the charm of wood was appealing, my preference for low maintenance led me to consider steel and vinyl options. Both materials offered a winning combination of durability and ease of care.

2. Climate-Driven Decision:

Living in an area with fluctuating temperatures and occasional humidity, the durability of the garage door material became paramount. Galvanized steel emerged as the ideal choice, providing resistance to rust in humid conditions.

3. Long-Term Investment:

Viewing the garage door as a long-term investment, I weighed the upfront cost against the potential savings in maintenance. While steel doors initially cost less, the durability and minimal maintenance requirements of vinyl became a compelling factor.

4. Aesthetic Harmony:

Balancing durability with aesthetic preferences, I explored vinyl options that offered customizable designs. The availability of various finishes allowed me to harmonize the durability of the material with the desired curb appeal.

5. Security Assurance:

Considering the role of the garage in home security, the strength of steel was a reassuring factor. Knowing that the material itself provided a robust barrier, I further enhanced security with advanced locking mechanisms.

Conclusion: Crafting Durability into Home Security and Style

The quest for the best garage door material for enduring durability is not just a technical decision; it’s a blend of practicality, aesthetic preferences, and long-term considerations. Each material brings its unique strengths to the table, allowing homeowners to tailor their choice to the specific needs and priorities of their homes.

This comprehensive guide from Garage Door Repair serves as a roadmap for those navigating the landscape of garage door materials, offering clarity on the attributes that define durability. Whether opting for the strength of steel, the low-maintenance appeal of vinyl, or the classic charm of wood, the right garage door material becomes a seamless integration of home security, style, and enduring durability.

Denzel Garage Door Repair

2380 Camino Vida Roble, Carlsbad, CA 92011, United States

760-970-8179

How To Program MDX Garage Door Opener – Carlsbad Garage Door & Gate Repairs

Programming the Carlsbad Garage Door Repair in your Acura MDX is a straightforward process that involves synchronizing the car’s HomeLink system with the garage door opener.

Follow these detailed steps to ensure a successful programming experience.

: Gather Information Start by collecting essential information about your garage door opener, such as the brand and model. Additionally, identify the location of the “learn” or “smart” button on the garage door opener.

: Locate the HomeLink Buttons In your Acura MDX, find the HomeLink buttons. Typically, these buttons are located on the rearview mirror or the overhead console.

: Clear Existing HomeLink Memory (if needed) If the HomeLink buttons have been programmed previously, you may need to clear the existing memory. Press and hold the first and third HomeLink buttons simultaneously until the indicator light flashes rapidly.

: Identify the “Learn” Button on the Garage Door Opener Locate the “learn” or “smart” button on your garage door opener. This button is usually near the antenna wire or motor head. Press and release this button.

: Program the HomeLink Buttons Return to your Acura MDX, and within 30 seconds, press and hold the desired HomeLink button (the one you want to program) and the garage door opener remote simultaneously. Continue holding both buttons until the HomeLink indicator light flashes slowly, then rapidly. This process may take up to 20 seconds.

: Test the HomeLink System To confirm successful programming, press the programmed HomeLink button in your Acura MDX. If the garage door opens or closes, the programming was successful. If not, repeat steps 4 and 5.

: Repeat for Additional Doors or Gates If you have more than one garage door or gate, repeat the entire process for each additional HomeLink button.

: Security+ 2.0 Systems (if applicable) For garage door openers with Security+ 2.0 technology, an additional step is required. Press the “learn” button on the opener and, within 30 seconds, press the HomeLink button in your Acura MDX twice. This ensures compatibility with rolling code systems.

: Final Testing and Troubleshooting After programming, thoroughly test each programmed button to ensure they operate the garage door or gate correctly. If any issues arise, refer to the vehicle and garage door opener manuals for troubleshooting tips.

Conclusion:

By following these detailed steps, you can successfully program the Carlsbad Garage Door Repair in your Acura MDX. Remember to consult the specific manuals for both your car and garage door opener for any model-specific instructions or troubleshooting steps. This comprehensive guide should help you seamlessly integrate your Acura MDX with your garage door opener, providing convenience and efficient operation.

Carlsbad Garage Door & Gate Repairs

760-350-3536

How To Clear Garage Door Opener On Chevy Silverado – Denzel Garage Door of Carlsbad

learing the Garage Door Repair on a Chevy Silverado involves resetting the HomeLink system, which is the built-in feature that allows you to program and control your garage door opener, security gate, or other compatible devices.

Follow these steps carefully to clear the garage door opener settings:

  1. Prepare Your Vehicle:
    • Ensure your Chevy Silverado is parked safely in a well-lit area, either inside or outside the garage.
    • Turn the ignition to the “ON” position without starting the engine. Make sure your vehicle’s key fob is nearby.
  2. Locate the HomeLink Buttons:
    • In your Chevy Silverado, the HomeLink buttons are typically located on the overhead console near the rearview mirror. There are three buttons labeled “1,” “2,” and “3.”
  3. Erase Existing Codes:
    • To clear the garage door opener settings, press and hold the two outside HomeLink buttons (Buttons “1” and “3”) simultaneously for about 20 seconds until the indicator light starts flashing. This erases all the stored codes.
  4. Release the Buttons:
    • Once the indicator light starts flashing rapidly, release both buttons. The flashing light indicates that the HomeLink system is now in programming mode.
  5. Prepare Your Garage Door Opener:
    • Go to your garage door opener motor unit and locate the “Learn” or “Program” button. This button is usually located on the back or side of the motor unit.
  6. Program the HomeLink Buttons:
    • Return to your Silverado and press and hold the HomeLink button (the one you want to program) that corresponds to the garage door or gate you wish to control. While holding the HomeLink button, simultaneously press and release the “Learn” or “Program” button on your garage door opener motor unit. Continue holding the HomeLink button until the HomeLink indicator light starts flashing rapidly.
  7. Test the HomeLink System:
    • Now, press the HomeLink button you just programmed in your Chevy Silverado. The garage door or gate should operate. If it doesn’t, you may need to repeat the programming steps, ensuring you press the HomeLink button in your vehicle while the garage door opener’s “Learn” or “Program” button is activated.
  8. Repeat for Additional Buttons (Optional):
    • If you have more than one garage door or gate to program, follow the same procedure for the other HomeLink buttons (Button “2” or “3”).
  9. Finalize Programming:
    • Once all desired devices are programmed and tested successfully, wait for the indicator light to stop flashing rapidly. This indicates that programming is complete.
  10. Test Your HomeLink System:
    • Test each programmed button in your Chevy Silverado to ensure they all operate the garage doors or gates correctly.
  11. Record the Codes (Optional):
    • It’s a good practice to record the codes you programmed in case you need to reprogram them in the future.

Remember that these steps may vary slightly depending on your specific Chevy Silverado model year and the type of Garage Door Repair you have. Always consult your vehicle’s owner’s manual for the most accurate instructions.

Denzel Garage Door of Carlsbad

300 Carlsbad Village Dr 108a 205, Carlsbad, CA 92008, United States

1-760-378-7470

How Many Rockets For Garage Door Rust – Carlsbad Garage Door & Gate Repairs

Your Garage Door Repair Carlsbad CA is an essential part of your home, providing security and easy access to your valuable possessions. Over time, exposure to the elements can cause rust to develop on its surface, compromising both its appearance and functionality.

In this comprehensive guide, we’ll discuss how to effectively remove rust from your garage door, ensuring it stays in top condition for years to come. While we won’t need any rockets for this project, we will need some basic tools and materials.

I. Assessing the Damage:

Before you start the rust removal process, it’s essential to assess the extent of the damage. Not all rust spots are the same, and some may be more severe than others. Here’s how to assess the damage:

  1. Surface Rust: Surface rust appears as a light layer on the garage door’s surface and can usually be addressed easily.
  2. Deep Rust: Deep rust penetrates the metal, causing pitting or holes. These areas may require more extensive repairs.
  3. Structural Damage: In extreme cases, rust can compromise the structural integrity of the door. If you notice severe damage, consider consulting a professional.

II. Gather Your Tools and Materials:

To tackle rust on your garage door, you’ll need some common tools and materials:

  1. Safety Gear: Safety goggles, gloves, and a mask to protect yourself from rust particles and chemicals.
  2. Wire Brush or Sandpaper: To remove loose rust and prepare the surface for treatment.
  3. Rust Converter: A chemical solution that converts rust into a more stable compound.
  4. Primer and Paint: To protect the metal after rust removal.
  5. Drop Cloth or Tarp: To catch any debris and protect the area around your garage door.

III. Rust Removal Process:

Follow these steps to remove rust from your garage door:

  1. Preparation: Put on your safety gear and lay down the drop cloth or tarp to catch debris. Remove any loose rust with a wire brush or sandpaper.
  2. Rust Converter: Apply the rust converter according to the manufacturer’s instructions. This chemical will neutralize the rust and prevent it from spreading further.
  3. Sand and Smooth: Once the converter has dried, lightly sand the area to create a smooth surface for painting. Wipe away any dust with a clean cloth.
  4. Primer Application: Apply a rust-inhibiting primer to the treated area. This helps the paint adhere and provides an extra layer of protection against future rust.
  5. Painting: Finally, apply a rust-resistant paint that matches your garage door’s color. Multiple thin coats are more effective than one thick coat. Allow each coat to dry before applying the next.

IV. Preventing Future Rust:

Prevention is key to keeping your garage door rust-free:

  1. Regular Inspections: Periodically inspect your garage door for any signs of rust or damage. Catching it early can prevent more extensive problems.
  2. Regular Cleaning: Clean your garage door to remove dirt and debris that can contribute to rust formation.
  3. Wax or Lubricate: Applying a silicone-based lubricant or wax to your garage door’s metal parts can help prevent rust and keep it operating smoothly.
  4. Repaint as Needed: Keep an eye on the condition of the paint. If it starts to chip or peel, touch it up promptly to maintain the protective barrier.

Conclusion:

With the right tools and materials, removing rust from your Garage Door Repair Carlsbad CA is a manageable DIY project. Regular maintenance and vigilance can help prevent future rust issues, ensuring that your garage door remains not only functional but also aesthetically pleasing. Remember, while rockets may not be needed, a little patience and effort can go a long way in preserving the integrity of your garage door for years to come.

Denzel Garage Door of Carlsbad

300 Carlsbad Village Dr 108a 205, Carlsbad, CA 92008, United States

1-760-378-7470

How To Set Garage Door Opener – Carlsbad Garage Door & Gate Repairs

Setting up a Garage Door Repair Carlsbad CA opener involves programming it to work with your garage door system. This process includes synchronizing the remote controls, programming the wall control console, and adjusting settings for optimal performance.

Here’s a comprehensive guide on how to set up a garage door opener:

1. Gather Required Tools and Materials:
Before you begin, gather the necessary tools and materials:

  • New garage door opener (if applicable)
  • Remote controls (usually included with the opener)
  • Ladder or step stool
  • Safety goggles and gloves

2. Read the Manual:
Carefully read the manufacturer’s manual that came with your garage door opener. Each opener model may have specific instructions and features that you need to understand before proceeding.

3. Assemble the Opener:
If you’re installing a new garage door opener, follow the manufacturer’s instructions to assemble it. This may involve connecting rail sections, motor unit, and other components.

4. Mount the Opener:
Install the garage door opener on the ceiling or wall, following the manufacturer’s guidelines. Ensure it’s securely fastened to provide stable support.

5. Attach the Opener to the Garage Door:
Attach the trolley to the garage door using the provided brackets and hardware. This connects the opener to the door, allowing it to open and close.

6. Install Safety Reversal System:
Most garage door openers have safety sensors that prevent the door from closing if an object is detected in the way. Install the sensors at the bottom of the garage door tracks, facing each other. Connect them to the opener according to the manufacturer’s instructions.

7. Power On the Opener:
Connect the garage door opener to a power source. If it has a power button, turn it on. The opener’s indicator lights should illuminate, indicating it’s ready for programming.

8. Program the Remote Controls:
Follow these steps to program the remote controls:

  • Press and release the “learn” or “programming” button on the opener unit.
  • The indicator light on the opener will start blinking.
  • Within a specified time frame (usually 30 seconds), press the button on the remote control you want to program.
  • The indicator light on the opener should stop blinking, indicating successful programming.

9. Test the Remote Controls:
Test the programmed remote controls by pressing their buttons. The garage door should respond by opening or closing. If not, repeat the programming process.

10. Program the Wall Control Console:
Follow these steps to program the wall control console (mounted inside your garage):

  • Press and hold the console’s “learn” or “programming” button until the indicator light starts blinking.
  • Release the button.
  • Within a specified time frame, press the button on the remote control you programmed earlier.
  • The indicator light on the console should stop blinking, indicating successful programming.

11. Adjust Settings:
Use the manufacturer’s instructions to adjust settings such as the force sensitivity and travel limits. These settings ensure that the garage door operates smoothly and safely.

12. Test Safety Features:
Test the safety features of the garage door opener. Place an object in the path of the closing door to verify that the safety sensors are working correctly and will stop the door from closing.

13. Regular Maintenance:
Perform routine maintenance on your garage door opener. Lubricate moving parts, inspect safety features, and test the auto-reverse mechanism periodically.

14. Troubleshooting:
If you encounter any issues during the setup process, refer to the troubleshooting section of the manufacturer’s manual. It might provide solutions for common problems.

15. Professional Assistance:
If you find the setup process confusing or encounter difficulties, consider seeking professional assistance. Garage door professionals can ensure that the opener is installed and programmed correctly.

In conclusion, setting up a Garage Door Repair Carlsbad CA opener involves programming remote controls, the wall control console, and adjusting settings for safety and performance. By following these steps and referring to the manufacturer’s instructions, you can successfully set up your garage door opener and enjoy convenient and reliable operation of your garage door system.

Carlsbad Garage Door & Gate Repairs

300 Carlsbad Village Dr 108a 205, Carlsbad, CA 92008, United States

760-350-3536

Repairing Garage Door Track Misalignment for Smooth Movement – Carlsbad Garage & Overhead Doors

Dealing with a misaligned garage door was a frustrating experience I encountered recently. What was once a smoothly operating system had turned into a jerky, noisy struggle. Determined to find a solution, I embarked on a DIY journey to repair the track misalignment and restore my garage door’s seamless movement. Through research, trial and error, and a bit of elbow grease, I successfully addressed the issue and regained control over my garage door’s operation.

I’m excited to share my experience and guide you through the steps of diagnosing track misalignment, identifying the causes, and implementing the necessary repairs for a hassle-free garage door as stated from Carlsbad Garage & Overhead Doors.

Step 1: Recognizing the Signs

The journey began with a keen observation of my garage door’s behavior. I noticed unusual noises, jerky movements, and visible gaps between the door panels and the tracks. These telltale signs indicated that my garage door was suffering from track misalignment.

Step 2: Preparing for the Task

Before diving into the repair process, I made sure to gather all the necessary tools and materials. A ladder, rubber mallet, level, socket wrench set, and safety gear including gloves and goggles were my essential companions for this task.

Step 3: Prioritizing Safety

My first step was to disconnect the garage door opener from the power source. Safety was paramount to prevent any accidental movements while I worked on the tracks.

Step 4: Thorough Inspection

Closely examining the tracks, I looked for visible signs of misalignment such as gaps between the tracks and the door panels or tracks that appeared bent or skewed.

Step 5: Loosening the Bolts

With safety in mind, I used a socket wrench to gently loosen the mounting bolts that held the tracks in place. This step allowed me to adjust the tracks for proper alignment.

Step 6: Adjusting the Tracks

Armed with a rubber mallet and a level, I gently tapped and adjusted the misaligned tracks. Using the level ensured that the tracks were both vertically and horizontally aligned, promoting smooth movement.

Step 7: Ensuring a Secure Fit

Once the tracks were in their proper position, I meticulously tightened the mounting bolts using the socket wrench. A delicate balance was important here to avoid over-tightening and causing unnecessary stress on the tracks.

Step 8: Testing and Observing

With the tracks realigned and bolts tightened, I put my garage door to the test. Opening and closing it multiple times, I listened for any unusual sounds and carefully observed the smoothness of its movement.

Step 9: Making Regular Maintenance a Habit

To prevent future track misalignment, I added regular maintenance to my to-do list. Regularly inspecting the tracks for signs of wear, debris, or any other issues became a part of my routine.

Knowing When to Seek Professional Help:

While I successfully tackled the track misalignment issue, I recognized that there might be scenarios where professional assistance is necessary:

  • Severe Misalignment: If the tracks are severely misaligned or if adjusting them seems daunting, seeking professional help ensures a precise fix.
  • Complex Repairs: If track misalignment is accompanied by other issues like damaged rollers or worn-out tracks, a professional can offer a comprehensive solution.

Overall, according from Carlsbad Garage & Overhead Doors, repairing garage door track misalignment was a journey that taught me the importance of regular maintenance and attention to detail. By following the steps outlined above and prioritizing safety, I was able to address the misalignment issue and enjoy the convenience of a smoothly operating garage door once again. Remember to invest in the right tools, perform regular maintenance, and consider professional help for complex repairs. With a garage door that’s back on track, you’ll experience the reliability and ease of operation that a well-maintained system provides.

Carlsbad Garage & Overhead Doors

300 Carlsbad Village Dr 108a 205, Carlsbad, CA 92008, United States

760-350-3536

How To Measure Garage Door Opening – Carlsbad Garage & Overhead Doors

Measuring a Garage Door Repair Carlsbad CA opening is a crucial step in ensuring that you select the right-sized door for your garage. Accuracy in measuring will not only prevent costly mistakes but also save you time and effort during installation.

In this comprehensive guide, we will walk you through the step-by-step process of measuring a garage door opening. Before you begin, ensure you have a measuring tape, pencil, paper, and a helper (optional but recommended).

Step 1: Gather the Necessary Tools

Start by gathering all the necessary tools mentioned above. Ensure your measuring tape is in good working condition and has both imperial (inches) and metric (centimeters) measurements for versatility.

Step 2: Clear the Area

Before taking measurements, ensure that the area around the garage door is clear of any obstacles or obstructions. Remove any clutter or items that might interfere with your measurements.

Step 3: Measure the Width

Begin measuring the width of the garage door opening. Position yourself inside the garage, facing the door. Measure the distance between the left and right sides of the opening. Take three measurements at different heights – near the top, middle, and bottom of the opening. Record the smallest measurement; this ensures that your garage door will fit properly.

Step 4: Measure the Height

Next, measure the height of the garage door opening. Stand to the side of the opening and measure from the floor to the underside of the header or lintel. As with the width, take three measurements at various points along the height of the opening and record the smallest measurement.

Step 5: Measure the Headroom

Headroom is the space between the top of the garage door opening and the ceiling or overhead structure. Measure this area to ensure there is enough space for the garage door hardware and tracks. It is crucial, especially for overhead doors and door openers.

Step 6: Measure the Sideroom

Sideroom refers to the space on each side of the garage door opening between the edge of the opening and the nearest wall or obstruction. Measure the sideroom on both sides, as some garage doors require more sideroom than others, depending on the hardware and track system used.

Step 7: Determine the Backroom

The backroom is the distance from the garage door opening to the nearest obstruction inside the garage, such as a wall or any items stored. Measure the backroom to ensure there is enough space for the garage door to fully open and close without any hindrance.

Step 8: Check for Level and Square

After obtaining all the measurements, check for level and square of the opening. Use a level to ensure the floor and header are both horizontal and that the side jambs are vertical. A perfectly square opening ensures smooth door operation and proper sealing.

Step 9: Consider the Type of Garage Door

Different types of garage doors (e.g., sectional, roller, swing-out) have specific requirements for measurements and clearances. Consult the manufacturer’s guidelines to ensure accurate measurements based on the type of door you plan to install.

Step 10: Seek Professional Assistance (Optional)

If you feel unsure or uncomfortable taking measurements, consider seeking professional assistance from a garage door expert. Many companies offer measuring services, and their expertise can help avoid costly mistakes.

Conclusion:

Measuring a Garage Door Repair Carlsbad CA opening requires precision and attention to detail. Following the steps outlined in this comprehensive guide will ensure you obtain accurate measurements, making the process of selecting and installing the right garage door smoother and more successful. Remember to double-check your measurements before purchasing the door and, if necessary, seek help from professionals. With proper measurements, you can enjoy a functional, secure, and aesthetically pleasing garage door for years to come.

Carlsbad Garage & Overhead Doors

300 Carlsbad Village Dr 108a 205, Carlsbad, CA 92008, United States

760-350-3536

How to Insulate Garage Door for Summer? – Carlsbad Garage & Overhead Doors

Insulating my garage door for the summer was a project I took on to keep the heat out and maintain a cooler temperature inside. It was a simple and cost-effective DIY project that I completed with basic tools and materials.

Here’s how I did it based from Garage Door Repair Carlsbad CA:

  1. I started by carefully assessing my garage door to identify any gaps or areas where heat might enter. I looked for cracks, holes, or weatherstripping that needed attention. Fixing these issues would ensure the insulation was effective.
  2. For summer insulation, I opted for reflective foil insulation or radiant barrier foil. This type of insulation reflects sunlight and prevents heat absorption. It usually consists of a layer of foam or bubble wrap sandwiched between two layers of reflective foil.
  3. I gathered all the necessary materials: reflective foil insulation, a utility knife, a straightedge or ruler, a tape measure, adhesive (construction adhesive or double-sided tape), duct tape, and safety goggles and gloves.
  4. Taking accurate measurements, I marked the dimensions of each garage door panel onto the reflective foil insulation. Using a straightedge or ruler, I guided my utility knife to cut the panels to the correct size. I prioritized safety by wearing goggles and gloves.
  5. I began installing the insulation panels starting from the top panel of the garage door. Following the manufacturer’s instructions, I applied adhesive or double-sided tape to the back of the reflective foil insulation. Pressing the panel firmly against the inside face of the door, I continued this process for each panel, working my way down the door. It was crucial to achieve a snug fit for optimal insulation.
  6. To create a more airtight and secure insulation barrier, I sealed the joints between the insulation panels using duct tape. This step eliminated any potential air leaks and improved the effectiveness of the insulation. Additionally, I sealed the edges of the garage door with weatherstripping to minimize heat transfer.
  7. If my garage door had windows, I also considered insulating them. I added a reflective film or shade to block sunlight and reduce heat transmission through the glass.
  8. With the insulation in place, I carefully inspected the installation to ensure everything was secure and properly fitted. I made any necessary adjustments or corrections to ensure optimal insulation before considering the project complete.
  9. To ensure the garage door still operated smoothly, I tested it by opening and closing it several times. This step allowed me to check if the added insulation interfered with the door’s movement.
  10. Throughout the summer, I planned to regularly monitor the insulation to ensure it remained in good condition. If any panels or weatherstripping became damaged or dislodged, I would promptly replace or repair them.

By following these steps from Garage Door Repair Carlsbad CA, I successfully insulated my garage door for the summer. Now I can enjoy a cooler temperature inside the garage and prevent the heat from radiating into my living spaces. It’s a simple and effective solution that enhances comfort during the hot summer months.

Carlsbad Garage & Overhead Doors

300 Carlsbad Village Dr 108a 205, Carlsbad, CA 92008, United States

760-350-3536

How to Paint Your Aluminum Garage Door? – Carlsbad Garage & Overhead Doors

I recently decided to paint my aluminum garage door to give it a fresh new look. I knew that painting aluminum could be tricky, so I did some research and gathered all the necessary materials and tools.

By following the steps I got from Garage Door Repair Carlsbad CA, I will guide you through the steps to paint an aluminum garage door, including the materials and tools you will need and the necessary steps to complete the project.

First, I cleaned the door with a pressure washer and allowed it to dry completely. Then, I used a screwdriver to remove the door handles and covered any areas that I didn’t want to paint with painter’s tape.

Next, I used sandpaper to remove any rust and debris from the door, making sure to sand it evenly with a sanding block. Since my door was weathered, I decided to apply a primer before painting to ensure that the paint would adhere properly. I waited for the primer to dry completely before moving on to the next step.

After the primer was dry, I started applying the paint to the door. I used a paintbrush to make sure that I was covering every inch of the door and used even strokes to ensure a smooth finish. I waited for the first coat to dry completely before applying a second coat to get the desired color and finish.

Once the second coat was dry, I reinstalled the door handles and other hardware that I had removed before painting.

Overall, by following these steps from Garage Door Repair Carlsbad CA, the project was a success! My garage door looks brand new and the paint has held up well over time. If you’re thinking about painting your aluminum garage door, I highly recommend taking the time to gather all the necessary materials and tools and following each step carefully to ensure a professional-looking finish.

Carlsbad Garage & Overhead Doors

300 Carlsbad Village Dr 108a 205, Carlsbad, CA 92008, United States

760-350-3536

Powered by WordPress & Theme by Anders Norén