Local Businesses Blog in Texas

Tag: garage door repair ramona ca

How Can You Secure Your Garage Against Break-ins? – Ramona Valley Garage Door & Gates

As a homeowner, one of my top priorities is ensuring the safety and security of my property. The garage, often considered an entry point vulnerable to break-ins, became a focal point in my quest to fortify my home.

In this comprehensive guide from Garage Door Repair, I share the strategies and measures I’ve taken to secure my garage against potential break-ins, offering insights and practical tips that can empower fellow homeowners to safeguard their own spaces.

**1. Assessing Vulnerabilities: Understanding Entry Points

Before implementing security measures, it’s crucial to assess the vulnerabilities of your garage. Identify potential entry points that could be exploited by intruders. Common vulnerabilities include:

**a. Garage Doors: The Primary Entry Point

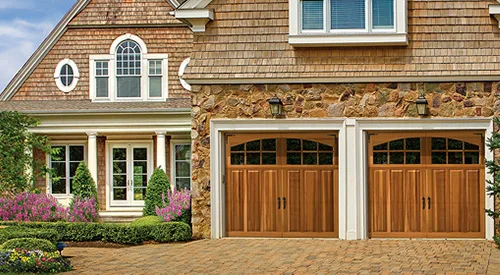
The garage door itself is a primary target for break-ins. Assess the condition of the door, including the strength of locks and the integrity of the material. Weak or outdated garage doors can be a significant security risk.

What I Did: I upgraded my garage door to a sturdy, modern model with advanced security features. Reinforced materials and a robust locking system added an initial layer of defense against unauthorized access.

**b. Windows: Potential Weak Points

Windows in the garage can be potential weak points if not adequately secured. Intruders might exploit vulnerabilities in window locks or even break the glass for entry.

What I Did: I reinforced my garage windows with security film, making it more difficult for potential intruders to shatter the glass. Additionally, I installed window locks for an extra layer of protection.

**c. Side Doors: Often Overlooked

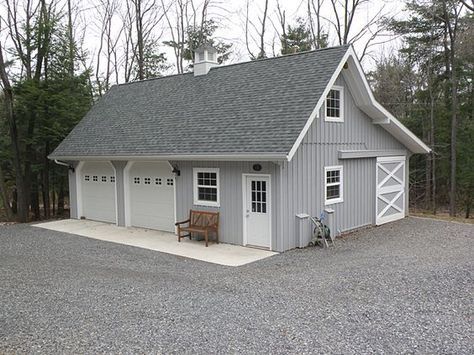
Side doors or pedestrian doors in the garage are sometimes overlooked but can be a preferred entry point for intruders. Ensure these doors are as secure as the main garage door.

What I Did: I upgraded my side door to a solid, metal option with a robust deadbolt lock. This simple yet effective measure significantly enhanced the overall security of my garage.

**2. Investing in Sturdy Garage Doors: A Strong First Line of Defense

Recognizing the garage door as a primary entry point, I invested in a high-quality, sturdy door designed with security in mind. Key features to look for in a secure garage door include:

**a. Material Strength: Durable and Resilient

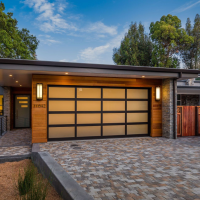
Opt for garage doors made from durable materials such as steel or reinforced fiberglass. These materials provide a higher level of resistance against forced entry attempts.

Why It Matters: The material strength of the garage door is the first line of defense. Choosing a robust material sets the foundation for a secure garage.

**b. Advanced Locking Systems: Fortifying Entry Points

Select garage doors with advanced locking systems. Multi-point locking systems and smart locks add an extra layer of security, making it more challenging for intruders to manipulate traditional lock mechanisms.

Why It Matters: Locking systems play a pivotal role in securing the garage door. Advanced mechanisms provide heightened protection against break-ins.

**c. Security Ratings: Assessing Reliability

Look for garage doors with security ratings or certifications. These indicate that the door has undergone testing to meet specific security standards, providing assurance of its reliability.

Why It Matters: Security ratings provide an objective measure of the door’s ability to withstand break-in attempts. Choosing a rated door offers peace of mind.

**3. Reinforcing Windows: Strengthening Potential Weak Points

Windows in the garage can be both functional and vulnerable. Reinforcing garage windows is a strategic move to bolster security. Here’s how:

**a. Security Film: Adding an Extra Layer

Apply security film to garage windows. This transparent layer holds the glass together even if shattered, making it more difficult for intruders to gain entry.

Why It Matters: Security film transforms ordinary windows into a resilient barrier. It acts as a deterrent and buys valuable time during a break-in attempt.

**b. Window Bars or Grilles: Physical Deterrence

Install bars or grilles over garage windows. These physical barriers provide an additional obstacle for intruders and discourage attempts to access the garage through windows.

Why It Matters: Window bars or grilles serve as a visible deterrent and physically impede unauthorized access, enhancing the overall security of the garage.

**c. Window Locks: Simple yet Effective

Add dedicated locks to garage windows. These locks, combined with other security measures, contribute to a comprehensive defense against break-ins.

Why It Matters: Window locks reinforce the overall security strategy, preventing intruders from exploiting vulnerabilities in window mechanisms.

**4. Securing Side Doors: Strengthening Secondary Access Points

Side doors in the garage, often considered secondary access points, merit equal attention in the security plan. Strengthening these doors involves specific measures:

**a. Solid Construction: Durable Materials

Opt for solid metal or solid-core doors for side entrances. These materials enhance the door’s resistance to forced entry attempts.

Why It Matters: Solid construction is a fundamental aspect of securing side doors. It creates a more robust barrier against intruders.

**b. Deadbolt Locks: Adding Reinforcement

Install deadbolt locks on side doors. Deadbolts provide additional reinforcement to the door, making it more difficult for intruders to force their way in.

Why It Matters: Deadbolt locks are a proven and effective security measure. They significantly enhance the resistance of side doors to break-ins.

**c. Security Lighting: Illuminating Entry Points

Install motion-activated security lighting around side doors. Adequate lighting serves as a deterrent and enhances visibility, discouraging unauthorized access.

Why It Matters: Security lighting is a proactive measure that adds an element of surprise for intruders attempting to access the garage through side doors.

**5. Implementing Smart Technology: A Modern Approach to Security

Embracing smart technology has become an integral part of my approach to home security. Integrating smart solutions into the garage enhances both convenience and monitoring capabilities:

**a. Smart Garage Door Openers: Remote Control and Monitoring

Invest in a smart garage door opener with features like remote control via smartphone apps and real-time monitoring. These systems allow homeowners to check and control garage door status from anywhere.

Why I Did It: Smart garage door openers offer unparalleled convenience and visibility. The ability to monitor and control the garage remotely adds a layer of security to my daily life.

**b. Smart Cameras: Surveillance and Deterrence

Install smart cameras in and around the garage. These cameras provide continuous surveillance, deter potential intruders, and offer valuable footage in the event of a security incident.

Why I Did It: Smart cameras are a proactive measure that enhances the overall security of the garage. The presence of visible cameras serves as a deterrent.

**c. Smart Alarms: Instant Notifications

Integrate smart alarms into the garage security system. These alarms can send instant notifications to homeowners’ smartphones in case of unauthorized access or suspicious activity.

Why I Did It: Smart alarms provide real-time alerts, allowing me to respond promptly to any security breach. The immediacy of notifications is a crucial aspect of garage security.

**6. Maintaining a Low Profile: Concealing Valuables

Securing the garage extends beyond physical measures; it also involves maintaining a low profile to minimize the temptation for potential intruders:

**a. Concealing Valuables: Out of Sight

Store valuable items such as tools, bikes, and equipment out of plain sight. Use cabinets, shelves, or storage solutions to keep valuable possessions concealed.

Why It Matters: Concealing valuables reduces the temptation for opportunistic thieves. Out of sight means out of mind for potential intruders.

**b. Window Coverings: Privacy and Security

Consider using window coverings for garage windows. Blinds or curtains add an extra layer of privacy, preventing outsiders from easily assessing the contents of the garage.

Why It Matters: Window coverings enhance privacy and contribute to maintaining a low profile. They discourage intruders from scoping out the garage for potential targets.

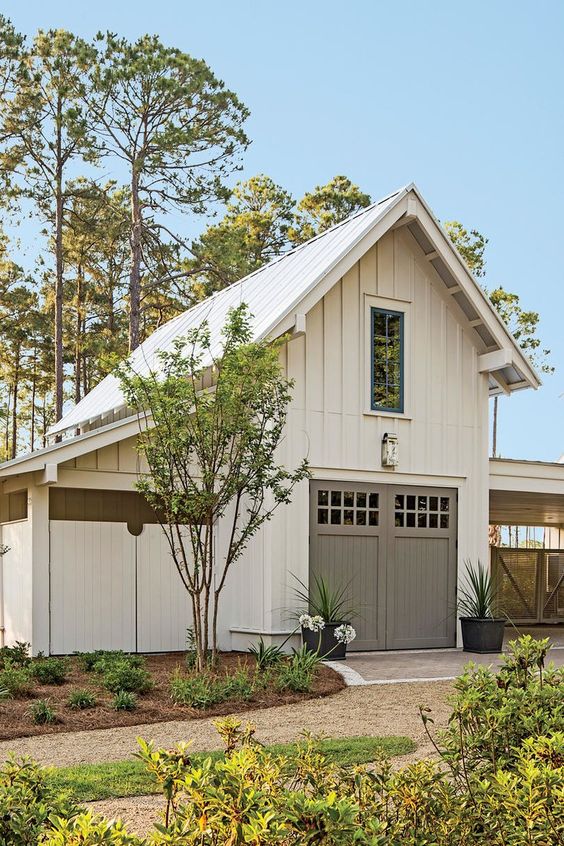
**c. Landscaping: Natural Barriers

Strategically use landscaping to create natural barriers around the garage. Dense shrubbery or thorny plants near potential entry points can act as deterrents.

Why It Matters: Landscaping serves as a visual deterrent and creates natural barriers that intruders may be hesitant to navigate.

Conclusion: A Fortified Haven

Securing my garage against break-ins has been a journey of comprehensive planning and strategic implementation. By addressing vulnerabilities, investing in sturdy doors, reinforcing windows, securing side entrances, embracing smart technology, and maintaining a low profile, I’ve created a fortified haven for my home.

As a homeowner, the responsibility of safeguarding our spaces extends beyond the interior of our homes. The garage, often a vulnerable point of entry, demands attention and proactive measures to ensure the security of our property and the well-being of our loved ones. By combining traditional security practices with modern technology, I’ve not only strengthened the physical defenses of my garage but also added layers of intelligence and convenience to my overall security strategy.

In summary, as stated in Garage Door Repair and as you embark on your journey to secure your garage, consider the unique aspects of your space, identify potential vulnerabilities, and tailor your security plan accordingly. Remember, a fortified garage contributes not only to the safety of your property but also to the peace of mind that comes with knowing your home is a haven, secure and protected against potential threats.

Ramona Valley Garage Door & Gates

842 B St #6, Ramona, CA 92065, United States

760-970-8367

How To Program Garage Door To Car Without Remote – Ramona Valley Garage Door & Gates

Before diving into the programming steps, it’s essential to understand the type of Ramona Garage Door Repair system you have.

Most modern systems use a rolling code mechanism, generating a new code each time the door is activated. However, older models may operate on a fixed code system. Check your garage door opener’s manual or contact the manufacturer to determine the type of system in place.

Locate the Learn Button on Your Garage Door Opener

The learn button is a pivotal element in the programming process. Typically situated on the motor unit of your garage door opener, this button plays a crucial role in syncing your car with the garage door system. The color of the learn button may vary, often being green, red, or another noticeable color.

Preparing Your Garage Door for Programming

Before jumping into the programming steps, ensure your garage door and opener are in optimal working condition:

  1. Check Door Balance: A well-balanced door is crucial for smooth operation. If your door is off-balance, it may strain the opener and affect performance.
  2. Inspect Safety Features: Confirm that safety sensors are aligned and free from obstructions. These sensors prevent the door from closing on objects in its path.
  3. Verify Power Source: Ensure your garage door opener is connected to a reliable power source. For battery-operated systems, check and recharge the battery if needed.

Programming Steps for Garage Door to Car

Now that your garage door system is ready, follow these steps to program your garage door to your car without a remote:

: Enter Programming Mode on Your Car

  • For most vehicles, sit in the driver’s seat and turn the ignition to the “On” position without starting the engine.

: Locate the Homelink or Car2U Buttons

  • Many cars come equipped with built-in systems like Homelink or Car2U designed for garage door programming. These buttons are typically found on the rearview mirror or the overhead console.

: Press and Hold the Program Button on Your Car

  • Press and hold the designated program button on your car’s system. This button may be labeled as “Learn,” “Program,” or a similar term. Hold the button until the indicator light starts flashing.

: Press the Learn Button on Your Garage Door Opener

  • Within 30 seconds of pressing the program button in your car, locate the learn button on your garage door opener motor unit. Press and release the learn button. The indicator light on the opener should flash.

: Test Your Garage Door

  • Return to your car and press the program button once. If the programming was successful, the indicator light on your garage door opener should stop flashing, indicating that your car is now synced with the garage door.

Troubleshooting Common Issues

Encountering issues during the programming process is not uncommon. Here are some common problems and their solutions:

Problem: Indicator Light Doesn’t Flash on Garage Door Opener

  • Solution: Check the power source and ensure the motor unit is operational. If the problem persists, consult your garage door opener’s manual for troubleshooting guidance.

Problem: Car Indicator Light Continues Flashing

  • Solution: Repeat the programming steps, ensuring that you are within range of the garage door opener and that there are no obstructions.

Benefits of Programming Your Garage Door to Your Car Without a Remote

Programming your garage door to your car without a remote offers several advantages:

  • No Need for Additional Remotes: Eliminate the need for extra remotes cluttering your car or worrying about losing them.
  • Convenience: Enjoy the convenience of opening and closing your garage door directly from your car, especially helpful during inclement weather.
  • Enhanced Security: With your car as the controller, you have an additional layer of security, as the garage door won’t respond to just any remote.

Conclusion:

Programming your Ramona Garage Door Repair to your car without a remote is a straightforward process that enhances your daily convenience. By understanding your garage door system, preparing it adequately, and following the programming steps meticulously, you’ll regain control without the need for a physical remote.

Ramona Valley Garage Door & Gates

842 B St #6, Ramona, CA 92065, United States

760-970-8367

How To Sync Garage Door Opener To Car – Ramona Valley Garage Door & Gates

Syncing a Garage Door Repair Ramona CA opener to your car is a convenient way to control your garage door without needing a separate remote control. This process, also known as programming or pairing, allows your car’s built-in garage door opener buttons to communicate with your garage door opener system.

Here’s a comprehensive guide on how to sync your garage door opener to your car:

1. Determine Compatibility: Before you begin, make sure your car’s built-in garage door opener buttons are compatible with your garage door opener system. Consult your car’s owner’s manual or contact the manufacturer to confirm compatibility.

2. Gather Information: Collect the necessary information, including the manufacturer and model of your garage door opener, as well as the type of remote control you have (e.g., HomeLink, Car2U, etc.). This information may be required during the syncing process.

3. Clear Existing Programming: If you’ve previously programmed your car’s garage door opener buttons to a different system, you may need to clear that programming before proceeding. Refer to your car’s owner’s manual for instructions on clearing existing programming.

4. Access the Garage Door Opener System: Locate the “Learn” or “Program” button on your garage door opener system. This button is typically located on the motor unit, which is installed on the ceiling of your garage. Press and release the “Learn” or “Program” button to put the opener in programming mode. The indicator light on the opener should start blinking.

5. Access Your Car’s Garage Door Opener Buttons: Sit in your car with the ignition on or in the “accessory” position. Some cars may require the engine to be running. Locate the built-in garage door opener buttons in your car’s interior. These buttons are usually located on the rearview mirror, overhead console, or sun visor. If you’re not sure where they are, refer to your car’s owner’s manual.

6. Initiate Programming Mode in Your Car: Press and hold the desired garage door opener button(s) in your car. While holding the button(s), watch for a slow or rapid blinking light on your car’s garage door opener buttons. This indicates that your car’s system is ready to learn a new code.

7. Send a Signal from the Garage Door Opener: Within 30 seconds of initiating programming mode in your car, press the “Learn” or “Program” button on your garage door opener system. The indicator light on the opener should respond by flashing or staying lit.

8. Test the Syncing: Release the garage door opener button(s) in your car and press the same button(s) again. The garage door should start moving. If it does, the syncing process was successful. If not, repeat the process from step 4.

9. Repeat for Other Buttons: If your car has multiple built-in garage door opener buttons, repeat the above steps for each button to sync them to different garage door openers or different doors.

10. Finalize and Save Settings: Once the syncing process is successful, allow the garage door opener system to complete its programming cycle. The indicator light on the opener should stop flashing or go off. Test the buttons in your car again to ensure they operate the garage door as expected.

11. Label Buttons (Optional): To avoid confusion, consider labeling the buttons in your car with the corresponding garage door or opener information. This can be particularly useful if you’ve synced multiple buttons to different doors or openers.

12. Troubleshooting: If you encounter issues during the syncing process, refer to your car’s owner’s manual for specific troubleshooting steps. It’s also a good idea to consult your garage door opener’s manual for additional guidance.

In conclusion, syncing a Garage Door Repair Ramona CA opener to your car involves putting both the car and the garage door opener into programming mode and then sending a signal from the opener to the car. This convenient process eliminates the need for a separate remote control and enhances the convenience of controlling your garage door. Following the steps outlined above will help you successfully sync your car’s built-in garage door opener buttons with your garage door opener system. If you encounter difficulties or are unsure about any step, consider seeking assistance from a professional technician or referring to the manufacturer’s instructions.

Ramona Valley Garage Door & Gates

842 B St #6, Ramona, CA 92065, United States

1-760-970-8367

Garage Door Opener Noise Reduction: Choosing Quieter Models – Ramona Valley Garage Door & Gates

As a homeowner who values peace and quiet in my living space, finding a garage door opener with noise reduction features was a top priority for me. I wanted to ensure that the garage door’s operation wouldn’t disturb my family, especially during late hours or early mornings. After some research and considering various factors, I learned valuable tips for selecting a quieter garage door opener model.

According to Garage Door Repair Ramona CA, one of the most significant factors affecting garage door opener noise is the type of drive system used in the mechanism. After learning about the different options, I decided to steer away from chain drive openers, as they tend to produce more noise due to the metal-on-metal contact of the chain. Instead, I opted for a belt drive opener, which uses a rubber belt for smoother and quieter operation. The rubber belt’s flexibility made a noticeable difference, significantly reducing the noise compared to chain drive models.

Additionally, I discovered that direct drive openers are renowned for their whisper-quiet performance. With their stationary motor design, they eliminate the need for chains, belts, or screws, resulting in minimal noise during operation. I considered a direct drive model, and it seemed like an excellent option for our home, as we have bedrooms close to the garage.

The motor’s power and type were other crucial factors that could impact the noise level of the garage door opener. I learned that models with higher horsepower ratings could handle the garage door’s weight more efficiently, leading to quieter operation. For this reason, I chose a garage door opener with a powerful DC-powered motor, known for its smoother and quieter performance compared to AC-powered motors.

As I continued my search, I came across some garage door opener models with noise-reducing features. These features, such as sound insulation, rubber vibration isolation systems, and soft-start and soft-stop mechanisms, were designed to dampen noise during operation. I realized that having these noise-reducing features would be beneficial, especially considering the proximity of our bedrooms to the garage. So, I made it a priority to find a model that incorporated such features.

Reading customer reviews and testimonials played a significant role in helping me make an informed decision. Learning from the experiences of other homeowners who had already purchased and used certain garage door opener models provided valuable insights. It was reassuring to hear positive feedback from those who had experienced quieter performance with their chosen openers.

Ultimately, I decided on a smart garage door opener that offered a “quiet mode” feature. This feature allowed me to set specific hours during which the opener would operate with reduced noise levels. I found this particularly helpful for late at night or early mornings when I wanted to minimize disturbances for my family and neighbors.

Before finalizing my purchase, I made sure to engage the services of a professional installer. I understood the importance of proper installation to ensure the smooth and quiet operation of the garage door opener. Having an expert installer who could make any necessary adjustments and ensure everything was set up correctly gave me confidence in the optimal performance of the opener.

In conclusion, as per Garage Door Repair Ramona CA, my quest for a quieter garage door opener led me to consider various factors such as drive system type, motor power and type, noise-reducing features, and customer reviews. Opting for a belt drive opener and a powerful DC-powered motor significantly reduced noise levels, and the smart features, including the “quiet mode,” were additional bonuses. The peace and quiet I now enjoy during garage door operation have made the investment in a quieter garage door opener well worth it.

Ramona Valley Garage Door & Gates

842 B St #6, Ramona, CA 92065, United States

760-970-8367

How to Paint Metal Garage Doors – Ramona Valley Garage Door & Gates

Before I start painting my metal garage doors, I need to make sure the area is ready. I remove any obstacles like cars or outdoor furniture and lay down drop cloths or plastic sheets to protect the ground from paint splatters.

Now it’s time to clean the doors thoroughly. I mix warm water and mild detergent in a bucket and grab a sponge or soft-bristle brush. I scrub the doors, getting rid of dirt, grime, and any loose paint. After a thorough scrubbing, I rinse the doors with clean water and let them dry completely.

Based from Garage Door Repair Ramona CA, if my garage doors have any hardware or accessories, I consider removing them to make painting easier. I grab a screwdriver and carefully detach handles, hinges, and any other removable parts.

Next, I need to roughen up the smooth surface of the metal doors to promote better paint adhesion. I use fine-grit sandpaper or a sanding block and lightly sand the entire surface. This creates a slightly rough texture that helps the paint adhere better. After sanding, I wipe away any dust with a clean cloth.

Now it’s time to apply a primer. I choose a high-quality metal primer suitable for exterior use. I make sure to stir the primer thoroughly before applying it to the doors. Using a brush or roller, I apply the primer evenly, following the manufacturer’s instructions regarding drying time.

Choosing the right paint is crucial for a successful paint job. I select a high-quality exterior paint specifically designed for metal surfaces. Considering the climate in my area, I choose a paint that offers durability and weather resistance. I also decide on a color and finish that will complement the exterior of my home.

It’s finally time to start painting! I dip a brush into the paint and begin applying a thin and even coat. I start with the corners and edges, working my way to the larger areas. To achieve a smoother finish, I switch to a roller, ensuring I cover all areas evenly with long, overlapping strokes. I pay attention to maintaining a consistent direction throughout.

Once I finish applying the first coat, I allow it to dry completely, following the recommended drying time mentioned on the paint can. Proper ventilation in the area helps expedite the drying process. I’m careful not to touch or place any objects on the freshly painted doors during this time.

For optimal coverage and durability, I know I’ll need multiple coats of paint. After the first coat is completely dry, I lightly sand the surface using fine-grit sandpaper to create a smooth finish. I remove any sanding residue with a clean cloth before applying the next coat. I repeat this process for each additional coat, making sure to allow sufficient drying time between coats.

Once the final coat is dry, I carefully reattach any hardware or accessories that were removed earlier. I ensure they are securely fastened and properly aligned to complete the look.

Before considering the paint job finished, I inspect the doors for any imperfections or areas that require touch-ups. I use a small brush to address any issues and achieve a polished appearance. If there are any paint drips or splatters on surrounding surfaces, I clean them up with a suitable cleaning solution.

Finally, I properly dispose of any used paint cans and clean the brushes and rollers according to the manufacturer’s instructions.

Following these steps from Garage Door Repair Ramona CA, I’ve successfully painted my metal garage doors, giving them a fresh and appealing look while providing protection against the elements.

Ramona Valley Garage Door & Gates

842 B St #6, Ramona, CA 92065, United States

760-970-8367

How Much Does a Garage Door Cost? – Ramona Valley Garage Door & Gates

When I started looking into getting a new garage door, I was overwhelmed by the number of options available and the range of prices. I knew I wanted a quality door that would last for years to come, but I also needed to find one that fit within my budget. After doing some research and consulting with a few professionals, I learned about the various factors that can affect the cost of a garage door.

As stated in Garage Door Repair Ramona CA, one of the first things I considered was the type of door I wanted. I found out that traditional raised-panel doors were the most affordable option, with prices starting around $500 for a basic steel door. I also learned about carriage-style doors, which have a more decorative look and are typically made of wood or steel. While these doors can cost anywhere from $1,000 to $4,000, depending on the material and level of customization, I was drawn to the classic look they provided.

I also considered the size of the door, since larger doors tend to be more expensive. My garage is a standard size, so I knew I wouldn’t have to pay extra for an oversized door. Material was another important factor to consider, as garage doors can be made from a variety of materials, each with its own advantages and disadvantages. I ultimately decided to go with a steel door, as it offered good durability and a lower cost compared to other materials like wood or glass.

Insulation was another feature I considered, as it can help improve energy efficiency and noise reduction. While insulated doors are more expensive, I knew it would be worth the investment in the long run. Finally, I thought about customization options, as I wanted a door that would complement the style of my home. I decided to go with a standard raised-panel steel door with a white finish, as it was both affordable and matched the existing aesthetic of my home.

In addition to the cost of the door itself, I also had to factor in the cost of installation. This can vary depending on the complexity of the job and any necessary modifications to the garage structure. I hired a professional to install the door, which added an additional cost to the project. I also needed to purchase a new garage door opener, which added another $200 to the overall cost.

When budgeting for a new garage door, it’s important to consider additional costs like routine maintenance and repairs over the life of the door. I made sure to check the warranty on the door I purchased, which covered parts and labor for a certain period of time. I also made sure to have the door serviced regularly to ensure it continued to function properly.

In the end, as per Garage Door Repair Ramona CA, I’m glad I took the time to research and consider all of my options when choosing a new garage door. While the cost was certainly a factor, I knew that investing in a quality door would pay off in the long run by providing both security and curb appeal to my home.

Ramona Valley Garage Door & Gates

842 B St #6, Ramona, CA 92065, United States

760-970-8367

Powered by WordPress & Theme by Anders Norén