Local Businesses Blog in Texas

Tag: garage door repair Grapevine TX Page 1 of 2

How To Program A Overhead Garage Door Opener – Grapevine Garage Door & Gates


Programming an overhead Garage Door Repair Grapevine TX is a straightforward process that allows you to synchronize the opener with your remote control transmitter, keypad, or other accessories. Here’s a detailed guide to help you through the programming process:

Garage Door Installation And Repair At Home. Contractor Man In House

Step 1: Read the Manual

  1. Access the Manual: Retrieve the instruction manual provided with your overhead garage door opener.
  2. Review Instructions: Read through the manual carefully to familiarize yourself with the programming process and any specific instructions for your model.

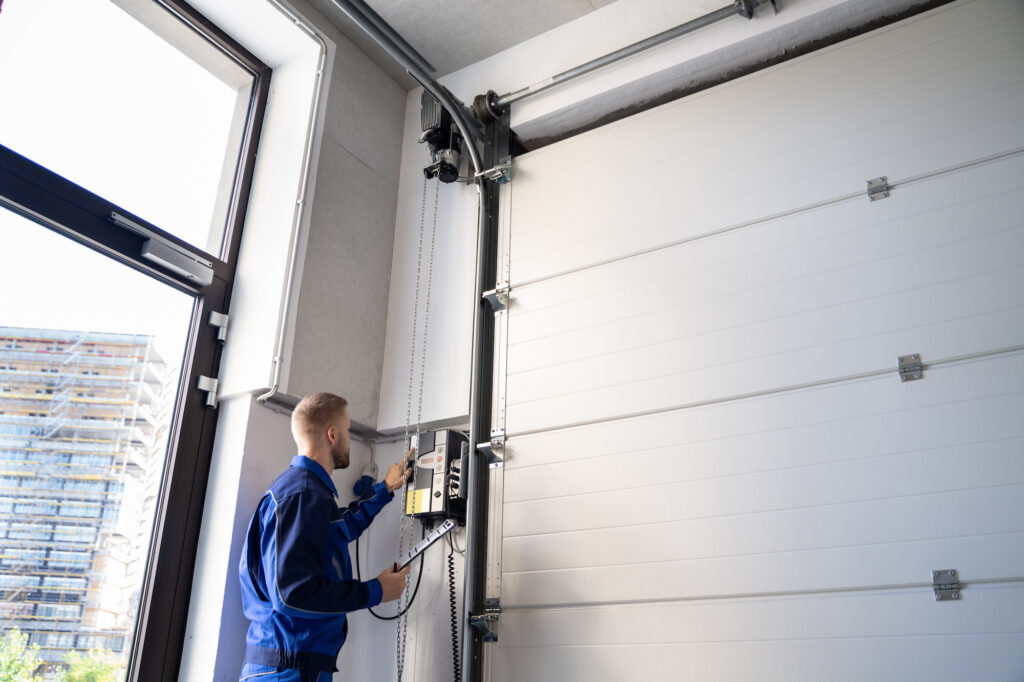
Step 2: Locate the Program/Smart/Learn Button

  1. Find the Button: Look for the “Program,” “Smart,” or “Learn” button on the overhead garage door opener unit.
  2. Identify Position: The button is typically located on the back or side of the opener unit near the antenna wire.

Step 3: Prepare the Remote Control

  1. Remove Cover (If Needed): If your remote control has a cover, remove it to access the programming buttons.
  2. Press and Hold Button: Press and hold the programming button on the remote control until the indicator light illuminates or blinks.

Step 4: Program the Remote Control

  1. Press Program Button on Opener: Press the “Program,” “Smart,” or “Learn” button on the overhead garage door opener unit. The indicator light should turn on or start blinking.
  2. Press Remote Button: Within 30 seconds of pressing the program button on the opener, press the button on the remote control that you want to program. Hold the remote close to the opener unit during this process.
  3. Wait for Confirmation: After pressing the remote button, you may hear a click or see the indicator light on the opener flash, indicating that the programming was successful.
  4. Repeat if Necessary: If you have multiple remotes to program, repeat the process for each remote control, ensuring to press the program button on the opener before pressing the button on the remote control.

Step 5: Test the Remote Control

  1. Press Remote Button: Test the programmed remote control by pressing the button you programmed. The garage door should respond by opening or closing.
  2. Observe Operation: Watch and listen to the garage door’s movement to ensure it operates smoothly and without any issues.
  3. Repeat Testing: Test the remote control from various distances and angles to ensure reliable operation.

Step 6: Program Keypad (If Applicable)

  1. Access Keypad: If your overhead garage door opener has a keypad, access it by removing any covers or protective layers.
  2. Enter Programming Mode: Follow the instructions in the manual to enter the programming mode on the keypad.
  3. Enter Code: Enter the desired access code using the keypad buttons.
  4. Press Program Button: After entering the code, press the “Program,” “Smart,” or “Learn” button on the opener unit.
  5. Test Keypad: Test the keypad by entering the programmed code and verifying that the garage door operates as expected.

Step 7: Program Additional Accessories (If Applicable)

  1. Follow Manual Instructions: If you have additional accessories to program, such as a keychain remote or wall console, refer to the manual for specific instructions.
  2. Repeat Programming Steps: Follow similar steps as programming the remote control, pressing the program button on the opener unit before activating the accessory.

Step 8: Finalize Programming

  1. Review Settings: Double-check the programming settings for accuracy and completeness.
  2. Secure Covers: Replace any covers or protective layers on the opener unit, remote controls, keypads, and other accessories.

Step 9: Troubleshooting

  1. Consult Manual: If you encounter any issues during programming, refer to the troubleshooting section of the manual for guidance.
  2. Contact Support: If troubleshooting steps do not resolve the issue, contact the manufacturer’s customer support for assistance.

Conclusion:

Programming an overhead Garage Door Repair Grapevine TX allows you to synchronize remote controls, keypads, and other accessories for convenient and secure access to your garage. By following the steps outlined in this guide and referring to the manual for your specific opener model, you can successfully program your garage door opener and accessories. Enjoy the convenience and peace of mind that comes with reliable access to your garage space.

Grapevine Garage Door & Gates

1-817-809-2507

https://maps.app.goo.gl/UmAbXjG5jFSa7YQp9

Do It Garage Door Opener- Grapevine Garage Door & Gates

Garage Door Repair Grapevine TX yourself can be a rewarding project that provides added convenience and security to your home.

With the right tools, materials, and knowledge, you can successfully complete the installation process and enjoy the benefits of automated garage door operation.

Preparation

1. Gather Tools and Materials

Before you begin, gather the necessary tools and materials for the installation, including a power drill, screwdriver, wrenches, level, ladder, measuring tape, and the garage door opener kit, which typically includes the opener unit, rails, motor, remote controls, and mounting hardware.

2. Read the Instructions

Carefully read and familiarize yourself with the installation instructions provided by the manufacturer. Pay close attention to any specific requirements or recommendations to ensure a successful installation.

3. Prepare the Garage Door

Ensure that the garage door is in good working condition and properly balanced. Lubricate the tracks, rollers, and hinges as needed and clear any obstructions from the door’s path.

Installation

1. Install the Rail

Attach the rail or track to the ceiling of the garage using the provided mounting brackets and hardware. Use a level to ensure that the rail is installed evenly and securely.

2. Mount the Motor Unit

Secure the motor unit to the ceiling near the front of the garage, aligning it with the rail. Follow the manufacturer’s instructions for proper positioning and mounting of the motor unit.

3. Install the Trolley and Drive Mechanism

Attach the trolley to the rail and connect it to the drive mechanism of the motor unit. Ensure that the trolley moves smoothly along the rail without binding or obstruction.

4. Connect the Door Arm

Attach the door arm to the trolley and connect it to the garage door using the provided hardware. Adjust the length of the arm as needed to ensure proper alignment and operation.

5. Install Safety Sensors

Mount the safety sensors near the bottom of the garage door opening, aligning them with each other and ensuring that they are positioned correctly to detect obstructions in the door’s path.

Programming and Testing

1. Program Remote Controls

Follow the manufacturer’s instructions to program the remote controls included with the garage door opener kit. Test each remote to ensure that it operates the door smoothly and reliably.

2. Test Safety Features

Test the safety features of the garage door opener, including the auto-reverse mechanism and photoelectric sensors. Place an object, such as a roll of paper towels, in the path of the closing door to verify that it reverses direction upon contact.

3. Adjust Settings

Adjust the settings of the garage door opener, including the force and speed of the door’s operation, as needed to ensure smooth and safe performance.

Safety Considerations

  • Always disconnect power to the garage door opener before beginning installation or performing any maintenance or repairs.
  • Use caution when working with heavy components such as the garage door and opener motor to prevent injury or damage.
  • Follow all safety guidelines and recommendations provided by the manufacturer throughout the installation process.

Conclusion:

Garage Door Repair Grapevine TX yourself can be a rewarding and cost-effective project that provides added convenience and security to your home. By following the step-by-step instructions outlined in this guide and taking necessary safety precautions, you can successfully complete the installation process and enjoy the benefits of automated garage door operation for years to come.

Grapevine Garage Door & Gates

Grapevine Doors and Gates 2958 Wentwood Dr. Grapevine, TX 76051

1-817-809-2507

Does Home Insurance Cover Garage Door – Grapevine Gates & Garage Doors

Home Garage Door Repair Grapevine TX the structure of your home, including components like the roof, walls, and doors.

However, the coverage can vary depending on the policy and the specific circumstances surrounding the damage to your garage door.

In most cases, if the damage to your garage door is caused by a covered peril, such as a fire, theft, vandalism, or a fallen tree, your home insurance policy may provide coverage for the repair or replacement of the garage door. Covered perils are events or situations listed in your insurance policy that are eligible for coverage.

It’s important to review your insurance policy to understand the specific coverage limits, deductibles, and exclusions related to your garage door. Some policies may have limitations on certain types of damage or may exclude coverage for specific perils.

If the damage to your garage door is due to wear and tear, lack of maintenance, or other non-covered perils, your insurance may not cover the cost of repairs or replacement. Insurance is typically designed to protect against sudden and unexpected events rather than issues that arise from normal wear and tear.

When filing a claim for garage door damage, it’s essential to document the incident thoroughly. Take photos of the damaged garage door, and if applicable, provide any supporting documents, such as a police report for vandalism or a contractor’s estimate for repair or replacement.

Keep in mind that filing a claim for minor damage to your garage door may not be cost-effective, especially if the repair costs are close to or below your deductible. It’s essential to weigh the potential increase in premiums against the benefits of making a claim.

In conclusion, while home insurance can cover damage to your Garage Door Repair Grapevine TX in certain circumstances, the specific coverage will depend on your policy, the cause of the damage, and any applicable exclusions. Review your policy carefully, and if you have questions or concerns, don’t hesitate to contact your insurance provider for clarification.

Grapevine Gates & Garage Doors

601 W Wall St, Grapevine, TX 76051

817-790-9634

How To Remove Battery From Liftmaster Garage Door Opener – Grapevine Gates & Garage Doors

Removing the battery from a LiftMaster Grapevine Garage Door Repair is a relatively straightforward process.

However, it’s crucial to follow the manufacturer’s guidelines to ensure safety and proper functioning. Here’s a detailed guide with step-by-step instructions.

  1. Prepare for Safety: Before starting the battery removal process, ensure that the garage door is in the fully closed position. Disconnect the power to the garage door opener to prevent any accidental activation.
  2. Locate the Battery Compartment: LiftMaster garage door openers typically have a battery compartment located on the motor unit. This is usually on the back or side of the opener. Refer to your opener’s user manual for the specific location.
  3. Identify the Battery Type: LiftMaster garage door openers may use different types of batteries, such as 12V lithium-ion or alkaline batteries. Check the user manual to confirm the correct battery type for your opener.
  4. Remove the Cover: Use a screwdriver or the appropriate tool to remove the cover of the battery compartment. The cover is usually secured with screws. Keep the screws in a safe place for reassembly.
  5. Take Note of Battery Orientation: Before removing the old battery, take note of its orientation. Note which end is positive (+) and which is negative (-). This is crucial for inserting the new battery correctly.
  6. Remove the Old Battery: Gently remove the old battery from the compartment. If the battery is connected with wires, carefully disconnect them. Pay attention to any clips or connectors securing the battery.
  7. Dispose of the Old Battery: Properly dispose of the old battery according to local regulations. Many communities have designated recycling centers for batteries. Avoid throwing batteries in the regular trash.
  8. Insert the New Battery: Take the new battery of the correct type and insert it into the compartment, ensuring the proper orientation. If there are wires, reconnect them securely. Make sure the battery is snugly in place.
  9. Replace the Cover: Put the cover back onto the battery compartment and secure it with the screws. Ensure that the cover is properly aligned and tightened.
  10. Reconnect Power: Reconnect the power to the garage door opener. Test the opener to ensure that the new battery is functioning correctly. If your opener has a remote control, check its functionality as well.
  11. Check for Proper Operation: Operate the garage door opener a few times to confirm that it is functioning smoothly with the new battery. If there are any issues, refer to the user manual for troubleshooting.
  12. Keep the Manual Handy: Store the user manual in a convenient location for future reference. It contains valuable information about maintenance, troubleshooting, and safety precautions.

By following these detailed steps, you should be able to successfully remove the old battery from your LiftMaster Grapevine Garage Door Repair and replace it with a new one. Remember to prioritize safety and follow the manufacturer’s instructions throughout the process.

Grapevine Gates & Garage Doors

817-631-6355

How To Clear Myq Garage Door Opener – Grapevine’s Maid Pros

learing your MyQ  Garage Door Repair Grapevine TX involves a series of steps to ensure a smooth process. Follow these detailed instructions to reset and clear your MyQ garage door opener.

Step 1: Identify Your MyQ Garage Door Opener

Before you begin, make sure you know the model of your MyQ garage door opener. This information is usually found in the user manual or on the device itself.

Step 2: Power Off the Opener

To initiate the clearing process, turn off the power to your MyQ garage door opener. This can typically be done by unplugging it from the power source or using a designated power switch.

Step 3: Locate the Reset Button

Find the reset button on your MyQ garage door opener. This button is usually a small, recessed button that may require a pointed object like a paperclip to press.

Step 4: Press and Hold the Reset Button

Press and hold the reset button for about 10 to 15 seconds. Keep the button depressed until you see a noticeable change in the indicator lights or hear a distinct sound, indicating that the reset process has begun.

Step 5: Release the Reset Button

After holding the reset button for the specified duration, release it. This action confirms your intent to clear and reset the MyQ garage door opener.

Step 6: Wait for Confirmation

Give the MyQ garage door opener some time to complete the clearing process. This may take a few moments, and during this time, it’s crucial to avoid interrupting the procedure.

Step 7: Power On the Opener

Once you’ve waited for a sufficient amount of time, power on the MyQ garage door opener. Reconnect it to the power source or flip the designated power switch back to the “on” position.

Step 8: Reconnect to Wi-Fi

If your MyQ garage door opener is connected to Wi-Fi, you’ll need to reconnect it. Follow the instructions in the user manual to establish a new Wi-Fi connection.

Step 9: Re-Program Remote Controls

If you use remote controls to operate your garage door, you may need to re-program them. Consult your user manual for specific instructions on how to pair or re-program your remote controls.

Step 10: Test the Garage Door

After completing the reset process and re-establishing connections, it’s essential to test the functionality of your garage door. Use both the wall-mounted control panel and any remote controls to open and close the garage door to ensure everything is working correctly.

Conclusion:

Clearing your MyQ Garage Door Repair Grapevine TX involves a combination of resetting the device, re-establishing connections, and re-programming remote controls. Following these detailed steps ensures a comprehensive and successful clearing process. Always refer to your specific model’s user manual for model-specific instructions and guidelines.

Grapevine’s Maid Pros

1527 W State Hwy 114, Grapevine, TX 76051, United States

1-817-442-2239

How To Measure Garage Goor – Grapevine Gates & Garage Doors

Measuring a Garage Door Repair Grapevine TX might sound like a simple task, but it requires precision and attention to detail to ensure a proper fit.

Follow these comprehensive steps to accurately measure your garage door:

  1. Gather Your Tools: Before you start, make sure you have the following tools ready:
    • Tape measure
    • Step ladder
    • Pencil and paper for notes
  2. Measure Width: Begin by measuring the width of the garage door opening. Use the tape measure to measure the distance between the inside edges of the opening. Measure in multiple places to account for any irregularities. Record the smallest measurement; this ensures the door will fit even if the opening is not perfectly square.
  3. Measure Height: Next, measure the height of the opening. Again, measure in multiple spots and record the smallest measurement. This is crucial for accommodating variations in the floor or ceiling height.
  4. Check Side Room: Measure the space on each side of the garage door opening. This is known as the side room. This measurement is essential for determining the type of door and track system that will fit in your garage.
  5. Measure Headroom: Headroom is the distance between the top of the door opening and the ceiling. To measure this, start from the highest point inside the opening and measure vertically to the ceiling. Ensure there are no obstructions in this space that might interfere with the operation of the garage door.
  6. Check Backroom: Backroom is the distance from the garage door opening to the back wall of the garage. Measure this distance to ensure there is enough space for the door and its hardware when fully open.
  7. Note the Type of Garage Door: Identify whether you have a sectional, roll-up, or swing-out garage door. This information is crucial for selecting the right replacement.
  8. Consider the Material: If you’re replacing the door, note the material of the existing door (e.g., steel, wood, aluminum). This information will help you choose a replacement door that matches the aesthetic of your home.
  9. Inspect the Track System: Examine the existing track system to determine whether it needs replacement or adjustment. The track should be straight, level, and securely attached to the walls.
  10. Check for Obstructions: Look for any obstructions in the garage, such as pipes, lights, or shelving, that might interfere with the installation or operation of the new garage door.
  11. Consider Insulation Needs: If you live in a region with extreme temperatures, consider whether you need an insulated garage door. Measure the thickness of the existing insulation (if any) to ensure consistency.
  12. Consult a Professional: If you’re uncertain about any measurements or aspects of the installation process, it’s advisable to consult a professional garage door installer. They can provide guidance and ensure a smooth installation process.

By following these detailed steps, you’ll have accurate measurements and essential information to choose or replace a Garage Door Repair Grapevine TX that fits perfectly and functions smoothly in your space.

Grapevine Gates & Garage Doors

817-631-6355

How To Make Garage Door Quieter – Grapevine Gates & Garage Doors

A noisy Garage Door Repair Grapevine TX can be a nuisance, especially if it disrupts the peace and quiet of your home or annoys your neighbors.

Fortunately, there are several steps you can take to make your garage door operate more quietly. Follow this guide for a quieter garage door experience.

1. Identify the Source of the Noise:

Before you start making changes, it’s important to identify the source of the noise. Common sources include rusty hinges, loose hardware, or a lack of lubrication. Inspect your garage door system to pinpoint the areas that need attention.

2. Lubricate Moving Parts:

Lubrication is key to reducing friction and noise. Use a silicone-based lubricant to grease the rollers, hinges, and springs. Apply the lubricant generously, and make it a routine maintenance task every few months.

3. Tighten Loose Hardware:

Vibrations from the garage door opener or the door itself can cause hardware to loosen over time. Check and tighten all nuts and bolts, paying special attention to the roller brackets and tracks.

4. Replace Worn Rollers:

If your garage door rollers are old or worn out, they can contribute to excess noise. Consider replacing metal rollers with nylon ones, as they operate more quietly. Ensure the new rollers are the correct size for your door.

5.Install a Quieter Garage Door Opener:

Older garage door openers can be noisy. Consider upgrading to a newer model designed for quieter operation. Belt-driven openers are generally quieter than chain-driven ones.

6. Add Insulation:

Insulating your garage door can help dampen sound. It also has the added benefit of improving energy efficiency. You can use foam board or garage door insulation kits for this purpose.

7. Adjust the Limit Settings:

If your garage door opener is closing or opening too forcefully, it can create excess noise. Adjust the limit settings on the opener to ensure smooth and controlled movement.

8. Check the Balance:

An imbalanced garage door can cause strain on the opener and lead to increased noise. Disconnect the opener and manually open the door halfway. If it doesn’t stay in place, the door may be unbalanced and requires professional adjustment.

9. Soundproofing:

Consider adding soundproofing material to the walls of your garage. This can be in the form of acoustic panels or weatherstripping to seal gaps and reduce external noise.

10. Regular Maintenance:

Make garage door maintenance a regular part of your home care routine. Clean the tracks, check for wear and tear, and address any issues promptly. Regular care can prevent excessive noise and extend the life of your garage door.

In conclusion, a quieter Garage Door Repair Grapevine TX involves a combination of proper maintenance, lubrication, and, if necessary, upgrades to key components. By following these steps, you can enjoy a smoother and quieter garage door operation, enhancing the overall peace and comfort of your home.

Grapevine Gates & Garage Doors

817-631-6355

How To Install Garage Door Trim Seal – Grapevine’s Best Garage Doors

Installing a Garage Door Repair Grapevine TX is a straightforward process that can help improve the energy efficiency of your garage, keep out pests, and prevent drafts and water from entering.

Below are detailed steps to guide you through the installation of a garage door trim seal. This guide will provide you with a thorough explanation, and it should be approximately.

Materials You’ll Need:

  1. Garage door trim seal kit (usually includes the seal and adhesive)
  2. Measuring tape
  3. Utility knife
  4. Caulk gun
  5. Silicone caulk (optional)
  6. Cleaning materials (rag, soap, water)
  7. Screwdriver (if needed for existing trim removal)

: Prepare Your Garage Door

Before you start installing the trim seal, it’s important to make sure your garage door and surrounding area are clean and dry. Remove any dirt, debris, or old sealant that might interfere with the adhesive’s bond.

: Measure and Cut the Seal

Unroll the garage door trim seal and measure it against the top and sides of the garage door. Ensure you have enough material to cover these areas. Most kits come in standard lengths, so you may need to cut the seal to fit your specific door. Use a measuring tape to determine the required length, and then cut the seal using a utility knife.

: Clean the Surface

Clean the area where you’ll be attaching the seal using a rag, soap, and water. Make sure it’s free from dust, dirt, and any loose debris. This will ensure a better bond when you apply the adhesive.

: Apply Adhesive

Open the garage door trim seal kit, and you’ll likely find adhesive included. If it’s not included, you can use a high-quality, waterproof silicone caulk. Load the adhesive into a caulking gun.

Starting at one corner, apply a thin and even bead of adhesive along the surface where you’ll attach the seal. Be precise, as excess adhesive can be difficult to remove and may not provide a clean finish.

: Attach the Seal

Carefully press the garage door trim seal onto the adhesive, starting from one end and working your way to the other. Ensure that the seal is pressed firmly against the door, creating a good seal between the door and the seal.

: Trim Excess Seal

After attaching the seal, check for any excess material that extends beyond the edges of the door. Use a utility knife to trim off any excess, ensuring a neat and clean finish.

: Repeat for Other Sides

Repeat steps 4 to 6 for the remaining sides of the garage door. Measure, cut, clean, apply adhesive, attach the seal, and trim any excess material.

: Allow Adhesive to Dry

The adhesive may have a drying time specified on the product packaging. Allow the adhesive to cure fully before using the garage door. This usually takes a few hours to a day, depending on the type of adhesive used and environmental conditions.

: Test the Seal

Once the adhesive is completely dry, test the seal by opening and closing the garage door. Ensure that the seal makes a tight and effective seal with the door, preventing drafts and water from entering.

: Optional – Caulk Seams

If you notice any gaps or seams where the seal meets the door or the garage frame, you can use silicone caulk to fill these gaps. This will provide extra protection against drafts and water infiltration.

: Maintenance

Regularly inspect the garage door seal for any signs of wear, damage, or loose areas. Replace or repair the seal as needed to maintain its effectiveness.

By following these steps, you can install a Garage Door Repair Grapevine TX to improve insulation, keep out pests, and protect your garage from drafts and water intrusion. Proper installation and maintenance of the seal will help ensure its long-term effectiveness.

Grapevine’s Best Garage Doors

820 Kings Canyon Dr, Grapevine, TX 76051, United States

1-817-790-9634

Emergency Garage Door Repair: Who to Call in Urgent Situations – Grapevine Gates & Garage Doors

As a homeowner, I’ve had my fair share of unexpected home maintenance emergencies, but one of the most stressful situations I’ve faced is a malfunctioning garage door, especially when it occurs at the most inconvenient times. A garage door emergency can disrupt your daily routine, compromise the security of your home, and even pose safety risks.

In this article, I’ll share my experiences and provide valuable insights into who to call in urgent garage door repair situations, ensuring that you’re prepared to handle these emergencies promptly and efficiently as stated from Garage Door Repair Grapevine TX.

The Perils of a Garage Door Emergency

A garage door emergency can strike at any moment, leaving you in a state of frustration and worry. These situations often involve sudden malfunctions or damages that require immediate attention. Here are some common garage door emergencies:

  1. Door Refuses to Open or Close: This can happen when you’re running late for work or need to leave for an important appointment. A stuck garage door can disrupt your entire day.
  2. Broken Springs: Broken torsion or extension springs can render your garage door inoperable. Attempting to open or close a door with a broken spring is dangerous and should be avoided.
  3. Off-Track Garage Door: An off-track garage door can become misaligned and pose safety hazards. It may also leave your garage exposed to unauthorized access.
  4. Garage Door Opener Malfunctions: If your garage door opener suddenly stops working, it can make entering or leaving your garage a challenge, particularly if you don’t have a manual override option.
  5. Security Concerns: A garage door that won’t close properly can compromise the security of your home, leaving it vulnerable to intruders.

The Importance of Timely Repairs

When faced with a garage door emergency, it’s essential to address the issue promptly. Delaying repairs can lead to additional damage, costly repairs, and safety hazards. A malfunctioning garage door may also prevent you from accessing your vehicle or important belongings stored in the garage.

Here’s why timely garage door repairs are crucial:

  1. Safety First: A malfunctioning garage door can pose safety risks to you, your family, and your property. Prompt repairs mitigate these risks.
  2. Preventing Further Damage: Ignoring a garage door issue can lead to more extensive damage and higher repair costs in the long run.
  3. Security Concerns: A garage door that doesn’t close properly can compromise the security of your home, making it essential to address the issue promptly.
  4. Convenience: A properly functioning garage door ensures convenience in accessing your vehicle, storage, and home.

Who to Call in an Emergency

Knowing who to call during a garage door emergency is essential to resolving the issue quickly and efficiently. Here are your primary options:

1. Emergency Garage Door Repair Services:

Many professional garage door repair companies offer emergency services. These services are available 24/7 and can handle a wide range of urgent garage door issues. When contacting an emergency repair service, be prepared to provide details about the problem and your location.

Advantages:

  • Prompt response, often within hours or even minutes.
  • Trained technicians with the expertise to handle emergency repairs safely.
  • Well-equipped service vehicles stocked with essential replacement parts.
  • Immediate resolution of the issue to restore security and functionality.

Considerations:

  • Emergency services may come with a higher cost compared to scheduled repairs.
  • Availability may vary depending on your location and the garage door repair company.

2. Manufacturer’s Support or Warranty Service:

If your garage door or opener is still under warranty, contact the manufacturer’s support or warranty service hotline. They can provide guidance on troubleshooting and may arrange for a certified technician to perform repairs covered by the warranty.

Advantages:

  • Potential cost savings if the issue is covered by the warranty.
  • Access to manufacturer-certified technicians familiar with the specific product.

Considerations:

  • Repairs covered by the warranty may be limited to certain components or conditions.
  • Response times may vary depending on the manufacturer’s support policies.

3. Local Garage Door Repair Specialists:

If you have a preferred local garage door repair specialist, you can reach out to them for emergency repairs. Local professionals may offer quicker response times and personalized service.

Advantages:

  • Familiarity with your garage door system and previous service history.
  • A local presence can lead to quicker response times.
  • Potential for ongoing maintenance and relationship-building.

Considerations:

  • Availability may be limited outside of regular business hours.
  • Ensure that your chosen specialist offers emergency services.

4. DIY Repairs (Caution Advised):

In some cases, you may be able to address minor garage door issues yourself. However, this approach is recommended only for individuals with experience in garage door repair and safety procedures. Attempting DIY repairs without the necessary knowledge and tools can be dangerous.

Advantages:

  • Immediate action if you have the expertise.
  • Cost savings if you have the necessary replacement parts on hand.

Considerations:

  • DIY repairs can lead to safety hazards if not performed correctly.
  • Not recommended for complex issues or those involving electrical components.

Preventing Garage Door Emergencies

While knowing who to call in a garage door emergency is essential, taking preventive measures can help minimize the likelihood of such emergencies occurring in the first place. Here are some steps you can take to prevent garage door issues:

1. Regular Maintenance:

Schedule routine maintenance for your garage door system. Professional technicians can inspect, lubricate, and adjust components to keep your garage door in optimal condition.

2. Visual Inspections:

Periodically inspect your garage door for signs of wear, damage, or misalignment. Pay attention to the condition of springs, cables, rollers, and tracks.

3. Lubrication:

Apply a silicone-based garage door lubricant to moving parts, such as springs and rollers, to reduce friction and wear.

4. Safety Sensor Checks:

Test the functionality of your garage door’s safety sensors regularly by placing an object in their path and ensuring that the door reverses as it should.

5. Professional Installations:

Ensure that your garage door system is installed by a reputable professional to minimize the risk of installation-related issues.

Conclusion: Be Prepared and Stay Safe

In summary, according to Garage Door Repair Grapevine TX, my experiences with garage door emergencies have taught me the importance of being prepared and knowing who to call when these situations arise. Garage door emergencies can disrupt your daily life, compromise security, and pose safety hazards. Whether you opt for an emergency repair service, manufacturer support, or a local specialist, addressing the issue promptly is crucial. Additionally, taking preventive measures and scheduling regular maintenance can help reduce the likelihood of garage door emergencies, ensuring the safety and functionality of your garage door system. Remember that safety should always be your top priority, and when in doubt, seeking professional assistance is the safest and wisest course of action.

Grapevine Gates & Garage Doors

601 W Wall St, Grapevine, TX 76051, United States

817-631-6355

Page 1 of 2

Powered by WordPress & Theme by Anders Norén