Local Businesses Blog in Texas

Tag: Garage Door Repair Lantana TX

How To Change Keypad On Garage Door – Lantana Gates & Garage Doors

Lantana Garage Door Repair are a modern convenience that provides secure access to your garage without the need for physical keys.

Ensuring the security of your home involves periodic maintenance, and one crucial aspect is changing your garage door keypad. In this guide, we’ll walk you through the process, step by step.

Types of Garage Door Keypads

Garage door keypads come in various types, each catering to different needs:

  • Wireless Keypads: Convenient and easy to install, these keypads use radio signals to communicate with the garage door opener.
  • Wired Keypads: Connected directly to the garage door opener, these keypads require a physical connection but offer reliable performance.
  • Smart Keypads: The latest in keypad technology, these keypads often integrate with smart home systems, allowing for remote access and control.

Signs It’s Time for a Keypad Change

Recognizing when your garage door keypad needs a change is crucial for maintaining optimal functionality and security:

  • Malfunctioning Keys: If some keys are unresponsive or erratic, it’s a sign that the keypad may need replacement.
  • Fading Keypad Numbers: Over time, the numbers on the keypad may fade, making it challenging to enter the correct code.
  • Security Concerns: If you’ve experienced a security breach or have concerns about the keypad’s reliability, it’s time for a change.

Preparing for Keypad Replacement

Before starting the replacement process, gather the necessary tools, and prioritize safety:

  • Tools Needed: Screwdriver, pliers, new keypad, and safety gloves.
  • Safety Precautions: Disconnect the power to the garage door opener to avoid any electrical accidents during the replacement.

Step-by-Step Guide to Changing Garage Door Keypad

  1. Disconnecting Power: Locate the power source for the garage door opener and disconnect it to ensure safety during the replacement.
  2. Removing the Old Keypad: Use the screwdriver to remove the screws holding the old keypad in place. Carefully detach the wires from the old keypad.
  3. Installing the New Keypad: Connect the wires to the corresponding terminals on the new keypad and secure it in place with screws.
  4. Testing the New Keypad: Reconnect the power to the garage door opener and test the new keypad by entering your code. Ensure all keys respond correctly.

Troubleshooting Common Keypad Replacement Issues

Encounter issues during the replacement process? Common problems include:

  • Power Connection Problems: Double-check the power connection to the garage door opener and ensure it’s securely connected.
  • Compatibility Issues: Ensure the new keypad is compatible with your garage door opener model. Consult the keypad and opener manuals for guidance.

z Upgrading to Smart Keypad Technology

Consider upgrading to a smart keypad for added convenience and security:

  • Benefits of Smart Keypads: Remote access, personalized user codes, and integration with home automation systems.
  • Integration with Home Automation Systems: Smart keypads can be seamlessly integrated with existing home automation systems, allowing for centralized control.

Conclusion:

Changing your Lantana Garage Door Repair is a proactive step in ensuring the security and functionality of your home. By following the outlined steps and considering an upgrade to smart technology, you contribute to a safer and more convenient living space.

Lantana Gates & Garage Doors

1180 Central Way, Lantana, TX 76226, United States

1-940-400-3038

How To Get A Garage Door License – Lantana Gates & Garage Doors

Embarking on a career in Garage Door Repair Lantana TX installation and repair is an exciting venture that can be financially rewarding.

However, to establish credibility and legality in this field, obtaining a garage door license is imperative. In this comprehensive guide, we’ll delve into the intricate process of acquiring a garage door license, encompassing various aspects from research to renewal.

Research Local Regulations:

The first step on your licensing journey is to meticulously research the local regulations governing garage door services. Licensing requirements can vary significantly between states and even within different municipalities. Identify the specific mandates, prerequisites, and procedures set forth by your local licensing authority.

Training and Experience:

Before diving into the licensing process, it’s crucial to gain the necessary training and hands-on experience in garage door installation and repair. Some regions may have specific education or apprenticeship requirements that you must fulfill to be eligible for a license. Consider enrolling in accredited programs or apprenticeships to enhance your skills and knowledge.

Business Entity Formation:

Establishing your business as a legal entity is a pivotal step in the licensing process. This may involve registering your business with the appropriate government authorities, choosing a suitable business structure, and obtaining an Employer Identification Number (EIN). Common business structures include sole proprietorships, partnerships, limited liability companies (LLCs), or corporations.

Insurance:

To safeguard your business and ensure compliance with licensing requirements, acquiring insurance is paramount. Typically, garage door professionals need liability insurance to protect against accidents, property damage, or injuries that may occur during installations or repairs. Verify the specific insurance requirements mandated by your local licensing authority.

License Application:

With your foundational groundwork laid, it’s time to delve into the license application process. Obtain the requisite application forms from your local licensing authority or regulatory body. Complete the application diligently, providing accurate details about your business, professional experience, and any required documentation. Some applications may necessitate a background check to assess your suitability for obtaining a license.

Fee Payment:

Every licensing process involves financial considerations. Prepare to pay the requisite fees associated with your license application. Fee structures can vary, so consult your local licensing authority for a detailed breakdown of costs. Ensure timely and accurate payment to avoid delays in processing your application.

Pass Examinations:

In certain jurisdictions, aspiring garage door professionals may be required to pass examinations to demonstrate their competency in installation and repair practices. These examinations may cover technical aspects, safety protocols, and local building codes. Prepare thoroughly for these assessments to enhance your chances of success.

Wait for Approval:

Once you’ve submitted your application and fulfilled all requirements, exercise patience as your application undergoes review by the licensing authority. The waiting period can vary, so use this time to stay informed about the progress of your application and be ready to address any additional requests for information.

Renewal:

Obtaining a garage door license is not a one-time endeavor. Licenses typically have a validity period, and renewal is necessary to maintain legal compliance. Stay informed about renewal requirements, which may include paying renewal fees, completing continuing education courses, or providing updated information about your business.

Conclusion:

Navigating the process of obtaining a Garage Door Repair Lantana TX requires meticulous planning, adherence to regulations, and dedication to honing your skills. By conducting thorough research, gaining relevant experience, and following the outlined steps, you can embark on a successful journey towards becoming a licensed garage door professional. Remember, compliance with local regulations not only establishes your credibility but also contributes to the safety and satisfaction of your clients.

Lantana Gates & Garage Doors

1180 Central Way, Lantana, TX 76226, United States

1-940-400-3038

How To Install Rubber Seal On Bottom Of Garage Door – Coppell Gates & Garage Doors

Installing a rubber seal on the bottom of your Lantana Garage Door Repair is a relatively straightforward DIY project that can help improve energy efficiency, keep out pests and debris, and reduce drafts.

Here’s a step-by-step guide with detailed instructions to walk you through the process:

Materials and Tools You’ll Need:

  1. Rubber garage door seal kit (measured to fit your door)
  2. Tape measure
  3. Pencil or marker
  4. Hacksaw or utility knife
  5. Screwdriver or power drill
  6. Screws or nails (depending on your kit)
  7. Garage door lubricant (optional)
  8. Safety goggles and gloves (for protection)

: Measure Your Garage Door

Start by measuring the width of your garage door. This measurement will help you determine the length of the rubber seal you need. Make sure to measure both sides to ensure accuracy.

: Purchase the Rubber Seal Kit

Visit your local hardware store or order a rubber garage door seal kit online. Make sure the kit you choose matches the measurements you took in Step 1 and is designed for your specific type of garage door.

: Prepare the Garage Door

Before you begin installing the rubber seal, make sure your garage door is clean and free of any dirt or debris. If needed, use a garage door lubricant to ensure smooth operation.

: Position the Rubber Seal

Unroll the rubber seal and lay it flat on the ground. Ensure that it’s the correct length for your garage door. You may need to trim it to size using a hacksaw or utility knife. Mark the cutting line with a pencil or marker.

: Cut the Rubber Seal

Carefully cut the rubber seal along the marked line. Make clean and straight cuts to ensure a proper fit. Be sure to wear safety goggles and gloves while cutting.

: Attach the Rubber Seal

Now it’s time to attach the rubber seal to the bottom of your garage door. Here are two common methods:

  • Screws Method: Some kits come with pre-drilled holes for screws. If your kit includes screws, use a power drill or screwdriver to attach the seal to the bottom of the garage door. Place screws at regular intervals along the seal to secure it firmly.
  • Nails Method: If your kit doesn’t include screws, you can use nails to attach the seal. Position the seal against the bottom of the garage door and use a hammer to drive nails through the holes in the seal and into the door.

: Test the Seal

After attaching the seal, open and close the garage door a few times to ensure that it operates smoothly and that the seal creates a good seal when the door is closed. Make any necessary adjustments if the seal is not snug against the ground.

: Trim Excess Seal

If there is any excess seal hanging over the sides of the garage door, use a utility knife to trim it away. Be careful not to cut the seal too short; it should reach the ground and create a tight seal.

: Maintenance

Regularly inspect the rubber seal for wear and tear. Replace it if you notice any damage or deterioration to maintain its effectiveness.

Installing a rubber seal on the bottom of your Lantana Garage Door Repair can be a relatively quick and easy project that provides numerous benefits. It can help keep your garage cleaner, improve energy efficiency, and reduce drafts, making it a worthwhile investment for any homeowner.

Coppell Gates & Garage Doors

440 Shadowcrest Ln, Coppell, TX 75019, United States

1-972-449-7776

Comparing Garage Door Brands: Finding Reliable Manufacturers – Lantana Gates & Garage Doors

As a homeowner, I understand the importance of making informed decisions when it comes to home improvements. Recently, I found myself in the market for a new garage door, and I quickly realized that choosing the right garage door brand is a critical part of the process. After all, the brand you select can determine the quality, durability, and overall performance of your garage door.

According to Garage Door Repair Lantana TX, I’ll share my journey of comparing garage door brands to find reliable manufacturers, helping you make a confident choice for your home.

Why the Garage Door Brand Matters

Before delving into the details of comparing garage door brands, it’s essential to understand why the brand matters in the first place:

1. Quality and Durability: The garage door brand you choose directly influences the quality and durability of the door. A reputable manufacturer is more likely to produce doors that stand the test of time.

2. Safety and Security: Garage doors are a crucial part of your home’s security. Trusted brands often prioritize safety features and security measures to protect your family and belongings.

3. Warranty and Support: Established garage door manufacturers typically offer reliable warranties and customer support, providing peace of mind in case of issues or malfunctions.

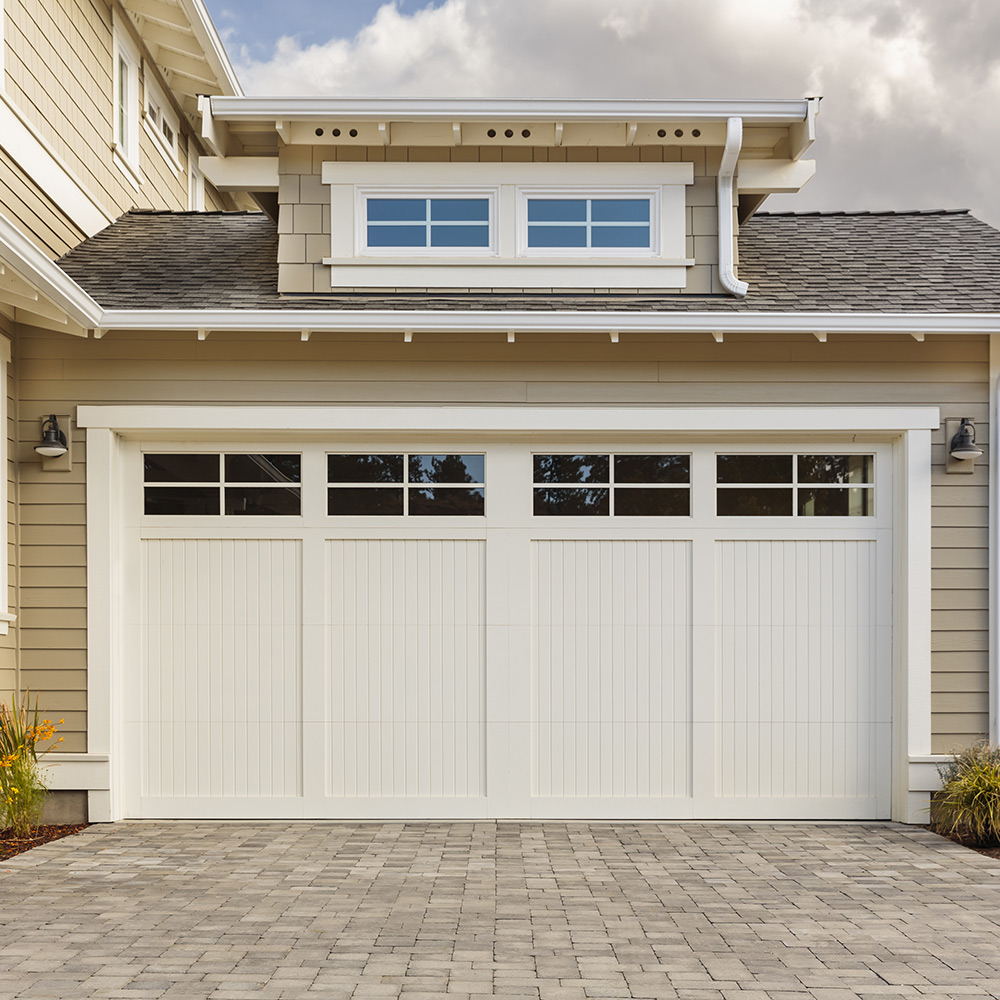
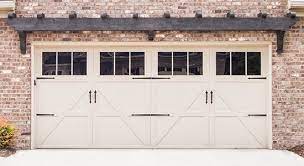
4. Design and Aesthetics: The brand you choose may also offer a wide range of design options and styles, allowing you to find a door that complements your home’s architecture and enhances curb appeal.

5. Compatibility: Some brands may have specific components or openers that work seamlessly with their doors, ensuring compatibility and ease of use.

Researching Garage Door Brands

My journey began with thorough research, as I wanted to ensure that the garage door I selected would meet my expectations. Here’s how I went about comparing garage door brands:

1. Online Reviews: I started by reading online reviews from homeowners who had experience with various garage door brands. This gave me insights into the overall satisfaction levels, common issues, and standout features of different manufacturers.

2. Consumer Ratings: Consumer rating websites and organizations, such as the Better Business Bureau, provided valuable information about the reputation of garage door brands. I paid attention to customer complaints and how companies resolved them.

3. Professional Recommendations: I consulted with garage door professionals and installers to gather their insights and recommendations. These experts often have firsthand experience with different brands and can provide valuable guidance.

4. Manufacturer Websites: I visited the official websites of garage door manufacturers to explore their product offerings, warranties, and available customization options. This allowed me to get a sense of each brand’s commitment to quality and innovation.

5. Product Specifications: Comparing the technical specifications of garage doors, such as insulation levels, materials, and security features, helped me evaluate the performance of different brands.

6. Local Availability: I considered the availability of garage door brands in my local area. Brands with a strong presence and local dealers made it more convenient for installation and support.

Notable Garage Door Brands

During my research, I came across several garage door brands known for their reliability and quality. Here are a few notable ones:

1. Clopay: Clopay is a well-established garage door manufacturer known for its wide range of design options and durable doors. They offer both residential and commercial garage doors and have a strong network of dealers.

2. Amarr: Amarr is recognized for its high-quality, energy-efficient garage doors. They provide various styles, insulation options, and customization choices. Amarr doors often come with generous warranties.

3. Wayne Dalton: Wayne Dalton is known for its innovation and offers a selection of insulated and non-insulated doors. They provide customizable options, including wood and steel doors, and prioritize security features.

4. Overhead Door: Overhead Door has been a trusted name in the industry for decades. They are known for their robust and dependable garage doors, and their products often come with strong warranties.

5. Chamberlain Group: While primarily known for garage door openers, Chamberlain Group also offers garage doors. They focus on smart home integration and provide products designed for convenience and security.

6. Raynor: Raynor is recognized for its residential and commercial garage doors, known for their durability and performance. They offer a variety of design options and insulation choices.

Evaluating Key Factors

As I compared garage door brands, I focused on several key factors to determine which manufacturer aligned best with my needs and preferences:

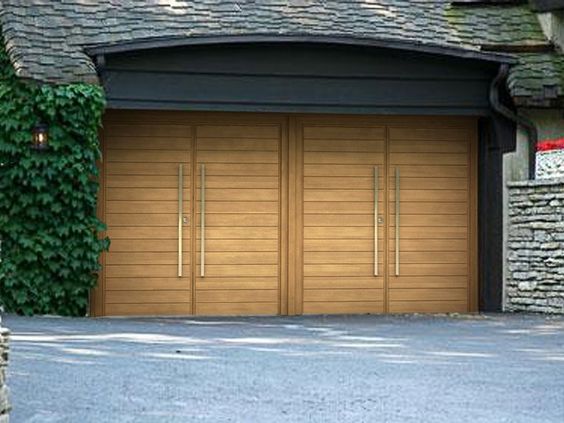
1. Materials: I considered the materials used in the construction of garage doors. Different brands may offer doors made from steel, wood, aluminum, or composite materials. The material choice impacts durability, insulation, and maintenance requirements.

2. Insulation: Since I live in an area with fluctuating temperatures, insulation was a significant factor. Some brands offer highly insulated doors, while others prioritize non-insulated designs. I assessed the R-value and energy efficiency of each option.

3. Design Options: I examined the design options available from each brand to ensure that I could find a garage door style that complemented my home’s architecture and personal taste.

4. Warranty and Support: Warranty terms and customer support offerings were crucial in my decision-making process. I looked for brands that stood behind their products with comprehensive warranties and accessible support.

5. Security Features: The safety and security of my home were a top priority. I evaluated the security features, including locking mechanisms and reinforcements, offered by each brand.

6. Budget: I established a budget for my garage door replacement project and compared the pricing of different brands. While quality was essential, I needed to ensure that the cost aligned with my financial plan.

The Right Choice for My Home

After thorough research and careful consideration, I ultimately chose a garage door brand that met my specific requirements and expectations. The door I selected not only enhances the aesthetics of my home but also provides the durability and security I sought.

Conclusion: Finding Reliable Manufacturers

In summary, based from Garage Door Repair Lantana TX, choosing a garage door brand is a significant decision that should be approached with careful consideration and research. By evaluating factors such as quality, durability, design options, and customer support, you can find a reliable manufacturer that aligns with your specific needs and ensures that your investment in a new garage door enhances the functionality and curb appeal of your home.

Lantana Gates & Garage Doors

1180 Central Way, Lantana, TX 76226, United States

940-400-3038

How To Open A Broken Garage Door – Lantana Gates & Garage Doors

A broken Garage Door Repair Lantana TX can be a major inconvenience and a safety hazard. Whether it’s stuck due to a malfunctioning opener, a damaged spring, or some other issue, knowing how to safely open it is essential.

In this comprehensive guide, we will walk you through the steps to safely open a broken garage door. Safety should always be your top priority, so follow these instructions carefully.

  1. Assess the Situation

Before attempting to open a broken garage door, assess the situation. Determine the type of malfunction or damage it has suffered. Common issues include a broken spring, a malfunctioning opener, or a dislodged cable. Understanding the problem will help you take the appropriate actions.

  1. Disconnect the Opener

If your garage door opener is still operational, disconnect it from the power source. This step ensures that the opener doesn’t attempt to open the door while you’re working on it, preventing potential accidents.

  1. Release the Emergency Cord

Most garage doors are equipped with an emergency release cord. Locate this cord, usually hanging from the opener rail, and pull it down. This disengages the door from the opener, allowing you to manually open it.

  1. Ensure Proper Lighting

Before proceeding, ensure that you have adequate lighting in your garage. This will help you see any potential hazards and work more safely.

  1. Gather Necessary Tools

Depending on the type of garage door and the issue, you may need specific tools such as pliers, wrenches, or a ladder. Gather all necessary tools before starting.

  1. Dealing with a Broken Spring

If the problem is a broken spring, be extremely cautious. Garage door springs are under high tension and can be dangerous if mishandled. Here’s how to proceed:

a. Identify the broken spring. There are usually two types: extension springs (located on either side of the door) or torsion springs (usually above the door).

b. If it’s an extension spring, carefully disconnect it from the track and remove it.

c. If it’s a torsion spring, do not attempt to repair it yourself. Torsion springs require specialized knowledge and tools. Contact a professional technician.

  1. Manually Lift the Door

Once you’ve addressed the spring issue (if applicable), it’s time to manually lift the door. Stand inside the garage and firmly grasp the door handle (or the bottom edge of the door). Lift it slowly and steadily, keeping an eye out for any obstructions or resistance.

  1. Prop the Door Open

If the garage door is too heavy or you’re unable to hold it open on your own, use a sturdy object such as a ladder or a wooden block to prop it open safely. Ensure that it is secure and won’t slip.

  1. Identify and Address the Cause

Now that the door is open, you can inspect the cause of the malfunction more closely. If you’re confident in your abilities, you can attempt to repair minor issues. However, for more complex problems, it’s advisable to contact a professional garage door technician.

  1. Preventive Maintenance

Once the door is open and any immediate issues are addressed, consider implementing a regular maintenance schedule for your garage door to prevent future breakdowns. Lubricate moving parts, tighten bolts, and replace worn-out components as needed.

Conclusion:

Opening a broken Garage Door Repair Lantana TX can be a challenging task, but with the right knowledge and precautions, it can be done safely. Remember always to prioritize safety and, when in doubt, consult a professional garage door technician to avoid any potential hazards. Regular maintenance and prompt repairs will help keep your garage door in good working condition and extend its lifespan.

Lantana Gates & Garage Doors

1180 Central Way, Lantana, TX 76226, United States

1-940-400-3038

How To Reset Odyssey 1000 Garage Door – Lantana Gates & Garage Doors

Resetting a Odyssey 1000 Garage Door Repair Lantana TX opener involves a series of steps to restore its settings to their default state. This can be helpful when troubleshooting issues or if you want to start over with the initial setup.

Here’s a detailed guide on how to reset an Odyssey 1000 garage door opener:

Step 1: Disconnect Power
For safety reasons, disconnect the power supply to the garage door opener. You can unplug it from the electrical outlet or turn off the circuit breaker that powers the opener.

Step 2: Clear Memory
Clearing the memory will remove any programmed codes and settings. This is particularly useful when you want to completely reset the opener. Follow these steps:

  1. Press and hold the “Program” button on the garage door opener for about 6 seconds. The “Program” button is usually located near the motor unit or on the wall control panel.
  2. Release the “Program” button when the LED light on the opener blinks or turns off. This indicates that the memory has been cleared.

Step 3: Reconnect Power
Plug the garage door opener back into the electrical outlet or turn on the circuit breaker to restore power.

Step 4: Reprogram Remote Controls
After clearing the memory, you’ll need to reprogram your remote controls to work with the opener. Here’s how:

  1. Press and release the “Learn” button on the garage door opener. The “Learn” button is usually near the motor unit.
  2. Within 30 seconds, press and hold the button on the remote control you want to program. Hold the button until the opener’s lights flash or you hear a click.
  3. Release the remote control button. The opener should now recognize the remote control.

Step 5: Reprogram Keypad (if applicable)
If you have a wireless keypad, you’ll need to reprogram it as well:

  1. Press and release the “Learn” button on the garage door opener.
  2. Within 30 seconds, enter the desired PIN on the keypad and press the “Enter” or “Send” button. The opener lights should flash or you’ll hear a click, indicating successful programming.

Step 6: Test Remote Controls and Keypad
Test your remote controls and keypad to ensure they are now functioning properly with the garage door opener. Open and close the door using each remote control and the keypad.

Step 7: Adjust Settings (Optional)
If you had specific settings configured before the reset and you want to restore them, consult your Odyssey 1000 garage door opener’s manual to adjust settings such as travel limits, force adjustments, and safety features.

Step 8: Reset Wall Control Panel (Optional)
If you have a wall control panel, you may need to reset it as well:

  1. Disconnect power to the opener.
  2. Press and hold the “Light” button on the wall control panel.
  3. While holding the “Light” button, reconnect power to the opener.
  4. Continue holding the “Light” button until the LED light on the wall control panel stops flashing. This usually takes about 6 seconds.
  5. Release the “Light” button.

Step 9: Final Test
Operate the garage door using the remote controls, keypad, and wall control panel to ensure that all components are working as expected.

Step 10: Troubleshooting
If you encounter any issues during or after the reset process, refer to your Odyssey 1000 garage door opener’s manual for troubleshooting steps or consider contacting the manufacturer’s customer support for assistance.

Resetting an Odyssey 1000 Garage Door Repair Lantana TX opener can help resolve operational issues and start fresh with programming. However, make sure to consult your opener’s manual for specific instructions related to your model, as features and procedures may vary.

Lantana Gates & Garage Doors

1180 Central Way, Lantana, TX 76226, United States

1-940-400-3038

Chain Drive vs. Belt Drive vs. Screw Drive: Choosing the Right Opener – Lantana Gates & Garage Doors

As a homeowner who values convenience and efficiency, I’ve come to realize that selecting the right garage door opener is a decision that can significantly impact the functionality of my garage door system. The options that have piqued my interest are chain drive, belt drive, and screw drive openers.

By following Garage Door Repair Lantana TX, I’m excited to share my journey of exploration and discovery as I weigh the characteristics, advantages, and disadvantages of each type to find the perfect fit for my garage door.

Unraveling Chain Drive Openers

Pros:

  1. Cost-Efficient: One aspect that caught my attention is that chain drive openers are often the most budget-friendly option. If I’m looking to stay within a specific budget, a chain drive opener might be the practical choice.
  2. Built to Last: Chain drive openers are known for their durability. The robust chain mechanism is capable of handling heavy lifting without showing significant signs of wear and tear.
  3. Handling Heavy Doors: Given that I have a relatively heavy garage door, such as one made of solid wood or with extra insulation, a chain drive opener seems to be well-suited for the task.

Cons:

  1. Noise Factor: On the downside, I’ve learned that chain drive openers tend to be noisier compared to other options. The clattering of the metal chain against the rail can potentially be disruptive, especially if my garage is attached to my living space.
  2. Maintenance Attention: I’ve noted that the chain mechanism requires periodic lubrication to keep it functioning smoothly and to minimize noise. Additionally, the metal components might need occasional tightening to prevent slack.

Considering Belt Drive Openers

Pros:

  1. Whisper-Quiet Operation: The aspect that really intrigues me about belt drive openers is their quiet and smooth operation. The absence of a metal chain translates to a significant reduction in noise, which would be perfect for a garage adjacent to living spaces.
  2. Smooth and Reliable: Belt drive openers employ a rubber belt that promises a smooth and reliable operation. The absence of vibrations associated with chain drives is a definite advantage.
  3. Ease of Maintenance: I’ve learned that belt drive openers typically require less maintenance compared to chain drive openers. The lack of metal-on-metal contact means that lubrication and adjustments are needed less frequently.

Cons:

  1. Higher Cost: However, I’m aware that the quieter and smoother operation of belt drive openers comes at a price. They are often more expensive than chain drive openers, which is something I’ll need to consider.
  2. Weight Compatibility: While belt drive openers can handle most residential garage doors, they might not be the best choice for extremely heavy doors, as the belt material could wear out faster.

Exploring Screw Drive Openers

Pros:

  1. Simplicity Speaks: Screw drive openers pique my interest due to their simpler design compared to chain and belt drive openers. The fewer moving parts could mean fewer maintenance requirements.
  2. Low Maintenance: With fewer components, screw drive openers could potentially require less maintenance and fewer part replacements over time.
  3. Moderate Noise Levels: While not as quiet as belt drive openers, screw drive openers are generally quieter than chain drive openers. It seems like a balanced choice that doesn’t compromise too much on noise reduction.

Cons:

  1. Temperature Sensitivity: One aspect that gives me pause is that screw drive openers can be affected by temperature changes. Extreme cold or heat could impact their performance, potentially leading to uneven door movements.
  2. Compatibility Concerns: There might be limitations when it comes to the compatibility of screw drive openers with different garage door sizes and weights. It’s essential to ensure that they align with my specific door requirements.

Deciding Which Opener is Right for Me

As I contemplate the choice between chain drive, belt drive, and screw drive openers, I’m taking several factors into consideration:

  1. Noise Sensitivity: Since my garage is close to living spaces, quiet operation is a priority. This leans me toward considering a belt drive opener.
  2. Budget Considerations: While I appreciate cost-efficiency, the potential benefits of reduced noise might justify the slightly higher expense of a belt drive opener.
  3. Maintenance Preference: I value a low-maintenance option that requires less attention over time, which makes belt drive openers quite appealing.
  4. Garage Door Weight: Given my garage door’s weight, a chain drive opener could be a contender due to its suitability for heavier doors.
  5. Climate Impact: Although I don’t live in an extreme climate, the sensitivity of screw drive openers to temperature changes is a factor I need to keep in mind.

Conclusion

Based from Garage Door Repair Lantana TX, the decision to opt for a chain drive, belt drive, or screw drive opener is undoubtedly a personal one, influenced by a range of considerations. Each type has its unique advantages and disadvantages, making it essential to align the choice with my specific needs and preferences. By taking into account factors like noise level, budget, maintenance, garage door weight, and climate conditions, I’m confident that I’ll be able to make an informed decision that results in a garage door opener that enhances the functionality and convenience of my garage space.

Lantana Gates & Garage Doors

1180 Central Way, Lantana, TX 76226, United States

940-400-3038

How to Adjust Garage Door Tension-Lantana Garage & Overhead Doors

Properly adjusting the tension of your Garage Door Repair Lantana TX is crucial for its smooth operation, longevity, and overall safety. Over time, the tension may need to be adjusted due to changes in weather conditions or regular wear and tear.

This guide will walk you through the step-by-step process of adjusting the tension on your garage door, ensuring it functions optimally.

Before You Begin:

  1. Gather the necessary tools: A ladder, a screwdriver, and winding bars (if applicable).
  2. Familiarize yourself with the components: Understand the different parts of your garage door system, such as springs, cables, and tracks.
  3. Ensure safety precautions: Wear protective eyewear and gloves, and keep children and pets away from the work area.
  4. Consult the manufacturer’s manual: Refer to the specific instructions provided by the manufacturer for your garage door system.

Step 1: Identify the Type of Spring System: Garage doors typically have one of two types of spring systems: torsion springs or extension springs. The adjustment process differs slightly for each.

A. Torsion Springs:

  1. Locate the torsion spring: It is usually positioned above the garage door opening, mounted on a shaft.
  2. Release the tension: Use winding bars to unwind the tension from the springs. Insert one winding bar into the winding cone and apply a slow, steady downward force. Insert the second bar into another hole on the cone, keeping it firmly in place.
  3. Balance the door: Once the tension is released, manually lift the garage door to the halfway position. If it stays in place, it is balanced correctly. If it moves up or down, proceed to adjust the tension accordingly.
  4. Increase or decrease tension: To increase tension, turn the winding cone in the direction that tightens the spring coils. To decrease tension, turn the winding cone in the opposite direction.
  5. Test the door: After each adjustment, test the door’s balance by lifting it manually to the halfway position. Repeat the adjustment process until the door stays balanced.

B. Extension Springs:

  1. Identify the extension springs: They are typically located on either side of the garage door, stretching parallel to the horizontal tracks.
  2. Secure the door: Close the garage door and clamp a locking pliers onto the track just below the bottom roller to prevent the door from opening.
  3. Adjust the tension: Locate the adjustment clips or pulleys near the ends of the extension springs. Move them up or down to increase or decrease tension, respectively.
  4. Test the tension: Remove the locking pliers and slowly open the door to test the tension. The door should open smoothly and remain in place when released. If the door is difficult to open or slams shut, readjust the tension as needed.

Step 2: Lubrication and Maintenance:

  1. Lubricate moving parts: Apply a silicone-based lubricant to the rollers, hinges, tracks, and springs to ensure smooth operation.
  2. Check for wear and damage: Inspect the springs, cables, rollers, and other components for signs of wear or damage. Replace any worn or damaged parts promptly to maintain optimal performance.

Conclusion: By following this step-by-step guide, you can effectively adjust the tension of your Garage Door Repair Lantana TX and ensure its smooth operation. Remember to exercise caution and consult your garage door manufacturer’s manual for specific instructions. Regular maintenance and periodic inspections will help prolong the lifespan of your garage door and keep it functioning safely and efficiently for years to come.

Lantana Garage & Overhead Doors

3501 FM 407 #15, Lantana, TX 76226

940-400-3038

Powered by WordPress & Theme by Anders Norén