Local Businesses Blog in Texas

Tag: GARAGE FLOOR

How To Prepare Garage Floor For Epoxy Coating – The Garage Floor Company Omaha

Epoxy coating is a popular choice for Garage Floor Omaha NE due to its durability, resistance to chemicals, and ease of maintenance. However, proper preparation of the garage floor is crucial to ensure the success and longevity of the epoxy coating.
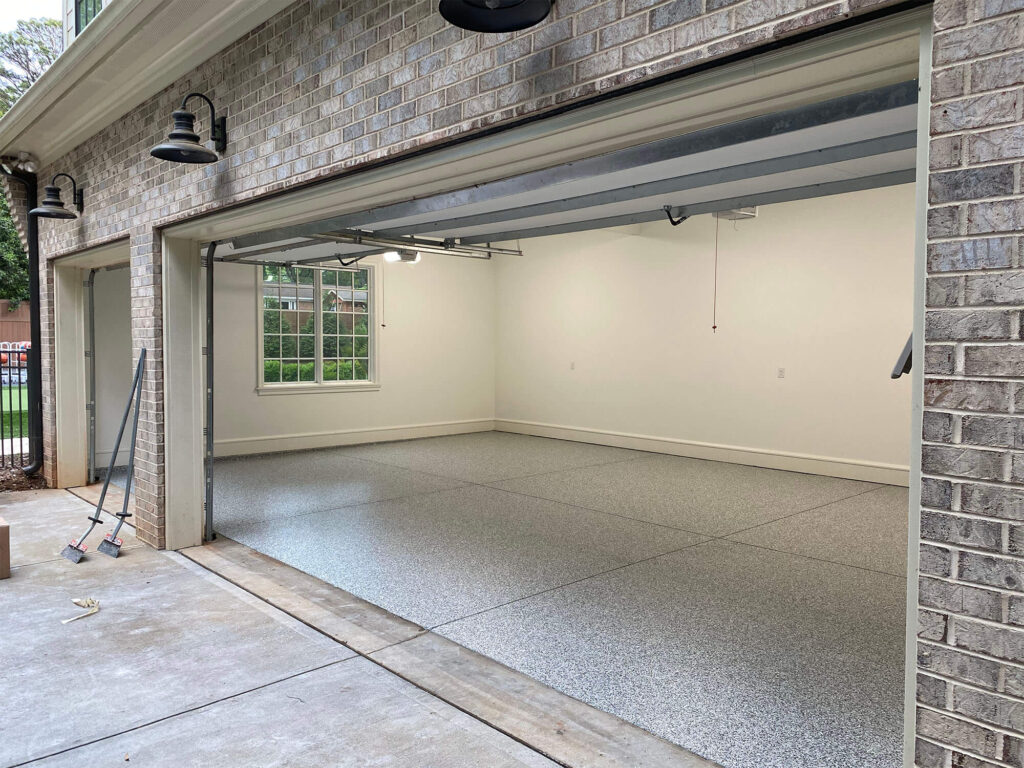
In this comprehensive guide, we’ll walk you through the step-by-step process of preparing your garage floor for epoxy coating to achieve a professional and long-lasting finish.

Tools and Materials Needed

Before you begin the preparation process, gather the following tools and materials:

  1. Broom or shop vacuum
  2. Pressure washer or hose with high-pressure nozzle
  3. Degreaser or concrete cleaner
  4. Scrub brush or stiff-bristled broom
  5. Concrete patch or repair compound
  6. Putty knife or trowel
  7. Concrete etching solution
  8. Bucket
  9. Safety goggles and gloves
  10. Protective clothing
  11. Plastic sheeting or drop cloths

Step-by-Step Preparation Process

1. Clear the Garage

Start by removing all items from the garage, including vehicles, tools, and storage items. Sweep the floor thoroughly to remove any loose dirt, dust, and debris. Alternatively, use a shop vacuum to clean up the garage floor.

2. Degrease the Floor

Next, tackle any oil stains, grease spots, or other contaminants on the garage floor. Apply a degreaser or concrete cleaner to the affected areas and scrub them with a stiff-bristled brush or broom. Allow the cleaner to sit for a few minutes, then rinse the floor with a pressure washer or hose with a high-pressure nozzle to remove the residue.

3. Repair Cracks and Imperfections

Inspect the garage floor for any cracks, holes, or uneven surfaces. Use a concrete patch or repair compound to fill in any cracks or holes, following the manufacturer’s instructions. Smooth the patch with a putty knife or trowel and allow it to dry completely before proceeding.

4. Etch the Concrete

Etching the concrete is essential to ensure proper adhesion of the epoxy coating. Mix the concrete etching solution with water in a bucket according to the manufacturer’s instructions. Apply the solution to the garage floor using a pump sprayer or watering can, working in small sections at a time.

5. Scrub the Floor

Once the etching solution is applied, use a scrub brush or stiff-bristled broom to scrub the garage floor thoroughly. This will help remove any remaining dirt, grease, or contaminants and open up the pores of the concrete for better adhesion of the epoxy coating. Rinse the floor with clean water to remove the etching solution and debris.

6. Allow the Floor to Dry

After cleaning and etching the garage floor, allow it to dry completely before applying the epoxy coating. This may take several hours or even overnight, depending on the temperature and humidity levels in your area. Ensure that the floor is completely dry before proceeding to the next step.

7. Protect Surrounding Areas

Before applying the epoxy coating, take steps to protect surrounding areas from accidental spills or splatters. Lay down plastic sheeting or drop cloths along the walls and edges of the garage floor to prevent the epoxy from staining or adhering to these surfaces.

8. Begin Epoxy Coating Application

Once the garage floor is clean, dry, and protected, you’re ready to begin applying the epoxy coating. Follow the manufacturer’s instructions carefully, mixing the epoxy resin and hardener together according to the specified ratios. Use a roller or squeegee to apply the epoxy coating evenly to the garage floor, working in small sections at a time.

9. Allow the Coating to Cure

After applying the epoxy coating, allow it to cure according to the manufacturer’s instructions. This typically involves letting the coating dry for a specified period, often 24 to 48 hours, before allowing foot traffic or parking vehicles on the garage floor. Ensure proper ventilation during the curing process to help expedite drying and minimize odors.

10. Apply a Second Coat (Optional)

For added durability and protection, consider applying a second coat of epoxy coating to the garage floor. Follow the same process as before, allowing the first coat to dry completely before applying the second coat. This will provide an extra layer of protection and enhance the appearance of the garage floor.

Conclusion:

Preparing your garage floor for epoxy coating is a crucial step in achieving a durable, long-lasting finish that enhances the appearance and functionality of your garage. By following the step-by-step process outlined in this guide and taking the time to properly clean, repair, and etch the concrete surface, you can ensure the success of your epoxy coating project and enjoy a beautiful and resilient garage floor for years to come.

The Garage Floor Company Omaha

15125 Industrial Rd, Omaha, NE 68144, United States

1-402-576-5599

How Do I Prepare My Garage Floor For Coating Or Tiling – The Garage Floor Company Arizona


Garage Floor Chandler AZ  Here’s a detailed guide on how to prepare your garage floor for coating or tiling:

Concrete Garage Floor Coatings

1. Clear the Space: Start by clearing out the garage space and removing any items, vehicles, or obstacles from the floor. This will provide you with a clean and open workspace to work efficiently and effectively.

2. Sweep and Vacuum: Sweep the garage floor to remove any loose dirt, dust, and debris. Use a vacuum cleaner with a brush attachment to ensure thorough cleaning, especially in corners and along edges where dirt may accumulate.

3. Degrease the Surface: Use a degreaser or concrete cleaner to remove any oil, grease, or other stains from the garage floor. Apply the degreaser according to the manufacturer’s instructions and scrub the surface with a stiff-bristled brush or broom. Rinse the floor thoroughly with water and allow it to dry completely before proceeding.

4. Repair Cracks and Holes: Inspect the garage floor for any cracks, pits, or holes, and repair them using a concrete patching compound or epoxy filler. Follow the manufacturer’s instructions for mixing and applying the patching material, and use a trowel or putty knife to smooth the surface. Allow the patched areas to cure completely before continuing with the preparation process.

5. Remove Old Coatings or Sealers: If the garage floor has previously been coated or sealed, it may be necessary to remove the old coating or sealer before applying a new one. Use a chemical stripper or mechanical grinder to remove the old coating, following the manufacturer’s instructions and safety precautions. Thoroughly clean the floor after removing the old coating to ensure proper adhesion of the new coating or tiles.

6. Etch or Profile the Surface: Etching or profiling the garage floor surface is essential to promote adhesion and ensure proper bonding of the coating or tiles. Use a concrete etching solution or mechanical grinder to etch the surface, creating a rough texture that allows the coating or adhesive to penetrate and bond effectively. Rinse the floor thoroughly with water to remove any residue and allow it to dry completely.

7. Test for Moisture: Before proceeding with coating or tiling, it’s essential to test the garage floor for moisture to prevent issues such as delamination or mold growth. Tape a plastic sheet or piece of plastic film to the floor and seal the edges with duct tape. Leave the plastic in place for 24 to 48 hours, then check for condensation or moisture buildup underneath. If moisture is present, it may be necessary to address the underlying cause before proceeding with the flooring installation.

8. Sand or Grind High Spots: If the garage floor has any high spots or uneven areas, use a concrete grinder or sander to smooth them out. Grinding or sanding the surface will ensure a level substrate for the coating or tiles and prevent any imperfections from showing through.

9. Clean and Vacuum Again: Once the surface preparation is complete, thoroughly clean the garage floor again to remove any dust, debris, or residue from the preparation process. Use a mop or shop vac to remove any remaining dirt or dust, and allow the floor to dry completely before applying the coating or tiles.

10. Apply Primer (If Necessary): Depending on the type of coating or tiles you’re using, it may be necessary to apply a primer to the garage floor before installation. Follow the manufacturer’s instructions for mixing and applying the primer, and allow it to dry completely before proceeding with the next steps.

11. Follow Manufacturer’s Instructions: Finally, carefully read and follow the manufacturer’s instructions for applying the coating or tiles to the garage floor. Whether you’re applying epoxy coatings, interlocking tiles, rubber mats, or another flooring material, following the manufacturer’s recommendations for surface preparation, application techniques, and curing times will ensure optimal results and long-lasting performance.

Garage Floor Chandler AZ  Proper preparation is essential for achieving professional-quality results and maximizing the lifespan of your garage flooring investment.

The Garage Floor Company Arizona

2300 W Pecos Rd #126, Chandler, AZ 85224, United States

1-480-405-1661

How To Install Garage Floor Tiles – The Garage Floor Company Arizona


Garage Floor Chandler AZ  Whether you’re looking to create a durable, attractive surface for parking vehicles, working on projects, or simply organizing your belongings, garage floor tiles offer a versatile and customizable solution.

Here’s a step-by-step guide on how to install garage floor tiles:

1. Gather Materials and Tools:

Before you begin, gather all the materials and tools you’ll need for the installation process. This typically includes garage floor tiles, transition edges or ramps (if needed), a rubber mallet or hammer, a tape measure, a straightedge or chalk line, a utility knife or saw, and any adhesive or connectors required for the specific tile system you’re using.

2. Prepare the Subfloor:

Start by preparing the subfloor surface to ensure a clean, level, and stable foundation for the tiles. Sweep or vacuum the floor to remove any dust, dirt, or debris, and then use a degreaser or cleaner to remove any oil, grease, or other contaminants. Repair any cracks or uneven areas in the concrete subfloor using a concrete patching compound, and allow it to dry completely before proceeding.

3. Plan the Layout:

Before installing the tiles, plan the layout of the garage floor to ensure a proper fit and alignment of the tiles. Start by determining the center point of the garage floor and work outward from there, using a tape measure and chalk line to mark guidelines for tile placement. Consider any obstacles such as garage doors, support columns, or built-in cabinets, and plan the layout accordingly to minimize cuts and waste.

4. Install Edge Pieces and Ramps:

If your garage floor tiles require edge pieces or ramps for a finished look and smooth transition to the surrounding floor, install these pieces first. Place the edge pieces along the perimeter of the garage floor and secure them in place using adhesive or connectors as recommended by the manufacturer. Install transition ramps at garage door thresholds or entryways to provide a smooth transition from the floor to the tiles.

5. Lay the Tiles:

With the perimeter and transition pieces in place, begin laying the garage floor tiles according to your planned layout. Start in one corner of the garage and work your way outward, interlocking the tiles together using the manufacturer’s recommended installation method. Use a rubber mallet or hammer to gently tap the tiles into place and ensure a snug fit. Check periodically with a straightedge or level to maintain a flat, even surface.

6. Cut Tiles as Needed:

As you reach the edges and corners of the garage floor, you may need to cut tiles to fit around obstacles or along walls. Measure and mark the tiles carefully, and use a utility knife, jigsaw, or tile cutter to make clean, precise cuts. Take your time to ensure accurate measurements and cuts, and double-check the fit before installing the cut tiles.

7. Finish the Installation:

Once all the tiles are installed, go over the entire garage floor to ensure that each tile is securely locked in place and that the seams are tight and even. Make any necessary adjustments or repositioning of tiles as needed. Install any additional edge pieces or ramps to complete the perimeter of the floor, and ensure that all transitions are smooth and level.

8. Clean and Maintain:

After the installation is complete, clean the garage floor tiles with a mild detergent and water solution to remove any dust or debris. Allow the floor to dry completely before using the garage space. Regular maintenance of the tiles, such as sweeping or vacuuming to remove dirt and occasional mopping with a mild cleaner, will help keep them looking new and prolong their lifespan.

9. Enjoy Your New Garage Floor:

Once the installation is finished and the floor is clean and dry, you can begin using your newly transformed garage space. Whether you’re parking vehicles, working on projects, or organizing your belongings, garage floor tiles provide a durable, attractive surface that enhances the functionality and appearance of your garage.

Conclusion:

Garage Floor Chandler AZ  By following these step-by-step instructions and taking the time to plan, prepare, and install the tiles properly, you can create a durable, attractive, and functional surface that adds value to your home and enhances your daily life. With proper maintenance, your garage floor tiles will provide years of reliable performance and enjoyment.

The Garage Floor Company Arizona

2300 W Pecos Rd #126, Chandler, AZ 85224, United States

1-480-405-1661

What are the Best Garage Floor Designs? – Garage Floor Coatings Omaha

As someone who has explored various garage floor designs and gone through the process of selecting the best one for my own space, I understand the importance of finding a design that suits your personal style and enhances the overall aesthetics of your garage.

Here is the best garage floor designs according to Garage Floor Coatings Omaha NE:

  1. Solid Color: For a clean and minimalist look, a solid color design is a timeless choice. It provides a sleek and uniform appearance to the garage floor, giving it a polished and professional look. Opting for neutral colors like gray, beige, or white can create a modern and versatile base that complements any garage theme or décor. Solid color designs also allow other elements in the garage, such as cars, equipment, or storage, to become the focal points.
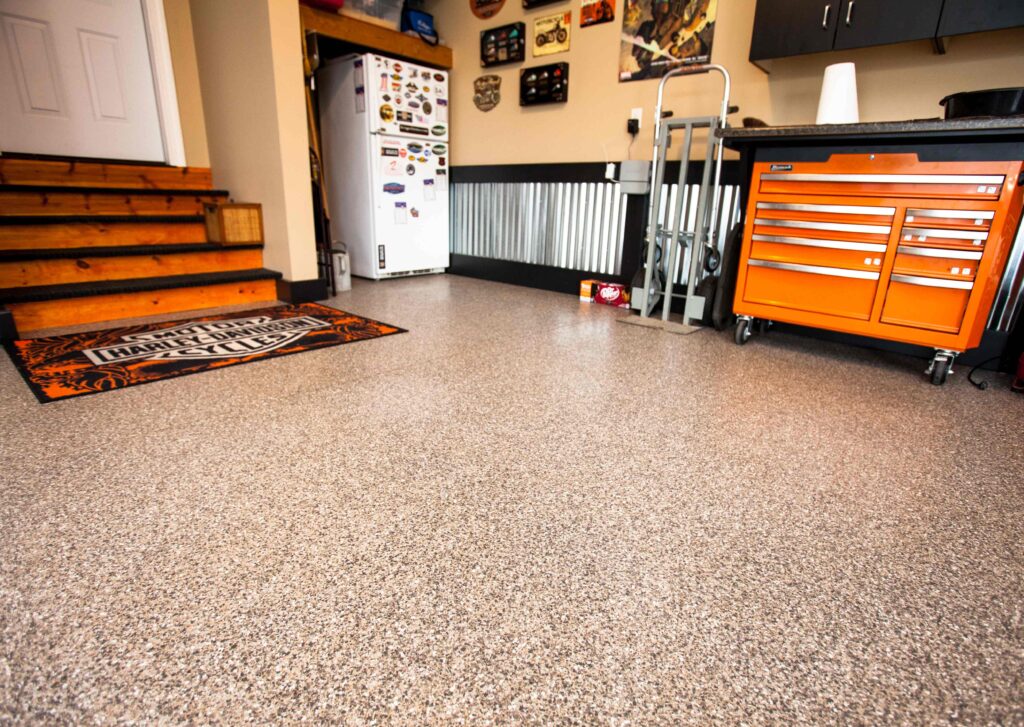
  2. Flecked or Chip Systems: If you’re looking to add some texture and visual interest to your garage floor, flecked or chip systems are an excellent option. These designs involve sprinkling decorative chips or flakes onto the wet base coat, creating a speckled or granite-like effect. The chips come in various colors, sizes, and materials, allowing you to customize the design to your liking. Flecked or chip systems not only add visual appeal but also provide a slip-resistant surface and help conceal minor imperfections.
  3. Metallic Epoxy: For a truly unique and eye-catching garage floor design, metallic epoxy coatings are a popular choice. They create a stunning, high-gloss finish with a luxurious and three-dimensional appearance. Metallic epoxy coatings incorporate pigmented epoxy with metallic additives that create beautiful swirls, patterns, and depth. These coatings can be customized with different color combinations and application techniques, allowing you to achieve a one-of-a-kind design that reflects your personal style.
  4. Stenciled or Stamped Patterns: If you’re looking to add a touch of elegance and sophistication to your garage, consider stenciled or stamped patterns. Stencils can be used to create intricate designs, geometric patterns, or even logos on the garage floor. These designs are achieved by applying a contrasting color or texture over the stencils, resulting in a visually striking effect. Stamping involves using specialized tools or molds to imprint textures or patterns into the coating, such as tile, brick, or stone patterns. Stenciled or stamped patterns add a unique and customized look to your garage floor.
  5. Epoxy Terrazzo: Terrazzo flooring is known for its durability, versatility, and timeless beauty. Epoxy terrazzo is a modern twist on this classic design, incorporating small chips or pieces of materials like marble, quartz, or glass into an epoxy or cementitious base. This creates a seamless, polished, and visually stunning floor surface. Epoxy terrazzo allows for endless design possibilities, allowing you to choose the colors, chip sizes, and distribution patterns that best suit your style and preferences.
  6. Racing Stripes or Borders: For automotive enthusiasts or those looking to add a sporty touch to their garage, incorporating racing stripes or borders can be an exciting design choice. Racing stripes involve applying contrasting colors in the form of bold stripes along the length or width of the floor, resembling the look of racing tracks. Borders can be added along the edges of the floor to create a defined and visually appealing boundary. Racing stripes or borders add a dynamic and energetic vibe to the garage, giving it a unique and personalized touch.
  7. Customized Logos or Graphics: To truly personalize your garage floor and make a statement, consider incorporating customized logos or graphics. This can be achieved through stenciling, specialized printing techniques, or custom graphics embedded into the coating. Whether it’s your favorite sports team logo, automotive brand, or any other design that holds significance for you, customized logos or graphics add a personal touch and make your garage floor truly one-of-a-kind.

When selecting the best garage floor design, it’s essential to consider your personal style, the overall theme of your garage, and the functionality of the space. Take into account factors such as durability, maintenance requirements, and the impact on lighting and visibility. Consulting with professionals or flooring experts can provide valuable insights and guidance to help you choose the design that best suits your needs and preferences.

Remember, according to Garage Floor Coatings Omaha NE, the garage floor design sets the tone for the entire space, so take your time, explore different options, and create a design that reflects your personality and enhances the overall aesthetics of your garage.

Garage Floor Coatings Omaha

14685 California St, Omaha, NE 68154, United States

402-538-8225

How to Clean your Epoxy Garage Floor? – Omaha’s Best Epoxy Garage Floor

As a homeowner who has an epoxy garage floor, I understand the importance of regular cleaning to maintain its appearance and durability. Cleaning an epoxy garage floor is a relatively simple process, and it’s essential to use the right techniques and products to avoid damaging the epoxy coating.

Here’s a step-by-step guide from Epoxy Garage Floor Omaha NE on how to clean your epoxy garage floor effectively.

  1. Gather the Necessary Supplies: Before starting the cleaning process, gather the following supplies:
  • Broom or dust mop
  • Soft-bristle brush or push broom
  • Mild detergent or specialized epoxy floor cleaner
  • Bucket
  • Warm water
  • Microfiber mop or sponge mop
  • Squeegee or wet vacuum (optional)
  • Clean towels or mop heads
  • Protective gloves and goggles (if using harsh chemicals)
  1. Remove Loose Debris: Begin by removing any loose dirt, dust, or debris from the floor. Using a broom or dust mop, sweep the entire surface, paying special attention to corners, edges, and areas around storage or workbenches. This step will prevent any loose particles from scratching the epoxy coating during the cleaning process.
  2. Prepare the Cleaning Solution: Fill a bucket with warm water and add a mild detergent or specialized epoxy floor cleaner. Follow the manufacturer’s instructions for the appropriate dilution ratio. Avoid using harsh chemicals, bleach, or abrasive cleaners that can damage the epoxy coating. If you’re unsure about which cleaner to use, consult the manufacturer’s recommendations.
  3. Scrub the Floor: Dip a soft-bristle brush or push broom into the cleaning solution and scrub the floor in small sections. Start at one end of the garage and work your way towards the exit. Use a back-and-forth motion, applying gentle pressure to remove any stains, spills, or grime. Pay extra attention to high-traffic areas and any visible stains. For larger areas, a microfiber mop or sponge mop can be used.
  4. Rinse the Floor: After scrubbing, rinse the floor thoroughly to remove any residue or cleaning solution. Use clean water and a mop or sponge mop to rinse the surface. Alternatively, you can use a squeegee or wet vacuum to remove the water efficiently. Ensure all cleaning solution is completely removed, as any residue left behind can make the floor slippery.
  5. Dry the Floor: Once the floor is rinsed, dry it thoroughly to prevent water spots or streaks. Use clean towels or mop heads to absorb excess moisture. If using a squeegee or wet vacuum, remove as much water as possible. Allow the floor to air dry completely before walking or driving on it. Make sure there is proper ventilation in the garage to aid in the drying process.
  6. Address Stubborn Stains: If there are any stubborn stains or marks on the epoxy floor, you may need to use additional cleaning techniques. For oil or grease stains, consider using a degreaser specifically formulated for epoxy floors. Apply the degreaser to the stain and let it sit for a few minutes. Then, scrub the area with a brush and rinse thoroughly. For other tough stains, consult the manufacturer’s recommendations or seek professional advice.
  7. Routine Maintenance: To keep your epoxy garage floor looking its best, establish a routine maintenance schedule. This may include regular sweeping or dust mopping to remove dirt and debris. Additionally, periodically clean the floor using the above steps to remove any accumulated grime or spills. Avoid using harsh chemicals, abrasive cleaners, or tools that can damage the epoxy coating.

By following these steps from Epoxy Garage Floor Omaha NE, you can effectively clean your epoxy garage floor and maintain its appearance and durability. Regular cleaning and proper maintenance will help your epoxy floor last for many years to come.

Omaha’s Best Epoxy Garage Floor

5060 Dodge St, Omaha, NE 68132, United States

402-814-8957

How do I Fix Garage Floor-Omaha’s Best Epoxy Garage Floor

A damaged Epoxy Garage Floor Omaha NE can be a nuisance, affecting the overall functionality and appearance of your space. Whether it’s cracks, spalling, or uneven surfaces, repairing your garage floor is essential to ensure its longevity and safety.

In this guide, we will provide you with step-by-step instructions on how to fix common issues and restore your garage floor to its former glory.

I. Assessing the Damage: Before you start repairing your garage floor, it’s important to assess the extent of the damage. This will help determine the appropriate repair method and materials needed. Here are some common issues you may encounter:

  1. Cracks:
  • Hairline cracks: These can be superficial and may not require immediate attention.
  • Wide cracks: Cracks wider than 1/4 inch should be addressed to prevent further damage.
  1. Spalling:
  • Spalling occurs when the surface layer of the concrete begins to flake off, creating pits and rough patches.
  1. Uneven Surfaces:
  • Uneven or sunken areas of the floor can be caused by soil settlement or poor installation.

II. Gather the Necessary Tools and Materials: To fix your garage floor, you will need the following tools and materials:

  • Safety equipment (goggles, gloves, mask)
  • Hammer and chisel
  • Wire brush
  • Vacuum cleaner
  • Concrete patching compound
  • Concrete resurfacer
  • Trowel
  • Bucket
  • Broom
  • Paint roller or brush
  • Concrete sealer

III. Repairing Cracks:

  1. Clean the crack: Use a wire brush and vacuum cleaner to remove debris and loose concrete from the crack.
  2. Create a V-shaped groove: Use a hammer and chisel to widen the crack into a V-shaped groove. This will allow the patching compound to adhere better.
  3. Apply the patching compound: Mix the patching compound according to the manufacturer’s instructions and fill the crack with the trowel. Smooth the surface and let it cure.

IV. Fixing Spalling:

  1. Remove loose concrete: Use a hammer and chisel to remove any loose or flaking concrete.
  2. Clean the area: Thoroughly clean the spalled area using a wire brush and vacuum cleaner.
  3. Apply concrete resurfacer: Mix the concrete resurfacer as directed and apply it to the spalled area using a trowel. Smooth the surface and let it cure.

V. Repairing Uneven Surfaces:

  1. Clean the area: Sweep the garage floor to remove any dirt or debris.
  2. Mix the resurfacer: Follow the manufacturer’s instructions to mix the concrete resurfacer.
  3. Apply the resurfacer: Pour the resurfacer onto the uneven areas and spread it using a trowel or a long-handled squeegee. Feather the edges to blend with the surrounding floor.

VI. Finishing Touches:

  1. Let the repairs cure: Allow the repaired areas to cure according to the manufacturer’s instructions.
  2. Apply a concrete sealer: Once the repairs have fully cured, apply a concrete sealer to protect the surface from future damage. Use a paint roller or brush to evenly apply the sealer and let it dry.

Conclusion: Repairing your Epoxy Garage Floor Omaha NE is a manageable task that can greatly improve the functionality and aesthetics of your space. By following these step-by-step instructions, you can fix cracks, spalling, and uneven surfaces, restoring your garage floor to its original condition. Remember to prioritize safety by wearing protective gear and follow the manufacturer’s instructions for the specific repair products you use. With a little effort, you can enjoy a durable and attractive garage floor for years to come.

Omaha’s Best Epoxy Garage Floor

5060 Dodge St, Omaha, NE 68132

1-402-814-8957

How to Maintain Garage Floor? – The Garage Floor Company

As a homeowner who takes pride in maintaining my garage floor, I can share with you the strategies and tips I use to keep it in excellent condition. Regular maintenance is crucial for preserving the functionality, appearance, and longevity of the garage floor.

Here’s how I effectively maintain my garage floor based from Epoxy Garage Floor:

  1. I make it a point to clean the garage floor regularly. Using a broom or a leaf blower, I remove loose dirt, dust, and debris. This simple step prevents dirt from accumulating and scratching the surface. For stubborn stains or spills, I use a damp mop or a mild floor cleaner. Harsh chemicals are avoided to prevent any damage to the floor or its coating.
  2. I prioritize protecting the floor against stains. Any spills or leaks, such as oil, gasoline, or chemicals, are promptly cleaned up. I keep absorbent materials like kitty litter or sawdust on hand to quickly absorb liquid spills. After absorbing, I clean the area with a mild detergent or a specialized concrete cleaner to remove any residue.
  3. To prevent heavy impact and potential damage, I avoid dropping heavy objects or dragging heavy equipment across the floor. I use padding or protective mats under heavy tools or equipment to distribute the weight and prevent dents or scratches.
  4. Moisture damage is a concern, so I ensure good ventilation in the garage. This helps to prevent moisture buildup that could lead to floor damage and the growth of mold. I also make sure there is proper drainage around the garage to avoid water pooling or seeping into the floor. If needed, I use a dehumidifier to control humidity levels.
  5. I take steps to protect the floor against tire marks. Placing rubber mats or parking pads under the tires of vehicles acts as a barrier, preventing tire chemicals and heat from affecting the floor directly. I avoid parking hot vehicles with warm tires on the floor to prevent tire marks or damage.
  6. Regular inspection is essential to catch any cracks or damage early on. I periodically examine the garage floor for any signs of cracks or deterioration. Small cracks can be repaired using a concrete patching compound or an epoxy-based filler. For larger cracks or extensive damage, I seek professional assistance. Addressing cracks promptly prevents them from spreading and causing further problems.
  7. I apply a protective coating to enhance the durability and resistance of my garage floor. Using an epoxy coating or a concrete sealer, I create a barrier against stains, chemicals, and abrasion. I follow the manufacturer’s instructions for application and reapplication as necessary.
  8. It’s crucial to regularly inspect and maintain the protective coatings on the garage floor. I check for any signs of wear, peeling, or damage. If needed, I reapply or touch up the coatings to ensure their effectiveness. I adhere to the recommended maintenance schedule provided by the manufacturer.
  9. I use mats or rugs in high-traffic areas or places prone to spills, such as near entrances or workstations. These mats collect dirt, absorb moisture, and provide extra protection for the floor. I make sure to clean and shake out the mats regularly to prevent debris buildup.
  10. I avoid using harsh chemicals or abrasive cleaners when cleaning the garage floor. Instead, I opt for mild detergents or specialized concrete cleaners recommended by the manufacturer. Before applying any new cleaning products, I always test them in a small, inconspicuous area to ensure they won’t cause any damage.

In summary, by implementing these maintenance tips from Epoxy Garage Floor, I’ve been able to keep my garage floor in excellent condition. Regular cleaning, preventative measures, and timely repairs have helped preserve its functionality and appearance. Each floor type and coating may have specific care requirements, so it’s always important to consult the manufacturer’s guidelines for the best maintenance practices.

The Garage Floor Company

866-507-0096

What are the Simple Design of Garage Floor-The Garage Floor Company

Designing a Epoxy Garage Floor involves considering various factors such as functionality, durability, aesthetics, and budget. There are several simple design options that can enhance the appearance and functionality of a garage floor.

In this article, we will explore some popular choices for designing a garage floor.

One of the simplest and most common garage floor designs is plain concrete. Concrete offers durability and strength, making it an ideal choice for heavy-duty use. It is relatively low-cost and easy to maintain. However, plain concrete can be prone to cracking over time and may lack visual appeal.

To enhance the look of a concrete floor, many homeowners opt for decorative finishes. Stamped concrete is a popular choice that mimics the appearance of various materials such as stone, brick, or tile. Stamps are used to create patterns on the surface, adding texture and visual interest. Stamped concrete can give a garage floor a high-end look without the high cost associated with natural materials.

Another option is epoxy flooring. Epoxy is a durable and resistant material that can be applied to the concrete floor. It comes in a variety of colors and finishes, allowing for endless design possibilities. Epoxy flooring is highly resistant to stains, chemicals, and abrasion, making it suitable for garages where spills and heavy use are expected. It is also relatively easy to clean and maintain.

For a more industrial and contemporary look, polished concrete is a great choice. Polishing the concrete surface creates a smooth and shiny finish. It not only enhances the aesthetics but also improves the durability of the floor. Polished concrete is resistant to stains, abrasion, and tire marks. Additionally, it is a sustainable option as it utilizes the existing concrete slab, reducing the need for additional materials.

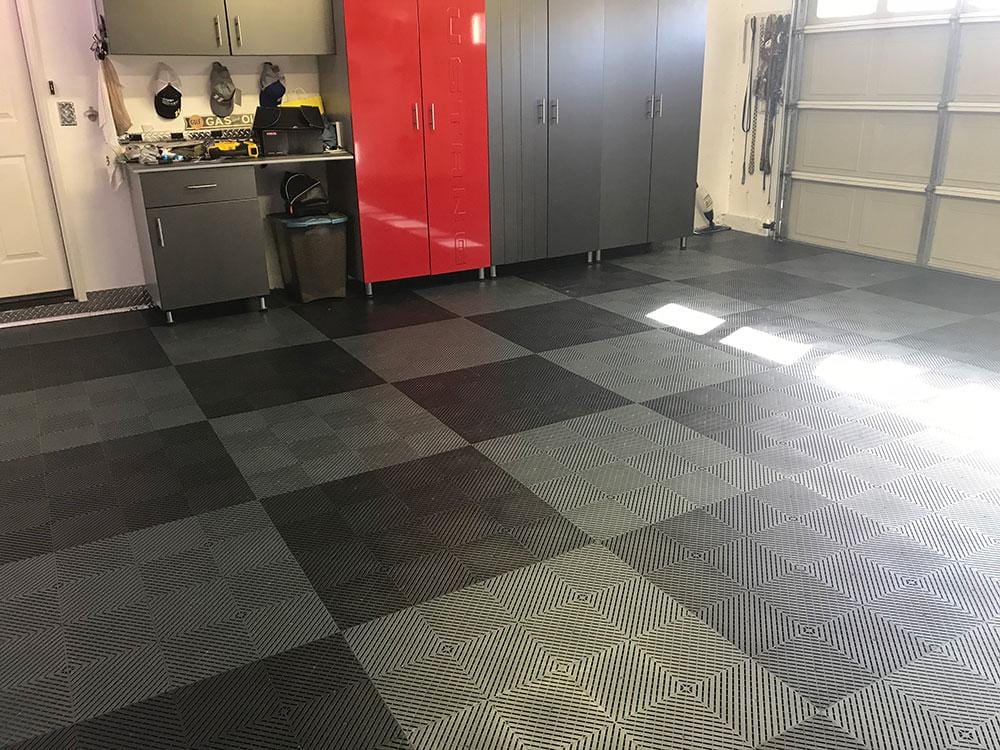
If you want a softer and more comfortable surface, interlocking floor tiles can be a great solution. These tiles are made of materials such as rubber or PVC and come in various designs and colors. They can be easily installed and removed, making them a flexible choice. Interlocking floor tiles provide cushioning, sound insulation, and protection against spills and stains. They are often used in workshops or areas where prolonged standing is required.

For those seeking a more customized design, garage floor coatings can be an excellent option. These coatings are applied directly on the concrete floor and can be customized with different colors, patterns, and textures. They offer durability, chemical resistance, and easy maintenance. Garage floor coatings can be combined with techniques like staining or stenciling to create unique and personalized designs.

Lastly, if budget is a constraint, floor paints can provide a simple yet effective design solution. Garage floor paints are available in various colors and finishes. They are easy to apply and can provide a fresh and clean look to the floor. However, it’s important to choose high-quality paints specifically designed for garage floors to ensure longevity and durability.

In conclusion, there are several simple design options for Epoxy Garage Floor. Whether you prefer a plain and cost-effective solution like plain concrete or want to explore more decorative options like stamped concrete, epoxy flooring, polished concrete, interlocking tiles, floor coatings, or floor paints, the choice depends on your preferences, budget, and specific needs. Consider the durability, maintenance requirements, and aesthetics to select the best design for your garage floor.

The Garage Floor Company

866-507-0096

Powered by WordPress & Theme by Anders Norén