Local Businesses Blog in Texas

Tag: garage door repair lake forest ca

How To Connect Craftsman Garage Door Opener – Lake Forest Overhead & Garage Doors

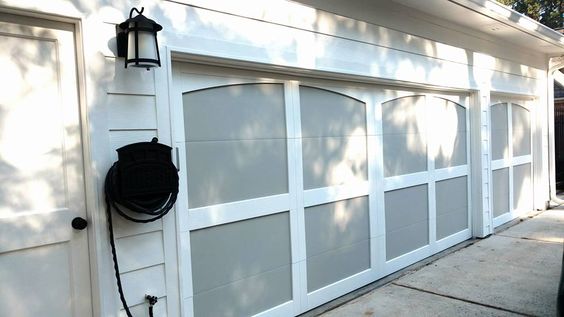
Connecting a Craftsman Lake Forest Garage Door Repair may seem like a daunting task, but with the right instructions and some patience, you can easily complete the process.

Craftsman garage door openers are known for their reliability and durability, and they come with user-friendly features for easy installation and setup. In this comprehensive guide, we will walk you through the step-by-step process of connecting your Craftsman garage door opener, ensuring a smooth and hassle-free experience.

Before you begin:

  1. Gather the necessary tools and materials:
    • Craftsman garage door opener kit
    • Ladder
    • Screwdriver
    • Drill and drill bits
    • Wrenches
    • Safety glasses
    • Extension cords
    • Electrical tape
  2. Ensure your garage door is in good working condition. Repair any issues with the door or its hardware before proceeding.
  3. Disconnect any existing garage door opener wiring and remove any old hardware if you are replacing an old unit.

Now, let’s get started:

: Assemble the Opener

Start by assembling the Craftsman garage door opener according to the instructions provided in the user manual. This typically involves attaching the motor unit to the ceiling and installing the rail assembly.

: Mount the Header Bracket

Using a ladder, position the header bracket over the center of the garage door opening. Ensure it is level and secure it to the header wall with suitable screws or bolts provided in the kit. Make sure the bracket is sturdy, as it will support the weight of the opener.

: Install the Rail

Attach the rail to the header bracket using the provided nuts and bolts. Extend the rail to the opposite end of the garage and secure it to the front wall with additional brackets. Follow the manufacturer’s instructions for proper spacing and alignment.

: Attach the Motor Unit

Hang the motor unit on the rail using the attachment bracket provided. Make sure it’s securely fastened, and adjust its position as needed to align with the rail.

: Connect the Drive Assembly

Attach the drive assembly to the motor unit as per the instructions in the manual. Ensure all components are properly connected and secure.

: Wire Connections

Now, it’s time to connect the wires. This typically involves connecting the power cord to an electrical outlet and connecting the wall control panel and safety sensors. Refer to the wiring diagram in the user manual for specific instructions.

: Program the Remote Control

If your Craftsman garage door opener comes with remote controls, follow the manual’s instructions to program them. This often involves setting a code to ensure the remote control can operate the door opener securely.

: Adjust the Opener Settings

Access the control panel on the motor unit and adjust the opener’s settings, such as travel limits and force settings. This ensures that the door opens and closes smoothly without causing any damage.

: Test the Opener

Before testing, ensure the area around the garage door is clear. Use the remote control or wall control panel to open and close the garage door several times. Observe any unusual noises or movements and make necessary adjustments if required.

: Secure the Safety Sensors

The safety sensors prevent the door from closing if an object or person is in its path. Make sure the sensors are aligned properly and secure them in place.

: Install the Wall Control

Mount the wall control panel in a convenient location inside your garage, usually near the door leading into your home. This allows you to control the opener from inside the garage.

: Final Inspection

Carefully inspect all the connections and hardware to ensure everything is secure. Double-check the safety features, such as the auto-reverse mechanism and the emergency release cord.

Conclusion:

Connecting your Craftsman Lake Forest Garage Door Repair requires careful attention to detail and following the manufacturer’s instructions closely. By following this step-by-step guide, you can successfully install and set up your Craftsman garage door opener, providing you with convenience and security for years to come. If you encounter any difficulties or have questions during the installation process, consult the user manual or contact Craftsman customer support for assistance.

Lake Forest Overhead & Garage Doors

22762 Aspan St 202 143, Lake Forest, CA 92630, United States

1-949-776-4731

How To Connect Craftsman Garage Door Opener – Lake Forest Overhead & Garage Doors

Connecting a Craftsman Garage Door Repair may seem like a daunting task, but with the right instructions and some patience, you can easily complete the process.

Craftsman garage door openers are known for their reliability and durability, and they come with user-friendly features for easy installation and setup. In this comprehensive guide, we will walk you through the step-by-step process of connecting your Craftsman garage door opener, ensuring a smooth and hassle-free experience.

Before you begin:

  1. Gather the necessary tools and materials:
    • Craftsman garage door opener kit
    • Ladder
    • Screwdriver
    • Drill and drill bits
    • Wrenches
    • Safety glasses
    • Extension cords
    • Electrical tape
  2. Ensure your garage door is in good working condition. Repair any issues with the door or its hardware before proceeding.
  3. Disconnect any existing garage door opener wiring and remove any old hardware if you are replacing an old unit.

Now, let’s get started:

: Assemble the Opener

Start by assembling the Craftsman garage door opener according to the instructions provided in the user manual. This typically involves attaching the motor unit to the ceiling and installing the rail assembly.

: Mount the Header Bracket

Using a ladder, position the header bracket over the center of the garage door opening. Ensure it is level and secure it to the header wall with suitable screws or bolts provided in the kit. Make sure the bracket is sturdy, as it will support the weight of the opener.

: Install the Rail

Attach the rail to the header bracket using the provided nuts and bolts. Extend the rail to the opposite end of the garage and secure it to the front wall with additional brackets. Follow the manufacturer’s instructions for proper spacing and alignment.

: Attach the Motor Unit

Hang the motor unit on the rail using the attachment bracket provided. Make sure it’s securely fastened, and adjust its position as needed to align with the rail.

: Connect the Drive Assembly

Attach the drive assembly to the motor unit as per the instructions in the manual. Ensure all components are properly connected and secure.

: Wire Connections

Now, it’s time to connect the wires. This typically involves connecting the power cord to an electrical outlet and connecting the wall control panel and safety sensors. Refer to the wiring diagram in the user manual for specific instructions.

: Program the Remote Control

If your Craftsman garage door opener comes with remote controls, follow the manual’s instructions to program them. This often involves setting a code to ensure the remote control can operate the door opener securely.

: Adjust the Opener Settings

Access the control panel on the motor unit and adjust the opener’s settings, such as travel limits and force settings. This ensures that the door opens and closes smoothly without causing any damage.

: Test the Opener

Before testing, ensure the area around the garage door is clear. Use the remote control or wall control panel to open and close the garage door several times. Observe any unusual noises or movements and make necessary adjustments if required.

: Secure the Safety Sensors

The safety sensors prevent the door from closing if an object or person is in its path. Make sure the sensors are aligned properly and secure them in place.

: Install the Wall Control

Mount the wall control panel in a convenient location inside your garage, usually near the door leading into your home. This allows you to control the opener from inside the garage.

: Final Inspection

Carefully inspect all the connections and hardware to ensure everything is secure. Double-check the safety features, such as the auto-reverse mechanism and the emergency release cord.

Conclusion:

Connecting your Craftsman Garage Door Repair requires careful attention to detail and following the manufacturer’s instructions closely. By following this step-by-step guide, you can successfully install and set up your Craftsman garage door opener, providing you with convenience and security for years to come. If you encounter any difficulties or have questions during the installation process, consult the user manual or contact Craftsman customer support for assistance.

Lake Forest Overhead & Garage Doors

22762 Aspan St 202 143, Lake Forest, CA 92630, United States

1-949-776-4731

Upgrading to High-Cycle Garage Door Springs: Advantages – Lake Forest Garage & Overhead Doors

As a homeowner who’s always seeking ways to improve the efficiency and longevity of my garage door, I’ve come to realize that certain components play a vital role in achieving these goals. One such essential element is the garage door springs. These often-overlooked springs carry the weight of the door and facilitate its movement, making them indispensable for smooth operations. However, what I’ve learned is that not all springs are created equal. In my quest to enhance the overall performance of my garage door, I’ve uncovered the remarkable advantages of upgrading to high-cycle garage door springs.

According to Lake Forest Garage & Overhead Doors, these springs, designed to endure a significantly higher number of open and close cycles, offer an array of benefits that contribute to the reliability, efficiency, and cost-effectiveness of my garage door system.

1. Prolonged Lifespan: A Smart Investment in Durability

One of the standout advantages of upgrading to high-cycle garage door springs is the notable extension of their lifespan when compared to standard springs. Standard springs typically offer around 10,000 cycles of opening and closing. In contrast, high-cycle springs can provide an impressive range of 25,000 to 100,000 cycles, depending on the specific type and quality. This extended lifespan translates to years of dependable operation without the need for frequent replacements.

Choosing high-cycle springs translates to fewer instances of spring replacements. This not only saves me money on replacement costs but also spares me the hassle of unexpected breakdowns. It’s a well-considered investment in the long-term robustness of my garage door system.

2. Consistent Performance: Reliability at Its Core

High-cycle garage door springs are engineered to maintain their performance and functionality over a much longer period. Standard springs tend to accumulate wear and tear more rapidly, leading to a gradual decline in performance. This can result in various issues such as uneven door movement, unbalanced weight distribution, and compromised safety features.

Upgrading to high-cycle springs means that my garage door’s operation remains consistently smooth and reliable, even after numerous cycles. The door’s movement remains stable, reducing the risk of sudden malfunctions and eliminating the need for constant adjustments.

3. Cost-Efficiency: Fewer Replacements and Repairs

While the initial cost of high-cycle garage door springs might be slightly higher than that of standard springs, the long-term cost savings are remarkable. Thanks to their extended lifespan and reduced wear and tear, high-cycle springs require fewer replacements and repairs. This translates to decreased maintenance expenses and less downtime for my garage door.

By making the choice to upgrade, I’m effectively lowering the overall cost of maintaining my garage door over its lifespan. The initial investment proves to be a prudent decision when considering the decreased need for maintenance and replacements, making it a financially sound choice.

4. Lower Maintenance Frequency: Less Frequent Attention Needed

Regular maintenance is a crucial aspect of keeping a garage door functioning properly. However, I’ve found that high-cycle garage door springs demand less frequent maintenance due to their extended lifespan and enhanced durability. This not only saves me time but also ensures that my garage door continues to operate efficiently without the need for constant adjustments.

5. Strengthened Safety Measures: Consistency in Action

Safety is a paramount concern when it comes to garage doors, and the choice of springs can significantly impact how safely the door operates. High-cycle springs maintain their consistent performance over an extended period, minimizing the risk of sudden spring failures or imbalances that could compromise safety.

By upgrading to high-cycle springs, I’m taking an essential step toward ensuring that my garage door operates securely and predictably. This brings a sense of reassurance, particularly when it comes to the safety of my family, pets, and valuable possessions.

6. Ideal for High-Usage Scenarios: Meeting Specialized Needs

High-cycle garage door springs are particularly advantageous in scenarios where the garage door experiences frequent use, such as in commercial or heavy-duty settings. For businesses, warehouses, and facilities requiring frequent loading and unloading, the durability and extended lifespan of high-cycle springs prove invaluable.

Even as a homeowner who uses my garage door frequently—for multiple vehicles, hobbies, or workspaces—opting for high-cycle springs is a smart decision. These springs are built to withstand the demands of high-usage scenarios, ensuring consistent performance and reducing the need for premature replacements.

7. Custom Solutions: Tailoring to My Needs

The range of high-cycle garage door springs available comes with various options, allowing me to choose the spring type that best suits my specific garage door and usage patterns. Professionals can help determine the appropriate spring type, size, and strength based on factors such as door weight, size, and frequency of use.

This level of customization ensures that my garage door system is optimized for both performance and durability, resulting in a seamless and efficient experience.

8. A Green Choice: Less Material Waste

Opting for high-cycle garage door springs isn’t just a practical decision—it’s also environmentally responsible. By choosing springs with an extended lifespan, I’m actively contributing to reducing material waste that often results from frequent spring replacements. This aligns with my commitment to sustainable practices and supports a greener approach to home maintenance.

9. Professional Installation: Ensuring Top Performance

While the benefits of upgrading to high-cycle garage door springs are undeniable, it’s important to emphasize the significance of professional installation. Garage door professionals possess the expertise and tools needed to install the springs correctly, ensuring optimal performance and safety.

In summary, as per Lake Forest Garage & Overhead Doors and as a homeowner dedicated to maximizing my garage door’s efficiency and longevity, upgrading to high-cycle garage door springs was a clear choice. The extended lifespan, consistent performance, cost-efficiency, reduced maintenance, and heightened safety that these springs offer make them a valuable investment. Whether for residential or specialized settings, the advantages of upgrading to high-cycle springs are clear. The decision not only results in financial savings but also guarantees that my garage door will continue to function reliably and effectively for years to come.

Lake Forest Garage & Overhead Doors

26111 Birendra #4, Lake Forest, CA 92630, United States

949-356-7568

How To Align Liftmaster Garage Door Sensors – Lake Forest Garage & Overhead Doors

Aligning LiftMaster Garage Door Repair Lake Forest CA sensors is essential to ensure the safe and reliable operation of your garage door system. The sensors prevent the door from closing if an object or obstruction is detected in its path. If the sensors are misaligned, the door might not close properly or could reverse unexpectedly.

Here’s a step-by-step guide on how to align LiftMaster garage door sensors:

1. Safety First: Before working on your garage door system, ensure your safety by disconnecting the power to the garage door opener. This prevents any accidental activation while you’re adjusting the sensors.

2. Identify Sensor Placement: LiftMaster garage door sensors consist of two units – the sending unit (transmitter) and the receiving unit (receiver). The sending unit emits an invisible beam of light that is received by the receiving unit. These units are usually located on either side of the garage door, about 6 inches above the ground.

3. Check Sensor Alignment: Observe the LED lights on both the sending and receiving units. The LED lights indicate the status of the sensors. If the sensors are misaligned, one or both lights might be blinking or not lit at all.

4. Clean the Sensors: Dirt, dust, or debris on the sensors’ lenses can interfere with the beam of light and cause alignment issues. Gently clean the sensor lenses using a soft cloth or a mild cleaner. Ensure the lenses are free of any obstructions that might affect their functionality.

5. Adjust Sensor Position: To align the sensors, follow these steps:

  • Horizontal Alignment: The sending and receiving units should be aligned horizontally. Check that the sensors are at the same height on both sides of the door. Use a level to ensure they are parallel to the ground.
  • Vertical Alignment: The sensors should also be aligned vertically. Use a tape measure to ensure that the distance from the ground to the center of each sensor is the same on both sides.

6. Realign Brackets: LiftMaster sensors are usually mounted on brackets that allow for adjustment. To align the sensors:

  • Loosen the screws securing the brackets to the wall or track.
  • Gently move the sensors up, down, left, or right to align them correctly.
  • Use a level to ensure the sensors are aligned both horizontally and vertically.
  • Once aligned, tighten the screws to secure the sensors in place.

7. Check LED Lights: After realigning the sensors, observe the LED lights again. The LED lights on both the sending and receiving units should now be solid and not blinking.

8. Test Operation: With the sensors aligned, it’s time to test the operation of your garage door. Reconnect the power to the garage door opener and activate the door to close using the remote control or wall-mounted button. If the sensors are aligned correctly, the door should close smoothly without any issues. If the door doesn’t close or reverses unexpectedly, recheck the alignment and repeat the process.

9. Regular Maintenance: Include sensor alignment in your regular garage door maintenance routine. Check the sensors periodically to ensure they remain properly aligned. Dirt, vibrations, or accidental bumps can cause misalignment over time.

10. Seek Professional Help: If you’re unable to align the sensors successfully, or if you’re not comfortable with performing the alignment yourself, consider seeking assistance from a professional garage door technician. They have the experience and tools to ensure proper sensor alignment and safe operation.

In Conclusion: Aligning LiftMaster Garage Door Repair Lake Forest CA sensors is a critical step in maintaining the safety and functionality of your garage door system. By following these steps and regularly checking the alignment, you can ensure that the sensors are working as intended and that your garage door operates smoothly and securely. Remember to prioritize safety and consult a professional if you encounter difficulties during the alignment process.

Lake Forest Garage & Overhead Doors

26111 Birendra #4, Lake Forest, CA 92630, United States

949-356-7568

Garage Door Automation: Advantages and Features Explained – Lake Forest Garage & Overhead Doors

I recently made the decision to automate my garage door, and I must say, it has been a game-changer. The advantages of garage door automation have exceeded my expectations, providing unparalleled convenience, security, and peace of mind.

In this article, I’ll share my experience and explain the key features that make automated garage doors such a valuable addition to any modern home based from Lake Forest Garage & Overhead Doors.

  1. Advantages of Garage Door Automation

1.1 Convenience and Ease of Use

One of the biggest advantages I’ve experienced with garage door automation is the convenience it offers. No more struggling to lift heavy garage doors manually or searching for my keys to gain access. With a simple press of a button on the remote control or through the smartphone app, I can effortlessly open or close the garage door from the comfort of my car or even from inside my home. It has made coming and going so much easier and hassle-free.

1.2 Improved Security

Security was a top priority for me, and the automated garage door system has certainly delivered. The robust locking system and integrated sensors provide an enhanced level of security. I feel confident knowing that the system is equipped with rolling code technology, which generates a new code every time I use the remote, making it nearly impossible for potential intruders to gain unauthorized access.

1.3 Safety Features

As a parent, safety is of utmost importance. The garage door automation system’s safety features have impressed me. The photoelectric sensors detect any obstructions in the door’s path and automatically reverse the door’s movement, ensuring that no one gets caught underneath. This feature is especially crucial when my kids are playing in the garage area.

1.4 Energy Efficiency

I’ve noticed that the automated garage door has also contributed to improved energy efficiency in my home. The system comes with seals and weather-stripping that enhance insulation, helping to maintain a more stable indoor temperature. As a result, I’ve seen a reduction in energy consumption and lower heating or cooling costs.

1.5 Increased Home Value

Another unexpected advantage of garage door automation is the increase in my home’s value. Having an automated system is a sought-after feature among potential buyers, making my property more attractive in the real estate market. It’s a win-win situation as I enjoy the benefits of automation while also adding value to my home.

  1. Key Features of Garage Door Automation

2.1 Remote Control Access

The remote control access is undoubtedly the highlight of the automation system. I keep the compact remote control in my car, allowing me to open or close the garage door without stepping out. It’s incredibly convenient, especially during inclement weather or when I’m in a rush.

2.2 Keypad Entry

The keypad entry option has proven to be very useful as well. I set a unique PIN code, enabling keyless access to the garage. It’s perfect for granting temporary access to family members, friends, or service personnel when I’m not around.

2.3 Smart Home Integration

Since I have a smart home setup, integrating the garage door automation system with my existing network was a breeze. Now, I can control the garage door along with other smart devices using voice commands or a centralized app, adding a new level of sophistication to my home automation.

2.4 Battery Backup

I’m relieved that the automation system includes a battery backup. It ensures that I can still operate the garage door during power outages, preventing any inconvenience or security risks.

2.5 Security Lighting

The built-in security lighting has been an excellent addition to the system. It automatically turns on when the garage door is activated, providing extra visibility and serving as a deterrent to potential intruders.

2.6 Timed Closing

The timed closing feature has proven to be very handy in my busy schedule. I can set a specific duration for the garage door to close automatically after opening, giving me peace of mind if I forget to close it myself.

2.7 Vacation Mode

The vacation mode feature has been reassuring during my travels. It allows me to disable remote access temporarily while I’m away, adding an extra layer of security.

Overall, as stated in Lake Forest Garage & Overhead Doors, automating my garage door has been a transformative experience. The advantages of convenience, improved security, safety features, energy efficiency, and increased home value have made it an investment well worth it. With remote control access, keypad entry, smart home integration, and other advanced features, the automated garage door system has become an essential part of my modern lifestyle. If you’re looking to enhance your home’s security and living experience, I highly recommend considering garage door automation.

Lake Forest Garage & Overhead Doors

26111 Birendra #4, Lake Forest, CA 92630, United States

949-356-7568

How to Open a Garage Door Manually? – Lake Forest Garage & Overhead Doors

When I needed to open my garage door manually, I found it to be a relatively simple process. Let me walk you through the steps based on my own experience.

By following Garage Door Repair Lake Forest CA, first and foremost, safety is crucial. Before attempting to open the garage door manually, I made sure there were no obstructions in its path and that no one or nothing was in the vicinity. Safety should always be the top priority.

Next, I located the emergency release cord or handle. In my case, it was a red cord hanging from the center rail or near the opener unit. The purpose of this emergency release cord is to disconnect the door from the opener system, allowing for manual operation.

I firmly grasped the emergency release cord and pulled it downward with a steady force. As I did this, I heard a clicking or clunking sound, indicating that the door was now disconnected from the opener. It’s important to note that the exact mechanism for the emergency release cord may vary depending on your garage door model, so consult your door’s manual if needed.

Before proceeding, I verified that the garage door was fully closed. If it was partially open, I carefully lowered it until it was completely closed. This ensured a smooth transition when I manually opened the door.

With the emergency release cord pulled and the door disconnected from the opener, I was able to lift the door manually. I positioned myself at the bottom of the door and used both hands to grip the door’s handles or edges securely. With controlled force, I pushed upward to lift the door. I made sure to keep my back straight and used my leg muscles to avoid straining my back. It’s worth noting that garage doors can be heavy, so caution and proper lifting techniques are essential.

Once the door was lifted to the desired height, I secured it in the open position using a locking mechanism. Some doors have built-in locks, while others require additional locking devices. I referred to my garage door’s manual or contacted the manufacturer for guidance on how to properly secure the door in the open position.

When manually operating the door, I was cautious and aware that it might require more effort compared to using the automatic opener. I took my time, avoided sudden movements, and made sure to maintain control throughout the process to prevent accidents or injuries.

When it was time to close the garage door, I carefully pulled down on the handles or edges, guiding the door downward with controlled force. I ensured that the door stayed on the tracks and closed smoothly. I made sure to avoid placing my fingers or hands between the door sections to prevent any potential injuries.

Once the power was restored or the issue with the opener was resolved, I needed to reconnect the garage door to the opener system. To do this, I located the emergency release cord and guided it back into its original position. I either pulled it straight down or towards the motor unit, and I felt or heard a click as the door reconnected with the opener.

To confirm that everything was functioning correctly, I tested the automatic operation of the garage door by using the remote control or wall-mounted button. I made sure the door opened and closed smoothly without any issues. If any problems arose, I referred to the garage door’s manual or contacted a professional for assistance.

Overall, by following steps from Garage Door Repair Lake Forest CA, that’s how I opened my garage door manually. Please keep in mind that the specific steps may vary depending on your garage door model and setup. It’s always a good idea to consult the manufacturer’s instructions or seek professional guidance if you encounter any difficulties.

Lake Forest Garage & Overhead Doors

26111 Birendra #4, Lake Forest, CA 92630, United States

949-356-7568

How to Remove a Garage Door Without a Help of Professional – Lake Forest Garage & Overhead Doors

If you’re looking to remove your garage door without the help of a professional, it’s important to take your time and proceed with caution. I have successfully removed a garage door on my own using the steps outlined above, but it’s important to note that this can be a challenging and dangerous task.

According to Garage Door Repair Lake Forest CA, one of the most important things to keep in mind when removing a garage door is safety. Garage doors are heavy and can cause serious injury if they fall or become unbalanced. It’s important to wear protective gear, including gloves and safety glasses, to protect yourself from harm.

Another helpful tip is to enlist the help of a friend or family member. Removing a garage door can be a time-consuming and challenging process, and having an extra set of hands can make the process easier and safer.

When removing a garage door, it’s also important to have the right tools on hand. In addition to basic tools like a hammer, pliers, and screwdriver, you may also need a pry bar, drill, and saw, depending on the type of garage door you have.

One of the most challenging steps in removing a garage door is disconnecting the springs. This is a dangerous step that requires caution and expertise. If you’re not comfortable with this step, it’s always best to hire a professional to handle it for you.

Overall, as per Garage Door Repair Lake Forest CA, removing a garage door without the help of a professional is possible, but it requires patience, caution, and a willingness to take the time to do the job right. By following the steps outlined above and taking the necessary safety precautions, you can successfully remove your garage door and complete your home renovation project.

Lake Forest Garage & Overhead Doors

26111 Birendra #4, Lake Forest, CA 92630, United States

949-776-4731

Powered by WordPress & Theme by Anders Norén