Local Businesses Blog in Texas

Tag: Garage Door Repair Hesperia CA

What Are The Best Garage Door Openers – Hesperia Overhead & Garage Doors

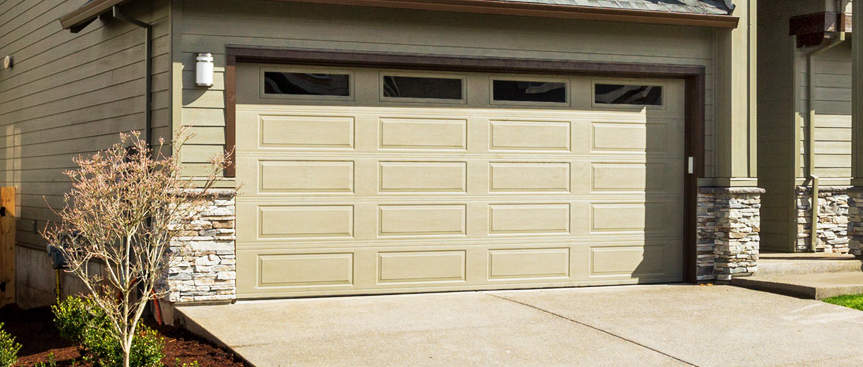
When it comes to selecting the best Garage Door Repair for your needs, various factors come into play.

From the type of drive system to horsepower, safety features, and smart technology integration, the market offers a plethora of options. In this comprehensive guide, we will explore some of the top garage door openers, considering their performance, reliability, and additional features.

1. Chamberlain B970 Garage Door Opener: The Chamberlain B970 is praised for its ultra-quiet operation, making it an ideal choice for homes with bedrooms above the garage. With a 1.25 HP motor, it provides sufficient power for heavy garage doors. The built-in battery backup ensures functionality even during power outages, adding an extra layer of convenience.

2. LiftMaster 8500 Elite Series Wall-Mount Garage Door Opener: For those seeking space-saving solutions, the LiftMaster 8500 is a wall-mounted opener that frees up ceiling space. Known for its smooth and quiet operation, it’s equipped with security features like a deadbolt lock for enhanced protection. The MyQ technology allows for remote monitoring and control via a smartphone app.

3. Genie Chain Drive 750 Garage Door Opener: Genie’s Chain Drive 750 is a cost-effective option without compromising on performance. The 3/4 HP motor provides ample power for most residential garage doors. It comes with Intellicode technology, enhancing security by changing the access code after each use. The durable chain drive system ensures reliability over the long term.

4. Craftsman 1.25 HP Smart Garage Door Opener: Craftsman combines power with smart technology in its 1.25 HP Smart Garage Door Opener. With built-in Wi-Fi, it allows for remote monitoring and control through the Craftsman AssureLink app. The steel-reinforced belt drive ensures smooth and quiet operation, while the battery backup provides continued functionality during power outages.

5. Ryobi Ultra-Quiet Garage Door Opener: Ryobi’s Ultra-Quiet Garage Door Opener lives up to its name with a whisper-quiet operation. The modular design allows for easy customization with various accessories, such as a Bluetooth speaker, fan, and extension cord reel. The 2 HP motor provides ample power for larger and heavier garage doors.

6. Sommer Direct Drive Garage Door Opener: Sommer’s Direct Drive opener stands out for its simplicity and reliability. With only one moving part, the motor glides along the stationary chain, minimizing wear and tear. The absence of a traditional chain or belt drive contributes to its quiet operation. Additionally, it comes with a lifetime warranty for added peace of mind.

7. Guardian 3/4 HP Garage Door Opener: Guardian’s 3/4 HP opener strikes a balance between power and affordability. It features a steel-reinforced belt drive for smooth and reliable operation. The SmartLink connectivity option allows for remote control and monitoring through a smartphone app. Safety sensors and rolling code technology enhance security.

In conclusion, choosing the best Garage Door Repair depends on your specific needs and preferences. Consider factors such as the type of drive system, horsepower, noise level, and smart technology features. Each of the mentioned openers has its unique strengths, catering to different requirements. Before making a decision, it’s advisable to assess your garage door’s size and weight, as well as your desire for additional features like smart connectivity and battery backup.

Hesperia Overhead & Garage Doors

18361 Bear Valley Rd # 4, Hesperia, CA 92345, United States

1-760-9901054

How To Connect Liftmaster Garage Door Opener – Hesperia Overhead & Garage Doors

Connecting a LiftMaster Garage Door Repair Hesperia CA opener involves several steps to ensure the opener is properly installed and linked to your garage door system. LiftMaster is a well-known brand that offers a range of garage door openers with advanced features and compatibility.

Here’s a step-by-step guide on how to connect a LiftMaster garage door opener:

1. Read the Manual:

  • Before starting, thoroughly read the user manual provided with your LiftMaster garage door opener. The manual contains essential information about installation, programming, and safety precautions.

2. Gather Necessary Tools and Materials:

  • Basic toolkit: Screwdrivers, pliers, hammer, and other basic tools.
  • Power drill and drill bits.
  • Ladder: To access high areas and install components.
  • Level: To ensure proper alignment.
  • Ceiling support: If required, for installing the opener securely.

3. Assemble the Opener:

  • Follow the instructions in the manual to assemble the garage door opener according to the manufacturer’s guidelines. This may involve attaching brackets, rails, and other components.

4. Install the Opener:

  • Mount the opener unit on the ceiling or wall according to the manufacturer’s recommendations. Use a power drill and appropriate hardware to secure it in place. Ensure it’s positioned properly to avoid interference with the garage door operation.

5. Attach the Rail and Trolley:

  • Connect the rail to the opener unit and attach the trolley to the rail. The trolley holds the garage door and is driven by the opener motor to open and close the door.

6. Install the Safety Sensors:

  • LiftMaster garage door openers are equipped with safety sensors that prevent the door from closing if an obstruction is detected. Install the sensors on each side of the garage door, about 6 inches above the ground. Ensure they are properly aligned and securely mounted.

7. Connect Wiring and Power:

  • Follow the manufacturer’s instructions to connect the wiring for the opener, safety sensors, wall control panel, and any other accessories. Plug in the opener to a grounded electrical outlet.

8. Program the Remote Controls:

  • LiftMaster garage door openers come with remote controls for wireless operation. Follow the manual to program the remote controls according to the provided instructions. This may involve setting codes or pairing the remote with the opener.

9. Program the Keypad (if applicable):

  • If your LiftMaster opener includes a wireless keypad, program it following the manufacturer’s guidelines. Typically, this involves setting a PIN code for secure access.

10. Program the Wall Control Panel:

  • The wall control panel is usually located near the garage door entrance. Follow the manual to program the control panel, including setting the time, adjusting the lighting, and configuring other settings.

11. Test the Opener:

  • Test the garage door opener by operating it with the remote controls, keypad, and wall control panel. Open and close the door several times to ensure smooth and proper operation.

12. Adjust Settings:

  • LiftMaster garage door openers often have adjustable settings, such as force limits and travel limits. Follow the manual to adjust these settings for optimal performance and safety.

13. Safety Precautions:

  • After installation, check the safety features of the opener, including the auto-reverse function and the safety sensors, to ensure they’re working correctly.

14. Regular Maintenance:

  • To keep your LiftMaster garage door opener functioning optimally, perform regular maintenance such as lubricating moving parts, checking safety features, and replacing batteries in remote controls and sensors.

15. Professional Help:

  • If you encounter difficulties during installation or programming, or if you’re unsure about any step, consider seeking the assistance of a professional garage door technician. They have experience with various garage door opener models and can ensure proper installation and setup.

In conclusion, connecting a LiftMaster Garage Door Repair Hesperia CA opener involves assembling and installing the opener unit, attaching rails and trolleys, installing safety sensors, connecting wiring, programming remote controls and other accessories, and performing tests to ensure proper operation. Following the manufacturer’s instructions and guidelines is crucial for a successful installation. Properly installed and programmed, a LiftMaster garage door opener can enhance the convenience and security of your home’s garage.

Hesperia Overhead & Garage Doors

18361 Bear Valley Rd # 4, Hesperia, CA 92345, United States

1-760-990-1054

How To Restain Wood Garage Door – Hesperia Garage Door Co.

Restaining a wood Garage Door Repair Hesperia CA is a great way to renew its appearance and protect it from the elements. Proper preparation, staining techniques, and finishing are crucial for achieving a beautiful and long-lasting result.

Here’s a comprehensive guide on how to restain a wood garage door:

1. Gather the Necessary Supplies:

Before you begin, make sure you have all the tools and materials you’ll need for the project:

  • Safety Gear: Safety glasses, gloves, and a mask to protect yourself from chemicals and fumes.
  • Clean Cloths: Soft and clean cloths or rags for wiping and cleaning.
  • Painting Tools: High-quality brushes, rollers, and paint trays for applying stain.
  • Painter’s Tape and Plastic Sheets: For masking off areas you don’t want to stain, such as windows or hardware.
  • Sandpaper: Various grits of sandpaper (120-220 grit) for sanding the wood.
  • Wood Stain: Choose a high-quality wood stain that is suitable for exterior use. Select a color that complements the existing style of your home.
  • Wood Sealer or Finish: A clear wood sealer or finish to protect the stained surface and enhance its longevity.
  • Stirrer: To thoroughly mix the stain before application.
  • Drop Cloths: To protect the surrounding area from stain splatters.

2. Choose the Right Time:

  • Plan to restain your wood garage door during mild weather conditions with low humidity. Avoid staining on extremely hot, cold, or rainy days.

3. Prepare the Wood Surface:

  • Remove any hardware, such as handles or locks, from the garage door. This will make the staining process easier and ensure a more professional finish.
  • Inspect the wood surface for any cracks, peeling, or damage. If needed, repair these areas before proceeding.
  • Use a wood cleaner or mild detergent mixed with water to clean the wood surface and remove dirt, grime, and old finishes. Rinse thoroughly and allow the door to dry completely before proceeding.

4. Sand the Surface:

  • Use sandpaper to lightly sand the entire surface of the garage door. Sanding helps remove rough spots, old finish, and opens up the wood’s pores for better stain absorption.

5. Mask Off Areas:

  • Use painter’s tape and plastic sheets to cover areas you don’t want to stain, such as windows, hardware, and adjacent surfaces.

6. Apply the Stain:

  • Stir the wood stain thoroughly using a stirrer to ensure consistent color and texture.
  • Start staining from the top of the garage door and work your way down. Use a high-quality brush to apply the stain to the edges and corners.
  • Use a roller and paint tray to apply the stain to the larger, flat sections of the door. Apply the stain evenly in long, smooth strokes. Avoid overloading the roller to prevent drips.

7. Allow to Penetrate and Wipe Excess:

  • Allow the stain to penetrate the wood for the recommended amount of time specified by the manufacturer. This typically ranges from a few minutes to around 15 minutes, depending on the type of stain and desired color intensity.
  • After the staining time, use a clean cloth to gently wipe off any excess stain. Wipe in the direction of the wood grain to achieve an even finish.

8. Apply Additional Coats (if needed):

  • Depending on the desired color and coverage, you may need to apply multiple coats of stain. Follow the same application process and allow each coat to dry before proceeding.

9. Apply Wood Sealer or Finish:

  • Once the stain is dry, apply a clear wood sealer or finish to protect the stained surface and enhance its longevity. Follow the manufacturer’s instructions for application and drying time.

10. Remove Masking Tape:

  • Carefully remove the painter’s tape and plastic sheets while the sealer or finish is still slightly wet. This prevents the tape from pulling off the finish with it.

11. Allow Final Drying:

  • After applying the sealer or finish, allow the door to dry for the recommended period specified by the manufacturer. This usually ranges from 24 to 48 hours.

12. Reattach Hardware:

  • Once the door is fully dry, reattach the hardware to the garage door.

13. Regular Maintenance:

  • To maintain the freshly stained appearance of your garage door, periodically clean it with mild soap and water to remove dirt and debris. You may also need to reapply a sealer or finish every few years to protect the wood and maintain its appearance.

14. Seek Professional Help:

  • If you’re unsure about any step of the process or if you encounter difficulties, consider seeking the help of a professional painter or wood restoration expert. They have the expertise to ensure a high-quality finish and provide expert advice.

In conclusion, restaining a wood Garage Door Repair Hesperia CA involves careful preparation, proper staining techniques, and applying a protective finish. By following these steps, you can achieve a refreshed and vibrant look for your garage door while protecting it from the elements. Remember to prioritize safety, choose the appropriate stain and finish, and allow adequate drying time between coats for the best results.

Hesperia Garage Door Co.

12052 Hesperia Rd #2, Hesperia, CA 92345, United States

1-760-664-3128

Unlocking the Secrets of Garage Door Professionals: Tips and Tricks Revealed – Hesperia Overhead & Garage Doors

As a homeowner who has sought the services of garage door professionals, I can attest to the valuable tips and tricks they have revealed to keep my garage door in top shape. Initially, I didn’t fully appreciate the extent of their expertise, but as I observed their work and interacted with them, I quickly realized their unique set of skills and knowledge.

According to Hesperia Overhead & Garage Doors, the first secret I discovered was their mastery of inspection techniques. When I called in garage door professionals for a routine maintenance check, I was amazed at how meticulously they examined every component of my garage door. They pointed out potential issues that I had never noticed before, such as worn-out springs and misaligned tracks. Their keen eyes and trained expertise allowed them to catch problems early on, preventing more significant and costly repairs in the future.

I also learned the importance of properly balancing and tensioning the springs. Garage door professionals skillfully adjusted the tension of the springs to ensure the door opened and closed smoothly. The improvement in door performance was immediately noticeable, and they explained that balanced springs not only extend their lifespan but also alleviate stress on other components, leading to enhanced safety and efficiency.

Another secret revealed by garage door professionals was their expertise in track alignment. They made precise adjustments to ensure the door moved effortlessly along the tracks. I had previously experienced some issues with the door getting stuck, but their expert alignment resolved the problem completely. I now understand how critical proper track alignment is for the smooth and quiet operation of the garage door.

Understanding different garage door opener systems was yet another valuable tip they shared. They explained the differences between chain-drive, belt-drive, and screw-drive openers and helped me troubleshoot issues with my existing opener. Their knowledge of programming remote controls and keyless entry systems also ensured that I had a seamless and secure garage door operation.

Weatherproofing and insulation techniques were additional secrets that garage door professionals offered. They installed weather seals around the door’s perimeter, which greatly reduced drafts and kept out pests and moisture. Moreover, they recommended suitable insulation materials to enhance energy efficiency and create a more comfortable environment inside the garage.

I was impressed by their safety sensor calibration skills as well. They ensured that the sensors were calibrated correctly to detect any obstructions in the door’s path and prevent accidents. Knowing that these safety features were functioning accurately brought peace of mind, especially since I have young children in the household.

The professionals also shared effective lubrication techniques with me. They used high-quality lubricants to coat moving parts like springs, rollers, and hinges, reducing friction and keeping the door operation quiet and efficient. I now understand that regular lubrication is vital for extending the life of these components and maintaining optimal door performance.

Beyond technical expertise, garage door professionals offered insights on customization and aesthetics. They guided me in choosing the best design, material, and color options to enhance the curb appeal of my home. Their suggestions helped me select a garage door that perfectly complemented the overall aesthetic of my property.

In addition to their problem-solving skills, I discovered that garage door professionals are equipped to handle emergencies with quick response times. When my garage door spring broke unexpectedly, they promptly arrived to provide emergency services. Their swift action allowed me to regain access to my garage quickly and address the issue before it worsened.

Overall, based from Hesperia Overhead & Garage Doors, my experience with garage door professionals has been enlightening and rewarding. Their tips and tricks have not only kept my garage door in excellent condition but also provided me with valuable knowledge on maintaining its performance and security. I have come to appreciate their expertise and the peace of mind that comes with knowing my garage door is in the hands of skilled professionals.

Hesperia Overhead & Garage Doors

18361 Bear Valley Rd # 4, Hesperia, CA 92345, United States

760-990-1054

How to Apply Garage Door Lubricant? – Hesperia Overhead & Garage Doors

Maintaining my garage door is essential to ensure its smooth and quiet operation.

I’ll guide you through the process of applying garage door lubricant step by step according to Garage Door Repair Hesperia CA.

First, I gather all the necessary materials for the task. I make sure to have garage door lubricant, a clean cloth or rag, and possibly a ladder or step stool if needed.

To begin, I ensure that the garage door is closed and disconnected from the power source to ensure my safety during the lubrication process.

Next, I take a moment to clean the garage door and its components. I use a clean cloth or rag to wipe away any dirt, debris, or old lubricant. This step ensures that the lubricant can adhere properly to the surfaces without any interference.

Now, I’m ready to apply lubricant to the hinges. These metal components connect the different sections of the garage door. I take a small amount of lubricant and apply it to each hinge, paying close attention to the pivot points and moving parts. To distribute the lubricant evenly, I manually move the door up and down a few times.

Moving on to the rollers, I recognize their crucial role in the smooth operation of the garage door. Using a spray lubricant or a cloth, I apply a small amount of lubricant to the roller bearings and the shafts they rotate on. Again, I move the door up and down several times to ensure the lubricant spreads evenly across the rollers.

If my garage door operates using torsion springs, I proceed with caution as I work with these springs, as they are under tension and can cause injury if mishandled. I take a moment to apply a light coating of lubricant to the springs, focusing on the coils and the areas where they attach to the door and brackets.

The tracks, which guide the garage door, require lubrication as well. I apply a thin layer of lubricant to the inside of the tracks, specifically focusing on the areas where the rollers make contact. It’s important not to apply too much lubricant, as it can attract dirt and debris. To ensure a clean finish, I wipe away any excess lubricant with a clean cloth.

In the case that my garage door has a lock mechanism, I take the opportunity to lubricate its moving parts. I apply a small amount of lubricant to the latch, bolts, and other components that engage and disengage the lock. To evenly distribute the lubricant, I operate the lock a few times.

Next, I inspect other moving parts of the garage door system, such as pulleys, cables, and the drive chain or belt if applicable. I apply lubricant to these components as necessary, focusing on areas where they make contact or move against each other. I refer to my garage door manufacturer’s guidelines for specific lubrication recommendations to ensure I’m applying the appropriate lubricant.

With the lubrication process complete, it’s time to test the door’s operation. I reconnect the power to the garage door opener if necessary and carefully open and close the door multiple times. I pay close attention to any remaining sticking or noise. If I notice any issues, I apply additional lubricant as needed and repeat the testing process.

I make a note on my calendar to perform this lubrication process every six months or as needed, depending on the usage and condition of my garage door. Regularly applying lubricant to my garage door will help maintain its performance and extend its lifespan.

By following steps from Garage Door Repair Hesperia CA and taking the time to properly lubricate my garage door, I ensure it operates smoothly and quietly, providing convenience and peace of mind for years to come.

Hesperia Overhead & Garage Doors

18361 Bear Valley Rd # 4, Hesperia, CA 92345, United States

760-990-1054

How to Connect Garage Door Opener to car without remote-Hesperia Overhead & Garage Doors

Connecting a Garage Door Repair Hesperia CA opener to a car without a remote can be accomplished through various methods.

In this guide, we will explore a few options to help you achieve this task. Please note that the specific steps may vary depending on the make and model of your garage door opener and car.

  1. Determine Compatibility: Before attempting to connect your garage door opener to your car, ensure that your garage door opener has the necessary compatibility features. Most modern garage door openers are equipped with built-in compatibility for connecting to vehicles. You may need to consult your garage door opener’s manual or contact the manufacturer for compatibility information.
  2. Homelink Compatibility: One common method for connecting a garage door opener to a car without a remote is by utilizing the Homelink system. Homelink is a universal wireless control system integrated into many vehicles. To determine if your car has Homelink capability, look for buttons with a house icon usually located on the overhead console or sun visor.
  3. Programming Homelink: To program your car’s Homelink system, follow these general steps: a. Clear any existing codes: Press and hold the two outside Homelink buttons until the indicator light starts flashing rapidly. This action will clear any previously programmed codes. b. Garage door opener button: Hold the button you wish to program while also holding your garage door opener’s remote close to the Homelink buttons. Press both the remote button and the Homelink button simultaneously until the indicator light starts flashing rapidly. c. Test the connection: Press the programmed Homelink button to verify if the garage door opens or closes. If it doesn’t, repeat the previous step. d. Finalize programming: Once the connection is established, hold the Homelink button until the indicator light stops flashing and remains solid. This action saves the programming.
  4. Rolling Code Openers: If you have a garage door opener that uses a rolling code system, additional steps are necessary. Rolling code systems change the code every time the remote is used, providing enhanced security. To program a rolling code opener: a. Locate the “Learn” or “Smart” button on your garage door opener motor unit. b. Press and release the “Learn” button, usually within 30 seconds, to activate the programming mode. c. Within 30 seconds, press and hold the Homelink button you programmed earlier until the garage door starts moving. You may need to hold the button for a longer duration, as the rolling code opener needs to learn the signal. d. Test the connection by pressing the programmed Homelink button once again. If the door operates correctly, programming is successful.
  5. Alternative Methods: If your car does not have a Homelink system, there are alternative methods to connect your garage door opener: a. Universal Remote Control: Purchase a universal garage door remote control and follow the instructions provided to program it to your garage door opener. b. Smart Home Integration: If you have a smart home system or a compatible garage door opener with smart features, you can connect it to your car through the corresponding app or integration, such as Google Assistant or Amazon Alexa.
  6. Consultation and Professional Help: If you encounter difficulties during the programming process or your garage door opener does not support the methods mentioned, it’s advisable to consult the instruction manual of your garage door opener or contact the manufacturer for further assistance. They can provide specific instructions tailored to your model.

Remember to exercise caution and prioritize safety when working with Garage Door Repair Hesperia CA openers. Follow the provided instructions carefully, and if needed, seek professional help to ensure a successful and secure connection between your garage door opener and car.

Hesperia Overhead & Garage Doors

18361 Bear Valley Rd # 4, Hesperia, CA 92345, United States

1-760-9901054

Powered by WordPress & Theme by Anders Norén