Local Businesses Blog in Texas

Tag: garage door repair anderson in

How Much To Replace Garage Doors – Anderson Gates & Garage Doors

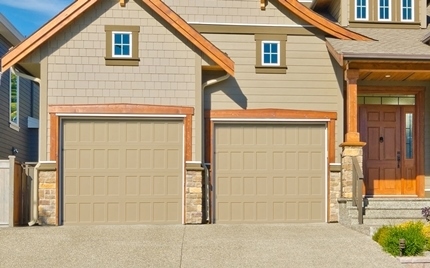
Garage Door Repair Anderson IN aren’t just about parking your car; they’re an integral part of your home’s aesthetics and security.

As these doors age, issues like creaking sounds and malfunctioning mechanisms become more apparent, signaling the need for a replacement.

Signs Your Garage Door Needs Replacement
Before diving into costs, it’s crucial to recognize when your garage door is telling you it’s time for a change. From strange noises to visible wear, understanding these signs ensures timely action.

Factors Affecting Cost
A. Type of Garage Door
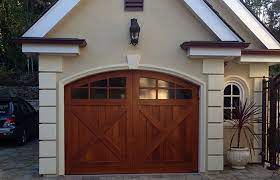
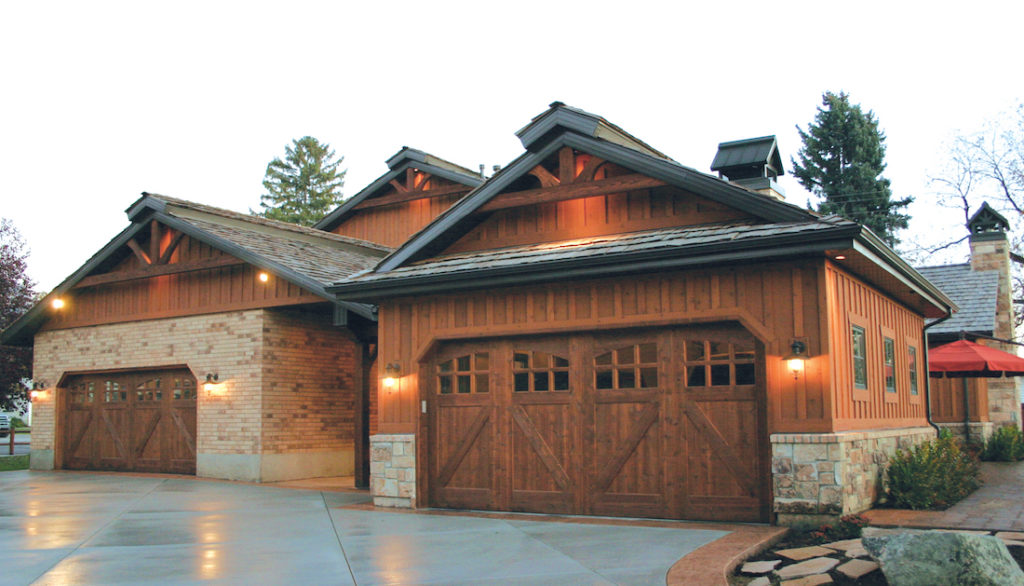
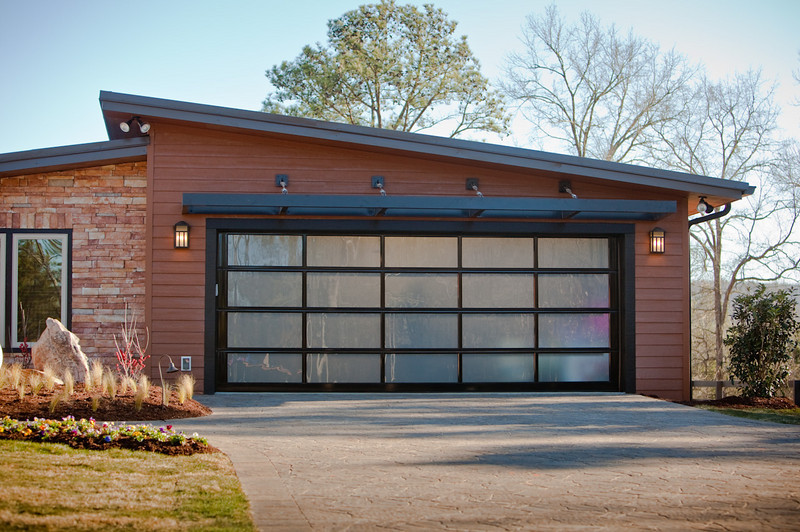
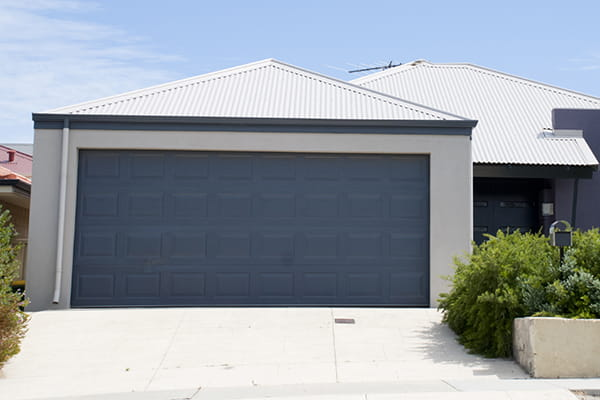
Garage doors come in various types, from traditional roll-up to modern sectional styles. Each type comes with its own set of costs, impacting your overall budget.

Material Selection
The material you choose significantly influences the replacement cost. Wood, steel, aluminum—the options are vast, and so are the price variations.

C. Size and Style Considerations
The dimensions of your garage door and the chosen style play a role in determining the final cost. Custom sizes or intricate designs may increase expenses.

Average Cost Breakdown
A. National Average
Understanding the national average cost gives you a baseline. This figure helps you gauge if local quotes are reasonable or if adjustments are necessary.

B. Regional Price Variations
Garage door replacement costs vary by region due to factors like demand, labor costs, and local regulations. Researching regional averages provides a more accurate estimate.

C. Additional Costs
Don’t forget the extras—windows, insulation, and smart features all contribute to the final bill.

DIY vs. Professional Installation
A. Pros and Cons of DIY
While tempting to save on labor costs, the DIY route has its drawbacks, including safety concerns and potential errors.

B. Benefits of Professional Installation
Professional installers bring expertise and ensure a seamless process, minimizing the risk of future issues.

C. Safety Concerns
Garage door replacement involves heavy materials and intricate mechanisms. Prioritize safety, and know when to call in the professionals.

Choosing the Right Replacement
A. Matching Aesthetics
Your new garage door should complement your home’s architecture. Explore styles and colors that enhance your curb appeal.

B. Energy Efficiency
Investing in an energy-efficient door not only lowers utility bills but also contributes to a greener environment.

C. Security Features
Modern garage doors offer advanced security features. Consider options that enhance your home’s safety.

Steps in Garage Door Replacement
A. Inspection and Measurement
Before diving into replacement, a thorough inspection and precise measurements are crucial for a seamless transition.

B. Removal of Old Door
Proper removal involves disassembly and disposal, ensuring a clean slate for the new installation.

C. Installation of New Door
Skilled technicians handle the installation, ensuring proper alignment, balance, and functionality.

D. Testing and Adjustments
Post-installation, rigorous testing and adjustments guarantee optimal performance and longevity.

Hiring a Professional Contractor
A. Researching Local Options
Explore local contractors, focusing on their experience, reputation, and customer reviews.

B. Reading Reviews and Ratings
Feedback from previous clients offers valuable insights into the contractor’s reliability and service quality.

C. Getting Multiple Quotes
Collecting quotes from multiple contractors ensures you make an informed decision based on competitive pricing.

Financing Options
A. Exploring Payment Plans
Many contractors offer financing options, making the investment more manageable for homeowners.

B. Considering Insurance Coverage
Check if your homeowner’s insurance covers any part of the replacement costs, potentially reducing your financial burden.

Maintenance Tips for Longevity
A. Regular Inspection
Frequent checks on hinges, springs, and tracks prevent minor issues from escalating.

B. Lubrication of Moving Parts
Keep your garage door running smoothly by lubricating moving parts regularly.

C. Professional Tune-ups
Schedule professional tune-ups to address potential issues and extend the lifespan of your garage door.

Conclusion:
In conclusion, the cost of replacing your Garage Door Repair Anderson IN is a worthy investment in your home’s safety and appearance. By understanding the factors influencing costs and following proper installation and maintenance practices, you ensure a durable and visually appealing addition to your property.

Anderson Gates & Garage Doors

2007 McKinley St, Anderson, IN 46016, United States

1-463-217-0904

How Do You Change Your Garage Door Opener Code – Anderson Gates & Garage Doors

Security is a top priority for homeowners, and when it comes to your Garage Door Repair Anderson IN  is a crucial aspect.

In this guide, we’ll walk you through the why, when, and how of changing your garage door opener code, ensuring your home remains a secure fortress.

Understanding Garage Door Opener Codes

Your garage door opener code acts as the first line of defense against potential intruders. It’s a digital key that grants access to your home, making it essential to understand its significance. This code prevents unauthorized entry, safeguarding your property and loved ones.

Reasons to Change Your Garage Door Opener Code

Changing your garage door opener code isn’t just a precaution; it’s a proactive measure to enhance your home security. Whether you’ve experienced a security breach or simply want to stay one step ahead, regular code changes provide peace of mind.

How Often Should You Change the Code?

The frequency of changing your garage door opener code depends on various factors. Generally, it’s recommended to do so periodically to prevent any potential breaches. Factors like neighborhood safety, recent break-ins, or the presence of smart security features influence the ideal frequency.

Step-by-Step Guide to Changing the Garage Door Opener Code

Changing your garage door opener code may sound complex, but with our step-by-step guide, it becomes a straightforward process. Access your control panel, select a new code, and ensure it works by testing the new entry.

Troubleshooting Common Issues

Encountering issues after changing the code is not uncommon. We’ll cover troubleshooting steps to address any problems, ensuring your garage door operates seamlessly with the updated code.

Choosing a Secure Code

Selecting a secure code is more than just combining random digits. We provide tips on creating a code that’s both strong and memorable, minimizing the risk of unauthorized access.

Benefits of Regularly Changing the Code

Discover the tangible benefits of proactive code changes. From maintaining a secure home to enjoying peace of mind, the advantages extend beyond mere security measures.

Technology Advances in Garage Door Opener Security

Explore the latest in garage door opener security, including smart features that integrate with home security systems. Stay abreast of technological advancements to ensure your home remains at the forefront of safety.

Common Mistakes to Avoid

Learn from common mistakes others make, such as overlooking the importance of code changes or sharing codes irresponsibly. Avoiding these pitfalls contributes significantly to a secure home.

Professional Assistance for Code Changes

Weigh the options between DIY code changes and seeking professional assistance. Understanding when it’s appropriate to call in the experts ensures a smooth and secure process.

Educating Family Members on Code Security

Your home’s security is a collective effort. Educate your family members on the importance of code confidentiality and teach them how to change the code when necessary.

Reviewing Manufacturer Guidelines

Manufacturers provide specific guidelines for changing garage door opener codes. We delve into the importance of consulting your manual and adhering to manufacturer recommendations.

Community Safety Measures

Extend the safety net beyond your property. Encourage your neighbors to change their codes and share information on recent security threats, fostering a community committed to safety.

Conclusion:

In conclusion, changing your Garage Door Repair Anderson IN isn’t just a task—it’s a responsibility. By staying proactive, you contribute to the overall safety of your home and community. Regular code changes, coupled with awareness and technological advancements, ensure your garage door remains a steadfast guardian.

Anderson Gates & Garage Doors

2007 McKinley St, Anderson, IN 46016, United States

1-463-217-0904

How To Reset Chamberlain Garage Door Opener – Anderson Gates & Garage Doors

Resetting your Chamberlain Garage Door Repair Anderson IN  is usually a straightforward process. Here’s a step-by-step guide to help you:

1. Identify Your Model:

  • Locate the model number of your Chamberlain garage door opener. This information is often found on the motor unit or in the user manual.

2. Power Cycle:

  • Disconnect the power to the garage door opener by unplugging it from the electrical outlet or turning off the circuit breaker that supplies power to the opener. Wait for about 10 seconds.

3. Reconnect Power:

  • Plug the garage door opener back in or turn the circuit breaker back on.

4. Locate the Learn Button:

  • Find the “Learn” button on the garage door opener. This button is usually located on the motor unit.

5. Press the Learn Button:

  • Press and hold the “Learn” button for approximately 6 seconds until the indicator light beside it turns on. Release the button.

6. Program the Remote Control:

  • Within 30 seconds of pressing the “Learn” button, press and hold the button on the remote control that you want to program. Release the button when the garage door opener lights blink or you hear a click.

7. Test the Remote Control:

  • Press the programmed remote control button to test if it opens and closes the garage door.

8. Repeat for Additional Remotes:

  • If you have multiple remotes, repeat the process for each one.

9. Erase Existing Codes (Optional):

  • To erase all existing remote codes and start fresh, press and hold the “Learn” button until the indicator light goes out. Then, reprogram your remotes as described above.

10. Keypad Programming (If Applicable):

  • If you have a wireless keypad, follow the manufacturer’s instructions to program it. This typically involves entering a PIN and pressing the “Learn” button on the opener.

11. Adjust Travel Limits (If Needed):

  • Test the garage door’s travel limits by opening and closing it. If adjustments are necessary, consult your user manual for instructions on adjusting the travel limits.

12. Final Testing:

  • Test all programmed devices to ensure they operate the garage door smoothly.

Note: If these steps do not work for your specific model, refer to your Chamberlain garage door opener manual or visit the official Chamberlain website for model-specific instructions.

Remember to prioritize safety while working with your  Garage Door Repair Anderson IN and if you encounter any difficulties, consult a professional for assistance.

Anderson Gates & Garage Doors

2007 McKinley St, Anderson, IN 46016, United States

1-463-217-0904

How Do I Program My Garage Door Remote – Anderson Gates & Garage Doors

Programming your garage door repair remote is a crucial step in ensuring the security and convenience of your home. This guide will walk you through the process, step by step, in plain English, to help you successfully program your garage door remote. Before we dive in, please note that garage door opener systems can vary, so consult your user manual for specific instructions related to your model.

However, the general principles covered in this guide should be applicable to most garage door repair remotes.

Table of Contents:

  1. Safety Precautions
  2. Gather Necessary Information and Tools
  3. Clear Previous Codes
  4. Access the Programming Button
  5. Initiate Programming Mode
  6. Program the Remote
  7. Test the Remote
  8. Additional Tips and Troubleshooting
  9. Conclusion
  10. Safety Precautions : Before you begin, it’s essential to prioritize safety. Ensure that your garage area is well-lit and free of obstacles. Keep children and pets away during the programming process. If you encounter any difficulties or uncertainties, consult a professional garage door technician for assistance.
  11. Gather Necessary Information and Tools : Start by gathering the following items:
  • Your garage door remote control.
  • The user manual for your garage door opener.
  • A ladder (if needed to access the opener).
  • A screwdriver or a similar tool (if required).
  1. Clear Previous Codes : It’s crucial to clear any previous remote codes from your garage door opener to prevent interference. Consult your user manual for specific instructions on how to do this. Generally, you will need to locate the “Learn” or “Reset” button on the opener unit and press it for a set period, usually about 10 seconds, until you see a light or hear a beep.
  2. Access the Programming Button : Find the “Programming” or “Set Up” button on your garage door opener. This button is typically located near the opener’s motor unit and may be labeled differently depending on your model. Consult your user manual if you are unsure about its location.
  3. Initiate Programming Mode : To program your remote, you will need to put your garage door opener into programming mode. This is usually done by pressing and holding the “Programming” button until you see a light or hear a specific sound, such as a beep or a click. Once the opener is in programming mode, it is ready to receive the new remote code.
  4. Program the Remote : With the opener in programming mode, it’s time to program your remote:
  • Press and hold the button on your remote that you want to use to open and close the garage door. While holding the remote button, point it towards the opener unit.
  • Simultaneously, press the “Programming” button on the opener unit. Release both buttons once you do this.

The garage door opener should respond by flashing its indicator light or making a specific sound to confirm that it has accepted the remote’s code. This process might differ slightly depending on your garage door opener model, so refer to your user manual for specific instructions.

  1. Test the Remote : After programming, test your remote to ensure it works correctly. Stand at a reasonable distance from your garage door and press the button you programmed. The door should respond by opening or closing. If it doesn’t, repeat the programming steps carefully.
  2. Additional Tips and Troubleshooting :
  • If you have multiple remotes, repeat the programming process for each one.
  • If you encounter any issues, such as the remote not working or the garage door not responding correctly, consult your user manual for troubleshooting tips.
  • If the remote still doesn’t work, it may be a battery issue. Replace the battery and try programming the remote again.
  • Ensure that the garage door opener’s antenna is undamaged and properly aligned for better reception.
  • Keep your remote in a safe place, away from extreme temperatures or moisture, to prolong its lifespan.

Conclusion:

Programming your garage door remote is a straightforward process that enhances the security and convenience of your home. By following this comprehensive guide, you can program your remote with ease. Remember to prioritize safety during the process and consult your user manual for model-specific instructions. If you encounter persistent issues or uncertainties, it’s always a good idea to seek professional assistance from a garage door technician. With a successfully programmed remote, you’ll enjoy the convenience of easily accessing your garage and enhancing your home’s security.

Anderson Gates & Garage Doors

2007 McKinley St, Anderson, IN 46016, United States

1-463-217-0904

How To Disengage Garage Door – Anderson Gates & Garage Doors

Disengaging a Garage Door Repair Anderson IN is a crucial step in manual operation, especially during power outages or when the opener malfunctions. Knowing how to disengage and reengage your garage door ensures that you can still open and close it when the automatic opener is not functioning.

Here’s a comprehensive guide on how to disengage and reengage a garage door:

Step 1: Safety Precautions

  1. Disconnect Power: Before working on your garage door, disconnect power to the automatic opener to prevent accidental activation.
  2. Safety Gear: Wear safety glasses and gloves to protect yourself during the process.

Step 2: Locate the Emergency Release Cord

  1. Locate the Opener: Find the main control unit of your garage door opener. This is usually located near the ceiling of the garage, attached to the garage door opener motor.
  2. Find the Emergency Release Cord: Look for a red cord or rope hanging from the opener motor. This is the emergency release cord.

Step 3: Disengage the Garage Door

  1. Pull the Cord: Gently pull the emergency release cord downward and away from the garage door opener. This action disengages the door from the opener’s carriage or trolley.
  2. Manual Operation: Once the door is disengaged, you can manually lift the door by hand. Use both hands to lift the door evenly, and be cautious of the door’s weight.
  3. Secure the Door: If the door is partially open, use a prop or a sturdy object to hold it in place while you work under it.

Step 4: Close the Garage Door

  1. Close the Door Manually: To close the door manually, gently push the door downward until it’s fully closed. Use both hands to guide the door and prevent it from slamming shut.

Step 5: Reengage the Garage Door Opener

  1. Ensure Door is Closed: Make sure the garage door is fully closed before reengaging the opener.
  2. Pull the Cord: Return to the emergency release cord and pull it toward the garage door opener motor. This action reengages the door with the opener’s carriage or trolley.
  3. Test the Opener: After reengaging the door, test the automatic opener by using the remote or wall button. The door should move smoothly and without resistance.

Step 6: Power On

  1. Reconnect Power: Once you’ve successfully reengaged the garage door opener, reconnect power to the opener.

Step 7: Lubrication and Maintenance

  1. Lubrication: It’s a good idea to lubricate the moving parts of the garage door, including rollers, hinges, and springs, to ensure smooth operation.

Step 8: Practice

  1. Regular Practice: It’s a good practice to manually disengage and reengage your garage door opener periodically. This ensures you’re familiar with the process and can do it quickly and safely when needed.

Step 9: Consult the Manual

  1. Manufacturer’s Instructions: Always refer to the manufacturer’s manual for your specific garage door opener model. The manual will provide accurate and detailed instructions for disengaging and reengaging the opener.

Conclusion:

Disengaging and reengaging a Garage Door Repair Anderson IN is an essential skill for manual operation during power outages or opener malfunctions. By following the steps outlined above and taking proper safety precautions, you can confidently disengage and reengage your garage door as needed, ensuring its functionality and your ability to access your garage even without power or automatic operation.

Anderson Gates & Garage Doors

2007 McKinley St, Anderson, IN 46016, United States

1-463-217-0904

Elevating Your Home’s Style: How Garage Door Professionals Transformed My Design Vision – Anderson Gates & Garage Doors

As a homeowner deeply passionate about creating a living space that resonates with my unique style and personality, I’ve come to realize that even the seemingly minor design choices can make a monumental impact on the overall look and feel of my home. Among these choices, the role of the garage door has become a focal point of my attention. It’s not just a functional component; it’s a canvas for expressing my design aspirations.

To navigate this intricate realm and bring my vision to life, I turned to garage door professionals from Anderson Gates & Garage Doors who have proven to be instrumental in elevating the style and essence of my home.

Designing the Gateway to Aesthetic Brilliance

The garage door, often overlooked in the grand scheme of home design, emerged as a significant player in creating a cohesive and appealing aesthetic. It became clear that this essential feature wasn’t just about practicality; it was an opportunity to make a bold design statement that sets the tone for my entire home. Garage door professionals, armed with their expertise, became my guides in this transformative journey.

Their knowledge extends beyond the mechanics of garage doors; they possess a deep understanding of architecture, color palettes, and materials. Collaborating with these professionals allowed me to harmonize the design of my garage door with the overall vision I had for my home’s exterior. Together, we crafted a visual narrative that resonates with both form and function.

Harmonizing with Architectural Style

One of the standout aspects of working with garage door professionals was their ability to tailor the design to perfectly complement the architectural style of my home. They recognized that a one-size-fits-all approach simply wouldn’t suffice. Whether my home boasts classic charm or embraces contemporary minimalism, these experts had the insight to suggest garage door options that seamlessly fit the architectural language.

For my traditionally designed home, garage door professionals guided me toward the allure of carriage-style doors. These doors, complete with intricate details and rustic hardware, evoke a sense of nostalgia and charm that aligns seamlessly with the classic aesthetic I adore. On the other hand, for a more modern home, they proposed sleek and minimalist designs that emphasize clean lines and a sense of simplicity. Their ability to align the garage door design with the architectural style was truly remarkable.

The Art of Material Selection

Choosing the right materials for a garage door is a delicate balance between aesthetics and practicality. Garage door professionals excel in this area, bringing to the table an in-depth understanding of the unique properties of each material. They guided me toward options that not only enhance the visual appeal of the home but also ensure longevity and durability.

I was introduced to the warmth and character of wood – a timeless choice that exudes a sense of authenticity. Garage door professionals recommended specific wood types and treatments to withstand the elements while adding a touch of rustic elegance to my home’s exterior. For a more contemporary touch, materials like aluminum and glass were proposed, offering a sleek and modern appearance that seamlessly aligned with my design vision.

Crafting a Cohesive Color Palette

Color palettes and finishes are often the finishing touches that tie a design together. Garage door professionals are adept at helping homeowners make informed decisions in this area, understanding that color plays a pivotal role in creating visual cohesion. They recognized that the color of the garage door can either harmonize with the existing palette or become a strategic focal point that adds contrast.

Through collaborative discussions, these professionals helped me select a color that not only complemented the overall facade but also contributed to the cohesive aesthetic. Their insights into finishes, whether matte or glossy, allowed me to fine-tune the design details to perfection.

Infusing Character with Hardware and Accents

In the hands of garage door professionals, hardware and accents transformed from mere functional elements to powerful design statements. Their acute attention to detail allowed me to infuse my garage door with character and personality. From handles and hinges to decorative studs and accents, each piece was carefully curated to enhance the visual appeal and narrative.

These professionals understood that even the smallest elements contribute to the overall design story. With their guidance, I was able to add a personal touch to the final aesthetic, turning a standard garage door into a unique expression of my individuality.

Staying Ahead of Trends and Innovations

One of the standout advantages of working with garage door professionals was their finger on the pulse of design trends and innovations. They introduced me to emerging concepts such as smart garage door technology, architectural hardware inspirations, and eco-friendly materials. Their expertise ensured that my design choices not only elevated the style of my home in the present but also remained relevant and timeless in the years to come.

A Collaborative Journey to Reality

What truly sets garage door professionals apart is their commitment to collaboration. They recognize that the design process is a partnership, valuing my input and vision while providing their expertise to shape and refine it. Through consultations, discussions, and visualizations, they helped me translate my design aspirations into a tangible reality.

From the initial concept to the final installation, garage door professionals walked with me every step of the way. Their attention to detail and dedication to creating a cohesive design ensured that the garage door seamlessly integrated with the overall architecture of my home. Their collaborative approach resulted in a visually pleasing and harmonious outcome that far exceeded my expectations.

Conclusion: Elevating Home Design Through Expert Guidance

In my pursuit of elevating my home’s style, I’ve come to appreciate the invaluable role that garage door professionals play in translating design dreams into reality. Their expertise extends beyond technical know-how; it encompasses a deep understanding of design principles, architectural aesthetics, and the delicate balance between form and function.

By following Anderson Gates & Garage Doors, through their guidance, I’ve witnessed the transformation of my garage door from a functional necessity into a design centerpiece that enhances the curb appeal and overall character of my home. Every design choice, every detail, has contributed to a harmonious visual narrative that reflects my individuality and aspirations as a homeowner. With garage door professionals by my side, I’ve learned that home design is a collaborative art that requires expert guidance to elevate style and create a living space that is not only fuctional but also a true reflection of my personal style and vision.

Anderson Gates & Garage Doors

2007 McKinley St, Anderson, IN 46016, United States

463-217-0904

Powered by WordPress & Theme by Anders Norén