Home Owners Guide in Improvements

Local Businesses Blog in Texas

What Are The Signs That My Windows Need Replacement? – North Texas Home Exteriors

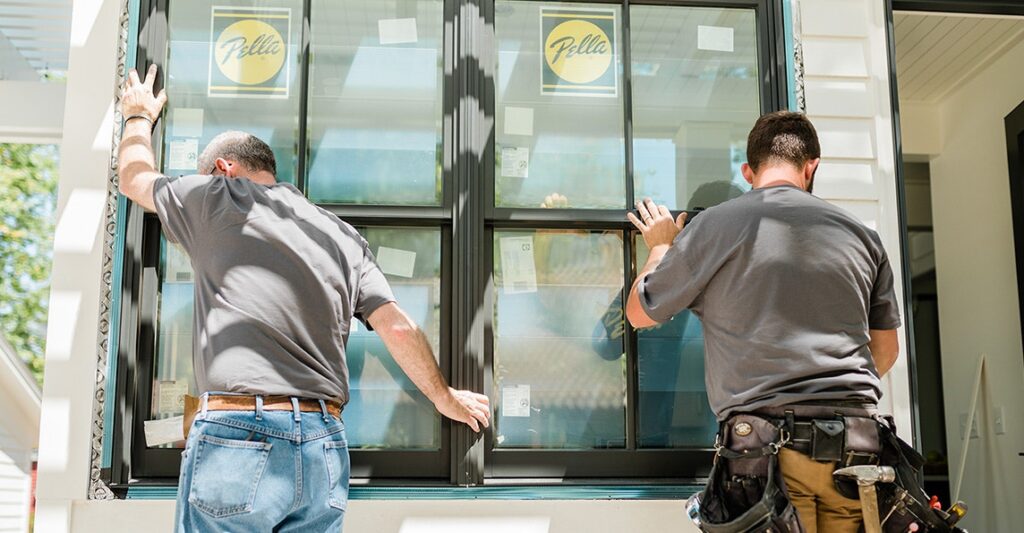
Windows Replacement Nort TX replace your windows is crucial for maintaining the comfort, energy efficiency, and aesthetics of your home. Here are some signs to look out for:
  1. Drafts and Air Leaks:
    • One of the most noticeable signs that your windows need replacement is drafts or air leaks around the frames. If you feel cold or hot air coming in from the outside, especially when the windows are closed, it indicates that the seals may be failing, and the windows are no longer effectively insulating your home.
  2. Increased Energy Bills:
    • If you’ve noticed a significant increase in your energy bills, it could be due to inefficient windows. Old or poorly insulated windows allow heat to escape during the winter and cool air to seep in during the summer, forcing your HVAC system to work harder to maintain a comfortable indoor temperature.
  3. Difficulty Opening or Closing:
    • Windows that are difficult to open or close, or that stick or jam when you try to operate them, are a clear sign of wear and tear. This could be due to issues with the frame, sash, or hardware, and it may indicate that the windows need to be replaced for smoother functionality and better security.
  4. Visible Damage:
    • Inspect your windows for visible signs of damage, such as cracks, rot, warping, or decay in the frames, sashes, or glass panes. These structural issues not only compromise the integrity of the windows but also detract from the appearance of your home and may pose safety hazards.
  5. Condensation Between Panes:
    • Condensation forming between the panes of double or triple-pane windows is a clear indication of seal failure. When the insulating gas between the glass layers escapes, moisture can accumulate inside the window, leading to fogging or cloudiness that cannot be wiped away. This not only obstructs your view but also diminishes the thermal efficiency of the windows.
  6. Excessive Noise Transmission:
    • If you notice that outdoor noise, such as traffic or neighborhood activities, is more audible inside your home than it should be, it may be a sign that your windows are not providing adequate sound insulation. Upgrading to new, soundproof windows can help reduce noise transmission and create a quieter indoor environment.
  7. Faded or Damaged Window Treatments:
    • Pay attention to the condition of your window treatments, such as curtains, blinds, or shades. Fading, discoloration, or damage to these materials may indicate that your windows are allowing excessive sunlight and UV rays to enter your home, which can cause furniture, flooring, and décor to fade over time.
  8. Security Concerns:
    • Windows that are old or damaged may compromise the security of your home, making it easier for intruders to gain access. If your windows are difficult to lock or if the frames are weak and susceptible to break-ins, it’s time to consider replacing them with newer, more secure models featuring advanced locking mechanisms and durable materials.
  9. Outdated Appearance:
    • If your windows look outdated or no longer complement the style of your home, replacing them can improve curb appeal and enhance the overall aesthetic appeal of your property. Upgrading to modern, stylish windows can give your home a fresh, updated look while increasing its value and marketability.
  10. Age of the Windows:
    • As a general rule of thumb, if your windows are more than 15-20 years old, it’s worth considering replacement, even if they don’t exhibit obvious signs of damage or wear. Older windows are likely to be less energy-efficient and may lack features found in newer models, such as low-emissivity coatings, argon gas fills, and thermal breaks.

In conclusion, paying attention to these signs can help you determine whether it’s time to replace your windows. Investing in high-quality, energy-efficient windows not only improves the comfort, functionality, and aesthetics of your home but also enhances its value and reduces long-term maintenance costs. If you notice any of these signs, consider consulting with a reputable window replacement contractor to explore your options and find the best solution for your needs.

North Texas Home Exteriors

1-817-201-6800

What Are The Top Roofing Companies In Long Beach? -Best Roofing Solution – Long Beach

Roofing Contractor Long Beach CA requires thorough research and consideration of various factors such as reputation, experience, services offered, customer reviews, and industry certifications.

Here’s a detailed overview of some of the top roofing companies in Long Beach:

1. Antis Roofing & Waterproofing: Antis Roofing & Waterproofing is a highly reputable roofing company in Long Beach known for its commitment to excellence and customer satisfaction. With over 30 years of experience, they specialize in residential and commercial roofing services, including installation, repair, and maintenance. Antis Roofing is known for its quality craftsmanship, attention to detail, and use of premium roofing materials.

2. Chandler’s Roofing: Chandler’s Roofing has been serving the Long Beach area for over 70 years, earning a reputation as one of the most trusted roofing companies in the region. They offer a comprehensive range of roofing services, including new roof installation, roof repairs, roof maintenance, and roof inspections. Chandler’s Roofing is known for its professionalism, integrity, and commitment to customer satisfaction.

3. McCormack Roofing, Construction & Energy Solutions: McCormack Roofing, Construction & Energy Solutions is a full-service roofing company serving Long Beach and the surrounding areas. With over 25 years of experience, they specialize in residential and commercial roofing services, including roof replacements, roof repairs, roof inspections, and solar panel installation. McCormack Roofing is known for its quality workmanship, competitive pricing, and exceptional customer service.

4. Accurate Roofing Solutions: Accurate Roofing Solutions is a locally owned and operated roofing company that has been serving the Long Beach community for many years. They offer a wide range of roofing services, including roof repairs, roof replacements, roof inspections, and preventative maintenance. Accurate Roofing Solutions is known for its prompt response times, reliable workmanship, and transparent pricing.

5. Top Roofing Inc.: Top Roofing Inc. is a well-established roofing company serving residential and commercial clients in Long Beach and the surrounding areas. They specialize in a variety of roofing services, including new roof installation, roof repairs, roof maintenance, and roof coatings. Top Roofing Inc. is known for its professionalism, attention to detail, and dedication to customer satisfaction.

6. Roof Rx: Roof Rx is a reputable roofing company with extensive experience in the Long Beach area. They offer a wide range of roofing services, including roof repairs, roof replacements, roof inspections, and emergency roof repairs. Roof Rx is known for its skilled technicians, efficient service, and commitment to quality workmanship.

7. Roofing Repair Long Beach: Roofing Repair Long Beach is a locally owned and operated roofing company specializing in residential and commercial roof repairs. They offer prompt and reliable repair services for various roofing issues, including leaks, damaged shingles, and flashing problems. Roofing Repair Long Beach is known for its affordable pricing, fast response times, and high-quality workmanship.

8. Renco Roofing: Renco Roofing is a trusted roofing company serving Long Beach and the surrounding areas for over 25 years. They specialize in residential and commercial roofing services, including new roof installation, roof repairs, roof maintenance, and roof coatings. Renco Roofing is known for its experienced team, superior craftsmanship, and commitment to customer satisfaction.

9. California Roofing Pros: California Roofing Pros is a leading roofing company providing comprehensive roofing services to homeowners and businesses in Long Beach. They specialize in roof installations, roof repairs, roof replacements, and roof inspections. California Roofing Pros is known for its professionalism, expertise, and dedication to delivering top-quality roofing solutions.

10. Falcon Roofing: Falcon Roofing is a family-owned and operated roofing company serving Long Beach and the surrounding areas. They offer a wide range of roofing services, including new roof installation, roof repairs, roof maintenance, and roof inspections. Falcon Roofing is known for its personalized service, attention to detail, and commitment to customer satisfaction.

When choosing a roofing company in Long Beach, be sure to research each company thoroughly, read customer reviews, and request quotes from multiple contractors to ensure you find the best fit for your roofing needs.

Best Roofing Solution – Long Beach

4447 Rutgers Ave, Long Beach, CA 90808, United States

1-562-265-3147

How To Replace Rubber Seal On Bottom Of Garage Door -Affordable Garage Doors

Garage Door Repair Kokomo IN also known as the bottom seal or weatherstripping, on the bottom of your garage door is essential for maintaining a weatherproof barrier and preventing drafts, pests, and debris from entering your garage.

Here’s a comprehensive guide on how to replace the rubber seal on the bottom of a garage door:

1. Gather Necessary Materials: Before starting the replacement process, gather the following materials:

  • New rubber seal (make sure it matches the width of your garage door)
  • Pliers
  • Utility knife
  • Soap and water (for cleaning)
  • Screwdriver (if necessary)
  • Lubricant (silicone spray or similar)

2. Prepare the Area: Close the garage door completely and disconnect the power to the garage door opener to prevent any accidental operation during the replacement process. Clear any debris or obstructions from the bottom of the garage door to ensure a clean work area.

3. Remove the Old Seal: Locate the existing rubber seal on the bottom of the garage door. Depending on the type of seal, you may need to remove screws or fasteners holding it in place. Use pliers or a screwdriver to remove any fasteners and carefully pull the old seal away from the bottom of the door. If the seal is glued in place, use a utility knife to cut through the adhesive and remove the seal.

4. Clean the Bottom of the Door: After removing the old seal, thoroughly clean the bottom of the garage door to remove any dirt, debris, or remaining adhesive. Use soap and water to clean the surface, and allow it to dry completely before proceeding.

5. Install the New Seal: Unroll the new rubber seal and align it along the bottom edge of the garage door. Start from one end and work your way across, ensuring that the seal is positioned evenly and snugly against the bottom of the door. Trim any excess length of the seal using a utility knife if necessary.

6. Secure the New Seal: Depending on the type of seal you’re using, secure it in place by reattaching any screws or fasteners that were removed earlier. If the seal has adhesive backing, press it firmly against the bottom of the door to ensure proper adhesion. Allow the adhesive to set according to the manufacturer’s instructions.

7. Test the Door: Once the new seal is installed, manually raise and lower the garage door to ensure that it moves smoothly without any obstructions or interference from the seal. If necessary, adjust the seal’s positioning to prevent it from dragging or catching on the garage floor.

8. Apply Lubricant (Optional): To prolong the life of the rubber seal and ensure smooth operation of the garage door, consider applying a thin layer of lubricant to the bottom of the seal. Silicone spray or a similar lubricant can help reduce friction and prevent the seal from sticking to the garage floor.

9. Reconnect Power to the Garage Door Opener: After completing the replacement process and ensuring that the new seal is properly installed, reconnect the power to the garage door opener and test the door’s operation using the opener.

10. Regular Maintenance: To maintain the effectiveness of the new rubber seal, periodically inspect it for signs of wear or damage and replace it as needed. Additionally, keep the bottom of the garage door clean and free of debris to prevent premature wear on the seal.

By following these steps, you can effectively replace the rubber seal on the bottom of your garage door, ensuring a tight seal and optimal protection against the elements

Affordable Garage Door Repairs of Kokomo

1206 Peace Pipe Dr, Kokomo, IN 46902, United States

1-765-441-4637

Hat Are The Signs That My Car Needs A Tune-Up – Circle S Auto Service


Auto Services Fort Worth TX car needs a tune-up is essential for maintaining its performance, efficiency, and reliability.

While modern vehicles require less frequent tune-ups compared to older models, there are still several indicators that it may be time to schedule maintenance. In this comprehensive guide, we’ll explore the signs that your car needs a tune-up, covering a range of mechanical and performance-related issues.

1. Decreased Fuel Efficiency: One of the most common signs that your car needs a tune-up is a noticeable decrease in fuel efficiency. If you find yourself filling up the gas tank more frequently than usual or experiencing a significant drop in miles per gallon (MPG), it may be time to address underlying issues such as dirty fuel injectors, worn spark plugs, or a clogged air filter.

2. Rough Idling or Stalling: A rough idle or stalling engine can indicate various problems, including misfiring spark plugs, a dirty throttle body, or a malfunctioning idle control valve. If your car’s engine is running erratically when idling or stalls unexpectedly, it’s essential to have it inspected and tuned up to prevent further damage.

3. Difficulty Starting the Engine: If your car struggles to start or requires multiple attempts before the engine turns over, it could be a sign of worn spark plugs, a weak battery, or fuel system issues. A tune-up can address these issues and ensure reliable starting, especially in cold weather or after extended periods of inactivity.

4. Poor Acceleration or Lack of Power: A decrease in engine performance, such as sluggish acceleration or a noticeable lack of power, may indicate issues with fuel delivery, ignition timing, or engine compression. A tune-up can address these issues and restore your car’s performance and responsiveness on the road.

5. Engine Misfires or Check Engine Light: Persistent engine misfires, indicated by a rough-running engine or flashing check engine light, are often caused by faulty spark plugs, ignition coils, or fuel injectors. Ignoring these warning signs can lead to more severe engine damage over time, so it’s crucial to address them promptly with a tune-up.

6. Unusual Noises or Vibrations: Unusual noises or vibrations coming from the engine, exhaust system, or drivetrain can indicate various mechanical problems, including worn or damaged components. A thorough inspection and tune-up can identify the source of the noise and prevent further damage.

7. Excessive Exhaust Smoke: Excessive exhaust smoke, whether it’s blue, white, or black, can signal underlying issues with the engine, fuel system, or emissions control system. A tune-up can diagnose and address the root cause of the smoke, such as worn piston rings, leaking valves, or a malfunctioning catalytic converter.

8. Sudden Changes in Performance: Sudden changes in your car’s performance, such as rough shifting, hesitation, or loss of power, should not be ignored. These symptoms may indicate issues with the transmission, fuel system, or engine management system that require attention during a tune-up.

9. Overdue Maintenance Intervals: If your car has exceeded recommended maintenance intervals for services such as spark plug replacement, air filter replacement, or fuel system cleaning, it’s time to schedule a tune-up. Regular maintenance is essential for keeping your car running smoothly and preventing premature wear and tear on vital components.

10. Manufacturer Recommendations: Finally, it’s essential to follow the manufacturer’s recommendations for scheduled maintenance outlined in your car’s owner’s manual. These guidelines provide valuable insight into when specific services, including tune-ups, should be performed based on mileage or time intervals.

In conclusion, recognizing the signs that your car needs a tune-up is crucial for maintaining its performance, efficiency, and longevity. By staying vigilant for these indicators and scheduling regular maintenance as needed, you can keep your vehicle running smoothly and avoid costly repairs down the road

Circle S Auto Service

12195 N Saginaw Blvd #120, Fort Worth, TX 76179, United States

1-817-439-8020

How To Rewire Garage Door Sensors – All American Garage Doors

Garage Door Repair Miami FL is a necessary task if you encounter issues with the sensor system, such as malfunctioning sensors or damaged wiring.

These sensors play a crucial role in ensuring the safe operation of your garage door by detecting obstructions in the door’s path and preventing it from closing if something is in the way. In this comprehensive guide, we’ll walk you through the process of rewiring garage door sensors, providing detailed instructions and helpful tips for a successful rewiring project.

1. Gather Necessary Tools and Materials: Before you begin rewiring your garage door sensors, gather the necessary tools and materials. You’ll likely need wire strippers, wire nuts, electrical tape, a screwdriver set, and possibly a voltage tester or multimeter. Additionally, ensure that you have the appropriate gauge of electrical wire for the job.

2. Identify Sensor Wiring: Start by identifying the wiring for the garage door sensors. There are typically two sensors, one on each side of the garage door, connected to the garage door opener motor unit by low-voltage wires. These wires are usually color-coded, with one wire being white or yellow and the other being black.

3. Check Sensor Alignment and Condition: Before rewiring the sensors, check their alignment and condition to ensure that they are functioning properly. Make sure that the sensors are properly aligned facing each other and that there are no obstructions blocking their view. Additionally, inspect the sensors for any damage or signs of wear that may indicate the need for replacement.

4. Turn Off Power to the Garage Door Opener: For safety, turn off power to the garage door opener at the circuit breaker or fuse box before working on the sensors. This will prevent the risk of electric shock while you work on the wiring.

5. Remove Old Wiring and Sensors: If you’re replacing existing wiring or sensors, start by carefully removing the old wiring and sensors from the garage door opener motor unit and mounting brackets. Disconnect any electrical connections and label each wire to keep track of where they were connected.

6. Install New Wiring: Using the appropriate gauge of electrical wire, begin installing the new wiring for the sensors. Route the wiring along the same path as the old wiring, securing it in place using cable clips or staples to prevent it from sagging or becoming tangled. Be sure to leave extra slack at each connection point to facilitate easy installation.

7. Connect New Wiring to Sensors: Once the wiring is in place, connect it to the terminals on each sensor, ensuring that the polarity is correct (i.e., white or yellow wire to the positive terminal and black wire to the negative terminal). Use wire nuts to securely join wires together and electrical tape to insulate the connections.

8. Mount New Sensors: After connecting the wiring, mount the new sensors to the mounting brackets or other suitable surfaces near the garage door tracks. Ensure that the sensors are aligned facing each other and are positioned at the correct height according to the manufacturer’s instructions.

9. Test Sensor Functionality: After installing the new sensors and wiring, test their functionality to ensure that they are working correctly. Turn the power back on at the circuit breaker or fuse box and test the garage door opener to see if the sensors detect obstructions and prevent the door from closing.

10. Perform Final Checks and Adjustments: Before completing the rewiring project, perform final checks and adjustments to ensure that everything is in proper working order. Verify that the sensors are aligned and functioning correctly, inspect the wiring for any signs of damage or wear, and make any necessary adjustments to improve functionality or safety.

In conclusion, rewiring garage door sensors is a relatively straightforward process that can help ensure the safe and reliable operation of your garage door opener. By following these step-by-step instructions and taking proper precautions, you can successfully rewire your garage door sensors and enjoy peace of mind knowing that your garage door is equipped with a functioning safety sensor system

All American Doors

8155 NW 93rd St, Medley, FL 33166, United States

1-305-885-8088

How To Change A Garage Door Opener Code – Denzels Garage Door

Garage Door Repair Marina Del Rey CA is a practical security measure to ensure the safety of your home and belongings.

By following the manufacturer’s instructions and taking a few simple steps, you can easily update the access code on your garage door opener. In this comprehensive guide, we’ll walk you through the process of changing a garage door opener code, providing detailed instructions and tips for a successful reset.

1. Locate the Control Panel: Begin by locating the control panel for your garage door opener. This panel is typically located on the wall near the garage entrance or on the motor unit itself. It may have a small cover that can be opened to access the programming buttons.

2. Access the Programming Buttons: Once you’ve located the control panel, you’ll need to access the programming buttons. These buttons are used to clear the existing code and input a new one. Depending on your garage door opener model, the programming buttons may be labeled “Learn,” “Program,” or “Set.”

3. Clear the Existing Code: Before setting a new code, it’s important to clear the existing one to ensure that only authorized users have access to your garage. To clear the code, press and hold the “Learn” or “Program” button for several seconds until the indicator light on the motor unit blinks or turns off.

4. Choose a New Code: With the existing code cleared, you can now choose a new code for your garage door opener. Select a secure and memorable combination of numbers, typically between four and eight digits long. Avoid using easily guessable codes such as birthdates or sequential numbers.

5. Program the New Code: To program the new code, press the “Learn” or “Program” button on the motor unit or control panel. The indicator light will illuminate, indicating that the opener is in programming mode. Enter your chosen code using the keypad on the control panel, ensuring that each digit is registered before proceeding to the next.

6. Test the New Code: After programming the new code, test it to ensure that it works properly. Close the garage door using the existing code or remote, then enter the new code on the keypad to open the door. Repeat this process several times to confirm that the code is functioning correctly.

7. Secure the Control Panel: Once you’re satisfied with the new code, secure the control panel cover if applicable. This helps protect the programming buttons from accidental activation and prevents unauthorized access to the garage door opener settings.

8. Update Remote Controls: If you have remote controls or keypads that are programmed to operate your garage door opener, you’ll need to update them with the new code. Follow the instructions provided with your remotes to reprogram them accordingly.

9. Keep the Code Secure: Finally, remember to keep your new garage door code secure by sharing it only with trusted individuals. Avoid writing it down or sharing it with anyone outside your household to prevent unauthorized access to your garage.

In conclusion, changing a garage door opener code is a straightforward process that can enhance the security of your home. By following these step-by-step instructions and taking precautions to keep your code secure, you can enjoy peace of mind knowing that your garage is protected against unauthorized

Denzels Garage Door

17841 Welby Way Reseda , CA 91335

1-619-496-9419

How Do I Troubleshoot Common Air Conditioning Problems Like Uneven – Cooling?Veteran’s A/C & Heating

Uneven cooling in your home can be frustrating and uncomfortable, especially during hot summer months. Fortunately, many common Air Conditioning Repair Euless TX cause uneven cooling can be diagnosed and resolved with some troubleshooting steps.

In this comprehensive guide, we’ll explore the most common causes of uneven cooling and provide practical solutions to help you restore comfort and efficiency to your home.

1. Understanding the Causes of Uneven Cooling: Uneven cooling can be caused by various factors, including:

  • Dirty air filters: Clogged or dirty air filters restrict airflow, leading to uneven cooling and reduced efficiency.
  • Blocked vents or registers: Blocked vents or registers can prevent airflow to certain areas of your home, resulting in uneven cooling.
  • Leaky ducts: Leaky ducts can allow cooled air to escape before reaching its intended destination, causing uneven cooling and increased energy bills.
  • Improperly sized HVAC system: An HVAC system that is too large or too small for your home’s square footage may struggle to maintain consistent temperatures throughout the space.
  • Faulty thermostat: A malfunctioning thermostat can result in inaccurate temperature readings and improper cooling cycles, leading to uneven cooling.

2. Troubleshooting Steps for Uneven Cooling: To troubleshoot and resolve uneven cooling issues, follow these steps:

  • Check air filters: Inspect air filters for dirt, dust, and debris, and replace them if necessary. Clean or replace filters regularly to ensure optimal airflow and efficiency.
  • Unblock vents and registers: Ensure that all vents and registers are open and unobstructed to allow for proper airflow throughout your home. Move furniture, curtains, and other objects away from vents to improve airflow.
  • Seal leaky ducts: Inspect ductwork for signs of leaks, such as visible gaps or cracks, and seal them using duct tape or mastic sealant. Consider hiring a professional HVAC technician to inspect and repair ductwork if needed.
  • Verify thermostat settings: Check thermostat settings to ensure they are set correctly for your comfort preferences. Test the thermostat by adjusting the temperature settings and monitoring the cooling cycles.
  • Consider zoning systems: Install zoning systems or smart thermostats that allow you to control temperatures in different areas of your home independently, ensuring consistent cooling and energy efficiency.

3. Additional Tips for Maintaining Even Cooling: To maintain even cooling and optimize your air conditioning system’s performance, consider the following tips:

  • Schedule regular HVAC maintenance: Schedule annual HVAC maintenance appointments with a licensed technician to inspect, clean, and tune up your air conditioning system.
  • Keep outdoor unit clean: Keep the outdoor unit free of dirt, debris, and vegetation to ensure optimal airflow and efficiency.
  • Upgrade insulation: Improve insulation in your home’s walls, attic, and crawlspace to minimize heat transfer and improve energy efficiency.
  • Install ceiling fans: Use ceiling fans to circulate air and distribute cool air more effectively throughout your home.

4. Conclusion: Uneven cooling in your home can be caused by various factors, including dirty air filters, blocked vents, leaky ducts, and faulty thermostats. By following the troubleshooting steps outlined in this guide and implementing additional maintenance tips, you can identify and resolve common air conditioning problems to restore comfort and efficiency to your home.

In summary, troubleshooting uneven cooling in your air conditioning system involves checking and replacing air filters, unblocking vents and registers, sealing leaky ducts, verifying thermostat settings, and considering upgrades such as zoning systems or smart thermostats. With proper maintenance and attention to detail, you can enjoy consistent and efficient cooling throughout your home

Veteran’s A/C & Heating

615 N Main St #155, Euless, TX 76039, United States

1-817-858-9301

How To Wire A Genie Garage Door Opener – Atlas Door Company

Garage Door Repair Joshua TX is a straightforward process that allows you to connect the opener to power,

safety sensors, wall consoles, and remote controls. Follow these detailed steps to wire your Genie garage door opener effectively and ensure smooth operation.

1. Gather Your Supplies: Before you begin, gather the necessary supplies:

  • Genie garage door opener
  • Mounting hardware
  • Power cord
  • Safety sensors
  • Wall console
  • Remote controls
  • Screwdriver
  • Wire strippers
  • Electrical tape

2. Install the Garage Door Opener: Follow the manufacturer’s instructions to mount the Genie garage door opener to the ceiling of your garage. Use the provided mounting hardware to secure the opener in place, ensuring that it is level and stable.

3. Connect the Power Cord: Locate the power cord on the Genie garage door opener and plug it into a nearby electrical outlet. Ensure that the outlet is properly grounded and can handle the power requirements of the opener.

4. Install Safety Sensors: Position the safety sensors on each side of the garage door opening, approximately 6 inches above the floor. Use screws to secure the sensors to the wall or frame, ensuring that they are aligned with each other and facing each other directly.

5. Wire the Safety Sensors: Connect the safety sensor wires to the terminals on the Genie garage door opener. Typically, one wire from each sensor will connect to the “Sensors” terminal on the opener, while the other wires will connect to the corresponding terminals on the opposite sensor.

6. Test the Safety Sensors: Once the sensors are wired and connected, test their functionality by closing the garage door. If the sensors are working correctly, the door should reverse direction and open again immediately if an object or obstruction is detected in the doorway.

7. Install the Wall Console: Mount the wall console for the Genie garage door opener in a convenient location inside your garage, near the entryway or access door. Use screws to secure the console to the wall, ensuring that it is easily accessible from inside the garage.

8. Wire the Wall Console: Connect the wires from the wall console to the terminals on the Genie garage door opener. Typically, the wires will be color-coded (e.g., red and white) and should be connected to the corresponding terminals on the opener.

9. Test the Wall Console: Once the wall console is wired and connected, test its functionality by pressing the buttons to open and close the garage door. Ensure that the console is communicating with the opener properly and that the door responds as expected.

10. Program Remote Controls: Finally, program any remote controls or keypads that you wish to use with your Genie garage door opener. Follow the manufacturer’s instructions to sync the remotes with the opener, ensuring that they are functioning correctly.

11. Additional Tips:

  • Follow all local building codes and regulations when wiring your garage door opener.
  • Use caution when working with electrical components and always turn off power before making connections.
  • If you’re unsure about any aspect of wiring your Genie garage door opener, consult a professional electrician or garage door technician for assistance.

By following these detailed steps to wire your Genie garage door opener, you can ensure that it is properly connected and functioning correctly for reliable operation. Enjoy the convenience and security of your newly installed opener for years to come

Atlas Door Company

6817 Sundance Cir W, Joshua, TX 76058, United States

1-817-295-3660

How To Install Torsion Spring On Garage Door – Ryder Garage Doors

Torsion springs are critical components of a Garage Door Repair Vancouver WA , providing the necessary tension to support the door’s weight and facilitate smooth operation.

Proper installation of torsion springs is essential for safety and efficiency. This comprehensive guide will walk you through the process step by step, ensuring a successful installation.

1. Gather Your Tools and Materials:

Before you begin, gather all the necessary tools and materials for the installation. You’ll typically need a ladder, safety glasses, gloves, winding bars, wrenches, pliers, and the torsion spring kit, which includes the springs, center bearing plates, cables, drums, and hardware.

2. Prepare Your Workspace:

Ensure your garage door is closed and disconnect the power to the opener to prevent any accidental operation. Position a sturdy ladder securely under the garage door tracks, providing safe access to the torsion springs and cables.

3. Identify the Correct Torsion Springs:

Determine the type and size of torsion springs required for your garage door. Measure the height and weight of the door to select the appropriate springs, ensuring they provide adequate counterbalance.

4. Mount the Center Bearing Plates:

Install the center bearing plates on the inside of the garage door header, following the manufacturer’s instructions. Secure the plates using bolts or lag screws, ensuring they are centered and aligned with the door’s tracks.

5. Install the Torsion Springs:

Slide the torsion springs onto the torsion shaft, ensuring they are properly oriented with the winding cones facing away from the center bearing plates. Secure the springs to the shaft using set screws or cotter pins provided in the kit.

6. Wind the Torsion Springs:

Using winding bars, carefully wind the torsion springs to apply tension and balance the garage door. Follow the manufacturer’s recommendations for the number of turns required based on the door’s weight and height. Ensure that the springs are evenly wound and under equal tension.

7. Install Cable Drums and Cables:

Attach the cable drums to the ends of the torsion shaft and secure them using set screws. Thread the lift cables through the cable drums and attach them to the bottom brackets on each side of the garage door. Ensure the cables are properly tensioned and aligned.

8. Test Door Operation:

After installing and adjusting the torsion springs, manually open and close the garage door to test its operation. Ensure that the door moves smoothly and evenly, without any binding or excessive resistance.

9. Secure and Inspect:

Once you’re satisfied with the door’s operation, secure any loose hardware and inspect the entire system for proper installation and functionality. Check that the cables are securely attached and that there are no visible signs of wear or damage.

10. Reconnect Power to Opener:

If you disconnected it earlier, reconnect the power to the garage door opener and test its operation using the wall-mounted control panel or remote transmitter. Verify that the opener responds correctly to open and close commands.

11. Perform Regular Maintenance:

To ensure the continued safe and efficient operation of your garage door system, perform regular maintenance tasks such as lubricating moving parts, inspecting springs and cables for wear, and testing safety features.

By following these step-by-step instructions, you can safely and effectively install torsion springs on your garage door, ensuring smooth and reliable operation for years to come.

Ryder Garage Doors

PO Box 5474 Vancouver, WA 98668

1-360-843-7981

How To Program A New Garage Door Opener Remote – First Responder Garage Doors

Garage Door Repair Southlake TX is a straightforward process that allows you to synchronize your remote with your garage door opener, enabling convenient and secure access to your garage.

Whether you’re replacing a lost remote or adding an extra one for family members, this comprehensive guide will walk you through the programming steps in detail, ensuring a successful setup.

1. Identify Your Garage Door Opener Model:

Before you begin programming your new remote, identify the brand and model of your garage door opener. This information can usually be found on the opener unit itself or in the owner’s manual. Knowing your opener’s make and model is essential for selecting the correct programming procedure.

2. Prepare the Remote:

Remove the battery cover from your new remote and insert the batteries according to the polarity markings. Ensure that the batteries are properly installed and that the remote is functioning correctly before proceeding with programming.

3. Access the Opener’s Programming Interface:

Locate the “Learn,” “Smart,” or “Program” button on your garage door opener. This button is typically found near the opener’s antenna or LED indicator light. Refer to your opener’s owner’s manual for specific instructions on accessing the programming interface.

4. Clear Existing Remote Codes (Optional):

If you’re programming a new remote to replace a lost or malfunctioning one, it’s recommended to clear any existing remote codes from the opener’s memory before proceeding. To do this, press and hold the “Learn” button on the opener until the LED indicator light turns off, indicating that the memory has been cleared.

5. Enter Programming Mode:

Press the “Learn” button on your garage door opener to enter programming mode. The LED indicator light on the opener will illuminate or flash, indicating that it is ready to receive programming signals from the remote.

6. Program the Remote:

Within 30 seconds of entering programming mode, press the desired button on your new remote control. Hold the button down until the LED indicator light on the opener flashes or turns off, indicating that the remote control’s code has been successfully programmed. Repeat this step for each button on the remote control if it has multiple buttons.

7. Test the Remote:

Once you have programmed the remote control, test its functionality by pressing the programmed button to operate the garage door opener. The door should respond promptly and open or close as expected. If the door does not respond, repeat the programming process and ensure that you’re within range of the opener.

8. Finalize Programming (Optional):

Depending on your garage door opener model, you may have additional programming options, such as setting the remote control’s button functions, adjusting the opener’s sensitivity, or activating security features. Consult your opener’s owner’s manual for instructions on accessing and configuring these settings if desired.

9. Secure and Store the Remote:

Once programming is complete, securely close the battery cover on the remote control and store it in a safe and convenient location. Avoid exposing the remote control to extreme temperatures or moisture, as this may affect its performance and longevity.

10. Enjoy Your Newly Programmed Remote:

With your new garage door opener remote successfully programmed, you can now enjoy the convenience and security of remote-operated garage door access. Feel confident knowing that you have reliable control over your garage door opener from the comfort of your vehicle or home.

By following these step-by-step instructions, you can program a new garage door opener remote with ease and confidence, ensuring seamless integration with your garage door opener and hassle-free operation.

First Responder Garage Doors

180 State St Suite 225, Southlake, TX 76092, United States

1-817-991-5551

Page 1 of 77

Powered by WordPress & Theme by Anders Norén