Local Businesses Blog in Texas

Tag: garage door repair service

Does Install Garage Door Openers –  First Call Garage Doors


Yes, installing a Garage Door Repair Richmond TX  is a common service offered by many professionals in the home improvement and garage door industry.

Here’s an in-depth explanation of the process and considerations involved in installing a garage door opener:

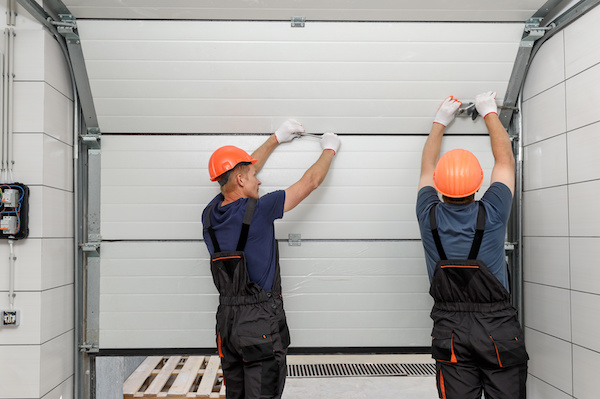
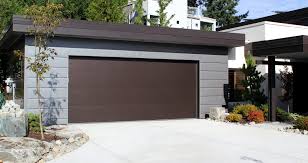
  1. Assessment and Preparation: Before installation, the technician will assess the garage door and surrounding area to determine compatibility and ensure proper installation. They will check the condition of the garage door, the available space for mounting the opener unit, and the electrical wiring in the garage.
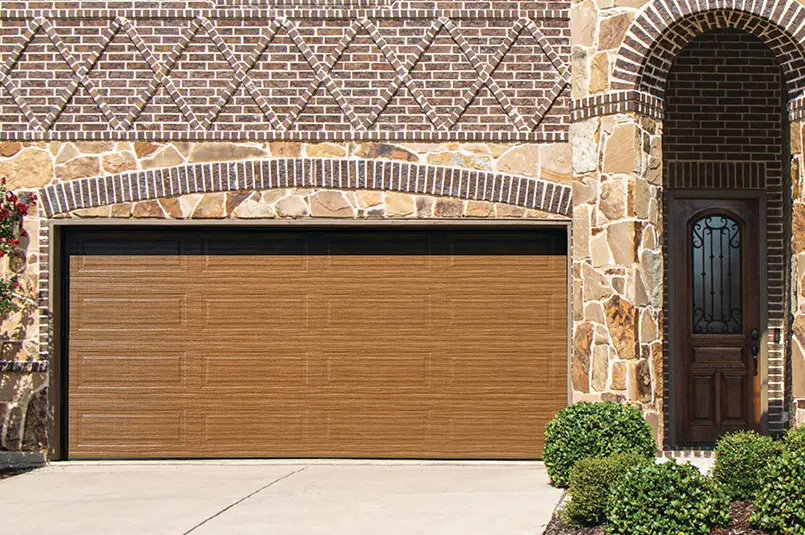
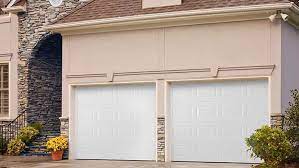
  2. Selecting the Right Opener: There are various types of garage door openers available on the market, including chain drive, belt drive, screw drive, and direct drive openers. The technician will help you select the right opener based on factors such as garage door size, weight, noise level preferences, and budget.
  3. Gathering Materials and Tools: The technician will gather all the necessary materials and tools required for installation, including the garage door opener unit, mounting hardware, rails or tracks, safety sensors, remote controls, wall-mounted control panel, and any additional accessories.
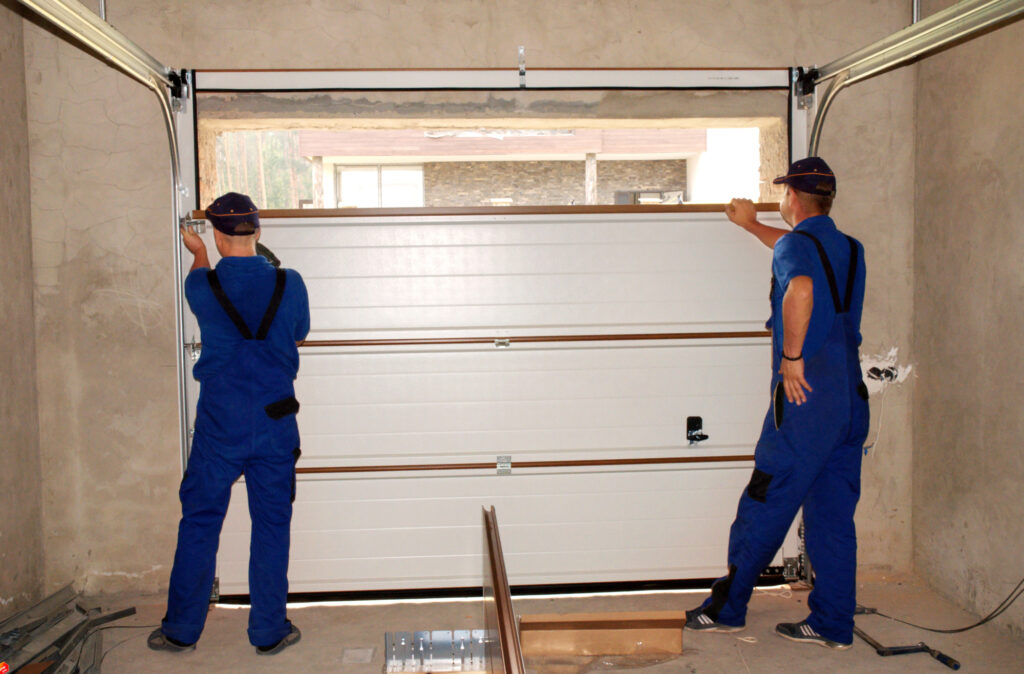
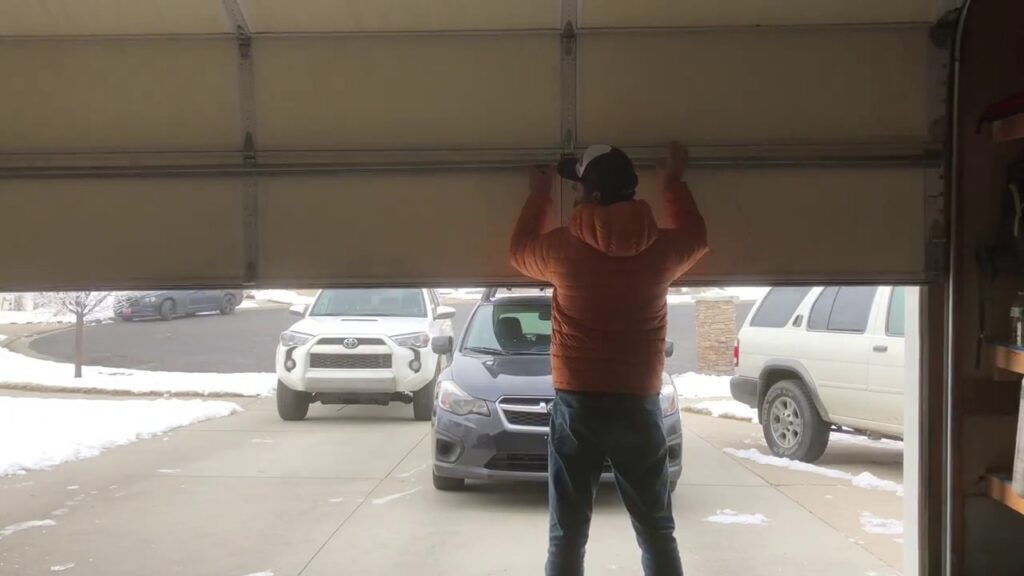
  4. Mounting the Opener Unit: The first step in installation is mounting the opener unit to the ceiling of the garage. The technician will secure the opener to the ceiling joists using sturdy mounting brackets and ensure that it is positioned at the appropriate distance from the garage door.
  5. Installing the Rails or Tracks: Next, the technician will install the rails or tracks that guide the garage door as it opens and closes. The rails are typically attached to the ceiling or walls of the garage and extend along the length of the door. The opener unit is then connected to the rails using a trolley mechanism.
  6. Wiring and Electrical Connections: The technician will connect the opener unit to the electrical wiring in the garage, ensuring that all connections are secure and compliant with local building codes. They will also install safety sensors near the bottom of the garage door to detect obstructions and prevent accidents.
  7. Programming and Testing: Once the installation is complete, the technician will program the garage door opener to synchronize with your remote controls and keypad entry system. They will also perform a series of tests to ensure that the opener operates smoothly and safely, checking for proper alignment, balance, and functionality.
  8. Demonstration and Cleanup: Before leaving, the technician will provide you with a demonstration of how to operate the garage door opener and troubleshoot common issues. They will also clean up any debris or packaging materials from the installation process, leaving your garage clean and tidy.

While some homeowners may attempt DIY installation, hiring a qualified technician is recommended to avoid potential safety hazards and ensure optimal performance of your Garage Door Repair Richmond TX 

First Call Garage Doors

20527 FM 1093 Rd Unit B205 Richmond, TX 77407

713-248-2684

https://maps.app.goo.gl/t63qb9AmNfom8KU87

How To Build An Eyebrow Over A Garage Door – BH Garage Doors and Gates


Building an eyebrow over a Garage Door Repair Rockwall TX can enhance the aesthetic appeal of your home while providing protection from the elements.

In this detailed guide, we’ll walk you through the step-by-step process of building an eyebrow over a garage door

1. Planning and Preparation:

  • Start by carefully measuring the width and height of your garage door opening to determine the size and shape of the eyebrow structure.
  • Consider the architectural style of your home and choose a design that complements its aesthetic features.
  • Gather the necessary tools and materials for the project, including lumber, plywood, roofing materials, fasteners, and exterior paint or stain.

2. Designing the Eyebrow:

  • Sketch a rough design of the eyebrow structure, taking into account the desired curvature, height, and overhang above the garage door.
  • Determine the angle and pitch of the eyebrow to ensure proper water drainage and structural stability.
  • Use a level and measuring tape to mark reference points on the garage wall for installing the eyebrow brackets or support beams.

3. Constructing the Frame:

  • Cut pressure-treated lumber or cedar boards to the appropriate lengths for the eyebrow frame components, including the top arch, side supports, and horizontal beams.
  • Assemble the frame on the ground or a work surface, securing the pieces together with exterior-grade screws or nails.
  • Ensure that the frame is structurally sound and properly aligned before proceeding to installation.

4. Installing the Eyebrow:

  • Position the assembled eyebrow frame above the garage door opening, ensuring that it is centered and level.
  • Use a ladder and assistance from another person to lift the frame into place against the garage wall.
  • Attach the frame to the wall using heavy-duty brackets or lag screws, making sure to anchor it securely to the structural framing of the garage.

5. Adding Roofing Materials:

  • Cut plywood or OSB (oriented strand board) panels to fit the curvature of the eyebrow frame, ensuring a snug and uniform fit.
  • Attach the panels to the frame using roofing nails or screws, spacing them evenly to provide adequate support for the roofing materials.
  • Apply roofing felt or underlayment over the plywood panels to provide a waterproof barrier and enhance durability.

6. Installing Roofing Shingles or Metal Panels:

  • Choose roofing materials that match the style and color of your home’s existing roof to maintain visual continuity.
  • Cut asphalt shingles or metal roofing panels to size, following the curvature of the eyebrow frame, and install them according to manufacturer guidelines.
  • Ensure proper overlap and sealing of roofing seams to prevent water infiltration and ensure long-term weather resistance.

7. Finishing Touches:

  • Apply a coat of exterior-grade paint or stain to the eyebrow frame and roofing materials to protect against moisture, UV damage, and rot.
  • Install decorative trim or molding along the edges of the eyebrow to enhance its appearance and conceal any exposed fasteners.
  • Consider adding architectural details such as corbels, brackets, or scrollwork to further enhance the aesthetic appeal of the eyebrow structure.

8. Maintenance and Care:

  • Regularly inspect the eyebrow for signs of wear, damage, or deterioration, particularly after severe weather events.
  • Clean debris from the roof surface and gutters to prevent clogging and ensure proper drainage.
  • Treat any exposed wood surfaces with a waterproof sealant or preservative to prolong the lifespan of the eyebrow structure.

Conclusion:

  • Garage Door Repair Rockwall TX By following these step-by-step instructions and exercising proper planning, preparation, and construction techniques, you can create a beautiful and functional eyebrow structure that enhances the overall appearance and value of your property.

BH Garage Doors and Gates

4035 N Goliad St, Rockwall, TX 75087, United States

1-214-206-5231

https://maps.app.goo.gl/iYdGkyhiGAiUXN3G7

How To Reset Code On Craftsman Garage Door Opener – Camco Commercial Door Company


Garage Door Repair Knoxville TN Whether you’re resetting the code for security reasons or to troubleshoot keypad issues, following these instructions will help you complete the process effectively.

Here’s a detailed guide on how to reset the code on a Craftsman garage door opener:

  1. Prepare the Garage Door Opener: Before starting the reset process, ensure that the garage door opener is powered on and in a standby mode. Locate the “Learn” or “Program” button on the opener motor unit, typically located near the antenna wire hanging from the motor housing. The button may be square or round and labeled with the word “Learn” or “Program.”
  2. Access the Control Panel: Locate the control panel or keypad on the outside of the garage door, typically mounted near the entrance or on the wall adjacent to the door. The keypad may be wireless or wired and features a numeric keypad for entering the access code.
  3. Clear Existing Code: To clear the existing access code from the keypad memory, press and hold the “Learn” or “Program” button on the garage door opener motor unit for approximately 10 seconds. Release the button when the indicator light on the motor unit flashes, indicating that the code has been cleared from the opener’s memory.
  4. Enter New Access Code: Once the existing code has been cleared, it’s time to program a new access code into the keypad. Begin by selecting a new four-digit access code that is easy to remember but difficult for others to guess. Avoid using common sequences or easily identifiable numbers for security reasons.
  5. Enter Program Mode: To enter program mode on the keypad, press and hold the “Program” or “Reset” button until the keypad indicator light begins flashing, indicating that the keypad is ready to accept a new code. Release the button once the indicator light starts flashing.
  6. Enter New Code: Using the numeric keypad on the control panel, enter the new four-digit access code you’ve chosen. Press each digit sequentially, waiting for a brief pause between each press to ensure accurate entry. After entering the four-digit code, wait for the keypad indicator light to flash, confirming that the code has been accepted.
  7. Test the New Code: Once the new access code has been programmed into the keypad, test it to ensure that it operates the garage door opener correctly. Stand outside the garage door and enter the new access code using the keypad. Listen for the sound of the garage door opener activating and observe the movement of the door as it opens and closes.
  8. Repeat if Necessary: If the new access code does not work as expected or if there are any issues with programming, repeat the reset and programming process from the beginning. Ensure that you follow each step carefully and accurately to ensure successful programming of the new access code.
  9. Secure the Keypad: Once the new access code has been programmed and tested successfully, secure the keypad to prevent unauthorized access or tampering. If the keypad is wireless, ensure that it is securely mounted to the wall using screws or adhesive backing. If the keypad is wired, ensure that the wiring is securely connected and concealed to prevent damage or interference.
  10. Record the New Code: To avoid forgetting the new access code, record it in a secure location such as a notebook or digital device. Store the code in a place where it can be easily accessed by authorized users but is not visible to unauthorized individuals.
  11. Update Additional Keypads (if applicable): If your garage door opener system includes multiple keypads, such as one mounted outside the garage and another inside the house, repeat the reset and programming process for each keypad to ensure that all access codes are synchronized and functional.
  12. Perform Regular Maintenance: To maintain the security and functionality of your garage door opener system, periodically check and update access codes as needed. Regularly inspect the keypad, control panel, and opener motor unit for signs of damage, wear, or tampering, and address any issues promptly to ensure reliable operation.

Garage Door Repair Knoxville TN If you encounter any difficulties or are unsure about the process, consult the manufacturer’s instructions or seek assistance from a professional garage door technician for expert guidance and support.

Camco Commercial Door Company

1-865-776-9455

https://maps.app.goo.gl/EHYTdzvLDSBDwnoi8

Do Led Bulbs Interfere With Garage Door Openers – Camco Commercial Door Company


 Garage Door Repair Knoxville TN In this guide, I’ll delve into the potential interference between LED bulbs and garage door openers, covering the causes, effects, and solutions in.

Understanding LED Bulbs:

LED (Light Emitting Diode) bulbs differ from traditional incandescent bulbs in several ways. They use semiconductor technology to produce light and consume significantly less energy than incandescent bulbs. LED bulbs also emit less heat and have a longer lifespan, making them an attractive choice for residential lighting.

Causes of Interference:

Interference between LED bulbs and garage door openers can occur due to electromagnetic interference (EMI) generated by the LED bulbs themselves. LED bulbs contain electronic components such as drivers and capacitors that can emit electromagnetic radiation, which may interfere with the radio frequency (RF) signals used by garage door opener remotes.

Effects of Interference:

The interference caused by LED bulbs can manifest in various ways, including:

  1. Remote Control Issues: Garage door opener remotes may experience reduced range, intermittent operation, or complete failure to operate the door.
  2. Wall Control Panel Malfunction: The wall-mounted control panel inside the garage may also be affected, leading to erratic behavior or unresponsive controls.
  3. Opener Motor Problems: In severe cases, the interference may affect the operation of the garage door opener motor, causing it to malfunction or overheat.

Solutions to LED Interference:

If you’re experiencing interference between LED bulbs and your garage door opener, there are several steps you can take to mitigate the problem:

1. Test Different LED Bulbs:

Not all LED bulbs are created equal. Some models may emit more electromagnetic interference than others. Experiment with different brands and types of LED bulbs to find ones that are less likely to interfere with your garage door opener.

2. Choose Quality LED Bulbs:

Opt for LED bulbs from reputable manufacturers known for their quality and reliability. Look for bulbs that meet industry standards for electromagnetic compatibility (EMC) and have undergone testing for interference issues.

3. Use Shielded LED Bulbs:

Some LED bulbs are specifically designed to minimize electromagnetic interference. Look for bulbs labeled as “shielded” or “EMI-shielded,” which feature built-in shielding to reduce the emission of electromagnetic radiation.

4. Install Ferrite Chokes:

Ferrite chokes, also known as ferrite beads or ferrite cores, can help suppress electromagnetic interference. These small, cylindrical devices are placed around the power cord of the LED bulb to absorb and dissipate unwanted electromagnetic energy. Install ferrite chokes on the power cords of LED bulbs to reduce interference with your garage door opener.

5. Increase Distance:

Increasing the distance between the LED bulbs and the garage door opener system can help reduce interference. If possible, install the bulbs farther away from the opener unit and its antennas to minimize the impact of electromagnetic radiation.

6. Install RF Filters:

Radio frequency (RF) filters can help attenuate unwanted RF signals, including those generated by LED bulbs. Install RF filters on the power lines feeding the LED bulbs to suppress electromagnetic interference and improve the reliability of your garage door opener system.

7. Consult a Professional:

If you’re unable to resolve the interference issues on your own, consider consulting a professional electrician or garage door technician for assistance. They can provide expert advice and may recommend specialized solutions tailored to your specific situation.

Conclusion:

With the right approach, you can enjoy the benefits of LED lighting without compromising the performance of your Garage Door Repair Knoxville TN system.

Camco Commercial Door Company

1-865-776-9455

Why Wont My Garage Door Opener Work – EDM Garage Doors, LLC


In this comprehensive guide, we’ll explore the various factors that can cause a Garage Door Repair Volo IL to stop working and provide troubleshooting steps to help you identify and resolve the issue.

Workers are installing lifting gates of the garage.

Here’s why your garage door opener may not work, explained in 1000 words:

  1. Power Source Issues: One of the most common reasons why a garage door opener may not work is due to power source issues. Start by checking if the opener is receiving power. Ensure that the power cord is plugged into a functioning electrical outlet and that there are no tripped circuit breakers or blown fuses. If the outlet is controlled by a wall switch, make sure the switch is in the “on” position.
  2. Dead Batteries: If your garage door opener uses a remote transmitter or keypad, the batteries may be dead or low. Replace the batteries with fresh ones and test the opener again. Additionally, check if the batteries in the wall-mounted control panel are also functioning correctly.
  3. Remote Transmitter Interference: Interference from nearby electronic devices or radio signals can disrupt the communication between the remote transmitter and the garage door opener. Move any electronic devices away from the opener and try using the remote transmitter again. If interference persists, consider reprogramming the remote transmitter or using a different frequency.
  4. Keypad or Remote Transmitter Programming Issues: Improper programming or lost synchronization between the keypad or remote transmitter and the opener can cause communication failures. Refer to the owner’s manual or manufacturer’s instructions for your opener to reprogram the keypad or remote transmitter. Follow the specific programming steps carefully to ensure proper synchronization.
  5. Opener Motor Problems: If the opener motor is malfunctioning or defective, the garage door may not open or close properly. Listen for any unusual sounds coming from the opener motor, such as grinding or clicking noises, which may indicate motor failure. In such cases, it’s best to contact a professional garage door technician for inspection and repair.
  6. Opener Drive System Issues: Problems with the opener’s drive system, such as a broken drive belt or chain, can prevent the garage door from opening or closing smoothly. Visually inspect the drive belt or chain for any signs of damage or wear, such as fraying or missing teeth. Replace the drive belt or chain if necessary, following the manufacturer’s instructions.
  7. Safety Sensor Misalignment: Garage door openers are equipped with safety sensors located near the bottom of the door tracks. These sensors detect obstacles in the door’s path and prevent it from closing if something is detected. Misaligned or obstructed safety sensors can prevent the door from closing properly. Check if the sensors are aligned correctly and free from any obstructions. Clean the sensor lenses with a soft cloth to remove dirt or debris.
  8. Safety Sensor Wiring Issues: Faulty wiring connections or damaged sensor wires can also cause safety sensor issues. Inspect the wiring connections between the sensors and the opener unit for any loose or disconnected wires. Repair or replace any damaged wires and ensure that all connections are secure.
  9. Limit Switch Adjustment: The limit switches on the opener control the travel limits of the garage door, determining how far it opens and closes. If the limit switches are improperly adjusted, the door may not open or close fully. Refer to the owner’s manual for your opener to adjust the limit switches properly. Make small adjustments and test the door’s operation until it opens and closes smoothly.
  10. Opener Circuit Board Problems: Issues with the opener’s circuit board, such as damaged components or corrosion, can cause operational problems. Visually inspect the circuit board for any signs of damage, such as burnt components or loose connections. If you suspect a circuit board issue, contact a professional technician for further diagnosis and repair.
  11. Remote Receiver Malfunction: The remote receiver inside the opener unit may malfunction due to age or damage, preventing it from receiving signals from the remote transmitter or keypad. If other troubleshooting steps fail to resolve the issue, consider replacing the remote receiver unit or contacting a professional technician for assistance.
  12. Opener Lock Mode: Some garage door openers feature a lock mode that disables the remote transmitters and keypads to prevent unauthorized access. Check if the opener is in lock mode by pressing the lock button on the wall-mounted control panel. If the lock mode is activated, deactivate it and test the opener again.
  13. Opener Settings and Programming: Review the settings and programming options on the opener unit to ensure that they are configured correctly. Check if any settings, such as travel limits, force adjustments, or programming modes, need to be adjusted. Refer to the owner’s manual for your opener for guidance on accessing and modifying these settings.
  14. Professional Inspection and Repair: If you’ve tried all the troubleshooting steps above and your garage door opener still isn’t working, it may be time to seek professional assistance. Contact a reputable garage door technician to inspect the opener, diagnose the problem, and perform any necessary repairs or replacements.

With proper maintenance and timely repairs, your
Garage Door Repair Volo IL opener can continue to provide reliable performance for years to come.

EDM Garage Doors, LLC

596 Richard Brown Blvd, Volo, IL 60073, United States

1-847-416-3036

Why Garage Door Wont Open-Team Taylor Doors

Garage Door Repair are an essential component of any home, providing security and convenience. However, there can be various reasons why a garage door won’t open.

In this article, we will explore some of the most common causes and possible solutions, helping you troubleshoot the issue effectively.

  1. Power supply: The first thing to check is whether your garage door opener is receiving power. Ensure that the opener is plugged in and the circuit breaker or fuse is not tripped. If the power supply is functioning properly, move on to the next steps.
  2. Remote control or keypad issues: If the garage door opener does not respond to the remote control or keypad, check the batteries. Replace them if necessary and make sure they are inserted correctly. If the problem persists, reprogram the remote control or keypad following the manufacturer’s instructions.
  3. Photo-eye misalignment: Modern garage doors are equipped with photo-eye sensors that detect objects in the door’s path, preventing it from closing on them. If the door won’t open, check if the sensors are properly aligned. Dirt, debris, or misalignment can obstruct the infrared beam, causing the door to remain closed. Clean the sensors and adjust their alignment if needed.
  4. Broken springs: Garage doors rely on springs to counterbalance the weight of the door, making it easier to open and close. If you hear a loud bang or notice a gap in the spring, it might be broken. Broken springs can make it difficult or impossible to open the door manually or with the opener. In this case, it is crucial to contact a professional for spring replacement, as they are under high tension and can be dangerous to handle.
  5. Malfunctioning opener: If the opener is not functioning properly, it could be due to various issues. Check if the motor is running but the door isn’t moving. This could indicate a problem with the drive mechanism, such as worn gears or a broken drive belt. Lubricate the moving parts and inspect them for any signs of damage. If necessary, consult a technician for further diagnosis and repairs.
  6. Track misalignment or obstruction: The garage door operates on tracks, and if they become misaligned or obstructed, it can prevent the door from opening smoothly. Inspect the tracks for any bends, gaps, or debris that might be blocking the door’s movement. Use a level to ensure the tracks are aligned correctly, and tighten any loose bolts or screws. Clean the tracks regularly and remove any obstructions to ensure proper functioning.
  7. Door lock engaged: Some garage doors have a manual lock feature to enhance security. If the lock is engaged, it will prevent the door from opening with the opener. Make sure the lock is disengaged before attempting to open the door.
  8. Broken cables or rollers: The cables and rollers assist in the smooth movement of the garage door. If they are damaged or worn out, the door may get stuck or become difficult to open. Inspect the cables for any signs of fraying or breakage, and examine the rollers for wear and tear. Replace any damaged components to restore the door’s functionality.
  9. Sensitivity settings: Garage door openers have sensitivity settings that determine how much force the opener uses to operate the door. If the settings are too high, the opener may be unable to open the door. Adjust the sensitivity settings according to the manufacturer’s instructions to ensure optimal performance.
  10. Professional assistance: If you have tried the above troubleshooting steps and the door still won’t open, it is advisable to seek professional help. Garage door systems are complex, and attempting repairs without proper knowledge and tools can be dangerous. Contact a reputable garage door repair company to diagnose and fix the issue.

In conclusion, a Garage Door Repair that won’t open can be caused by various factors, ranging from simple issues like power supply and remote control problems to more complex problems like broken springs or malfunctioning openers. By systematically troubleshooting the possible causes and seeking professional assistance when needed, you can ensure your garage door operates smoothly and securely.

Team Taylor Doors

210 SW Market St Suite 144, Lee’s Summit, MO 64063

1-816-408-6999

How to Connect Garage Door Opener-Martin Garage Door

Connecting a Garage Door Repair opener involves several steps to ensure proper installation and functionality.

Here’s a detailed guide on how to connect a garage door opener:

  1. Gather the necessary tools and materials:
    • Garage door opener unit
    • Mounting brackets and hardware
    • Safety sensors
    • Remote control(s)
    • Power drill
    • Screwdriver
    • Measuring tape
    • Level
    • Stepladder
    • Extension cord (if needed)
    • Electrical outlet (if not already present)
  2. Read the manufacturer’s instructions: Before beginning the installation, carefully read the instructions provided by the manufacturer. Different models may have specific requirements and steps to follow.
  3. Assemble the garage door opener unit:
    • Attach the mounting brackets to the ceiling or walls of the garage using the provided hardware. Ensure that they are securely fastened.
    • Follow the manufacturer’s instructions to assemble the drive mechanism and other components of the opener.
  4. Install the safety sensors:
    • Position the safety sensors near the bottom of the garage door, on each side.
    • Use a measuring tape and level to align the sensors at the same height.
    • Attach the sensors to the wall or track using the provided brackets and screws.
    • Connect the sensor wires to the garage door opener unit according to the instructions.
  5. Power supply:
    • Plug the garage door opener unit into a nearby electrical outlet. If no outlet is available, you may need to hire an electrician to install one.
    • Ensure the extension cord (if used) is properly rated for the opener’s power requirements.
  6. Configure the settings:
    • Adjust the travel and force limits on the opener unit as per the manufacturer’s instructions. This ensures that the door opens and closes to the correct positions and doesn’t exert excessive force.
    • Set up any additional features, such as auto-close timers or Wi-Fi connectivity, following the provided instructions.
  7. Test the system:
    • With the garage door fully closed, press the remote control or wall-mounted button to open the door.
    • Verify that the door opens smoothly and without any unusual noises.
    • Test the safety sensors by obstructing the infrared beam between them. The door should stop and reverse if the beam is interrupted.
  8. Install additional remote controls:
    • Follow the manufacturer’s instructions to program additional remote controls or keypads, if desired.
  9. Mount the control panel:
    • Install the control panel on the wall inside the garage, at a convenient height.
    • Connect the control panel wires to the opener unit according to the instructions.
  10. Fine-tune the settings:
    • If necessary, adjust the travel and force limits again to ensure optimal performance.
  11. Secure any loose wires:
    • Use zip ties or cable clips to secure any loose wires and prevent them from interfering with the garage door’s operation.
  12. Perform regular maintenance:
    • Lubricate the moving parts of the garage door opener as recommended by the manufacturer.
    • Periodically check the safety sensors and other components to ensure they are clean and properly aligned.

Note: This guide provides a general overview of connecting a Garage Door Repair opener. Always refer to the specific instructions provided by the manufacturer for your particular model to ensure correct installation and safe operation. If you are unsure or uncomfortable with any step, consult a professional installer.

Martin Garage Door

10411 S Parker Rd, Parker, CO 80134

1-303-663-1310

How to Close Garage Door Manually-Dynamo Overhead Garage Doors

Closing a Garage Door Repair Services manually is a simple process that can be done with a few basic steps.

Whether you are experiencing a power outage, a malfunctioning garage door opener, or simply prefer to close the door manually, this guide will provide you with a step-by-step explanation.Please note that the following instructions are meant to serve as a general guide, and it’s important to consult your specific garage door manufacturer’s instructions for any additional details or safety precautions.

Step 1: Prepare the area Before you begin, make sure the area around the garage door is clear of any obstacles or debris. This will ensure a safe and unobstructed path for the door to close.

Step 2: Disengage the garage door opener Locate the emergency release cord or lever on the garage door opener. This is usually a red handle or cord hanging from the center rail of the garage door mechanism. Pull down on the handle or cord to disengage the garage door opener. This will allow you to manually operate the door.

Step 3: Position yourself correctly Stand facing the inside of the garage with your back to the door. This position will give you the best leverage and control when closing the door manually.

Step 4: Grip the door With both hands, grab onto the bottom section or handle of the garage door. Ensure that your grip is secure and comfortable.

Step 5: Close the door Using your legs and upper body strength, begin to push the door downward. Be cautious not to apply too much force, as this could cause the door to close too quickly or forcefully. Instead, use controlled and steady pressure to guide the door downward.

Step 6: Monitor the door’s movement As you close the door, pay attention to its movement and make sure it remains balanced. If the door starts to close unevenly or becomes difficult to control, stop immediately and assess the situation. It could indicate a problem with the door’s alignment or springs, which may require professional attention.

Step 7: Secure the door Once the door is fully closed, make sure it is securely latched. Check that the locking mechanism, such as a lock bar or slide bolt, is engaged and holding the door in place. This will help prevent unauthorized access and provide additional security.

Step 8: Re-engage the garage door opener When you are ready to revert to using the garage door opener, re-engage it by pulling the emergency release cord or lever back into its original position. This will reconnect the door to the opener mechanism.

Step 9: Test the door’s operation After re-engaging the garage door opener, test the door’s operation by using the opener’s remote or wall-mounted control button. Ensure that the door opens and closes smoothly and without any issues. If you encounter any problems, consult the manufacturer’s instructions or consider contacting a professional for assistance.

Step 10: Store the emergency release handle or cord Finally, remember to store the emergency release handle or cord in a safe and easily accessible location for future use. This will ensure that it is readily available if you need to manually close the garage door again.

Closing a Garage Door Repair Services manually is a practical skill to have in case of emergencies or temporary power outages. By following these steps and taking the necessary precautions, you can safely and effectively close your garage door manually when needed.

Dynamo Overhead Garage Doors

Based in Conroe, TX

1-832-270-3373

How to Improve Garage Door Opener Range-CCM Overhead Doors

Improving the range of a Garage Door Repair opener can be a useful solution if you’re experiencing limitations in its operation. Several factors can affect the range of a garage door opener, including signal interference and physical obstructions.

In this guide, we’ll explore various methods to enhance the range of your garage door opener. Here are some steps you can take:

  1. Check the Batteries: The first step is to ensure that the batteries in both the remote control and the garage door opener itself are fresh and fully charged. Weak batteries can significantly reduce the range of the opener, so replace them if necessary.
  2. Reposition the Antenna: The antenna on the garage door opener is responsible for transmitting and receiving the signal. Start by locating the antenna, usually a wire hanging down from the motor unit. Make sure it is properly extended and not damaged. Try repositioning the antenna to a different angle, pointing it towards the direction you typically use the remote from.
  3. Clear Line of Sight: Obstructions between the remote control and the garage door opener can hinder the signal’s range. Remove any physical obstructions such as boxes, tools, or debris that might be blocking the signal’s path. Additionally, ensure that the antenna on the remote control is not covered or obstructed by your hand or any other object when operating it.
  4. Reduce Interference: Signals from other electronic devices can interfere with the garage door opener’s range. Devices like wireless routers, cordless phones, and even LED lights can cause signal interference. Keep these devices away from the opener or relocate them to reduce the interference. In some cases, you can switch to a different frequency range on your wireless devices to minimize the interference.
  5. Upgrade the Remote: If you’ve had your garage door opener for a long time, it might be worthwhile to upgrade to a newer model. Modern garage door openers often come with improved range capabilities and enhanced signal transmission technology. Look for models that specifically mention extended range or improved signal strength.
  6. Install a Range Extender: Another option is to install a range extender or a repeater. These devices are designed to boost the signal and extend the range of the garage door opener. The range extender is usually plugged into an electrical outlet in the garage, and it captures the signal from the remote control and retransmits it at a higher power, effectively increasing the range.
  7. Inspect and Adjust the Opener: It’s essential to ensure that the garage door opener is functioning optimally. Check the alignment of the opener’s antenna, as well as the motor unit itself. Make sure all components are securely fastened and not loose. Lubricate any moving parts as per the manufacturer’s instructions to ensure smooth operation.
  8. Consult the Manual: If you’ve tried the above steps and are still experiencing range issues, consult the manufacturer’s manual for specific instructions on improving the range of your particular garage door opener model. The manual may contain additional troubleshooting tips or specific recommendations for your situation.

Remember to exercise caution when working with your Garage Door Repair opener. If you’re unsure about any of the steps, it’s always best to consult a professional to avoid any damage or injury.

CCM Overhead Doors

1000 NW 80th St, Oklahoma City, OK 73114, United States

1-405-563-8982

How Garage Door Opener Works-Affordable Garage Doors

A Garage Door Repair opener is a device used to open and close garage doors automatically. It provides convenience and security by allowing homeowners to operate their garage doors without having to manually lift them.

In this article, we will explore the inner workings of a typical garage door opener and understand how it functions.

  1. Introduction to Garage Door Opener: A garage door opener consists of several key components that work together to facilitate the movement of the garage door. These components include the power unit, remote control, motor, drive mechanism, and safety sensors.
  2. Power Unit: The power unit of a garage door opener is responsible for converting electrical energy into mechanical energy. It usually consists of an electric motor, which is connected to a power source. The motor powers the operation of the drive mechanism, enabling the movement of the garage door.
  3. Remote Control: The remote control is a handheld device used to operate the garage door opener from a distance. It typically communicates with the power unit through radio frequency signals. When a button on the remote control is pressed, it sends a signal to the power unit, triggering the motor to open or close the garage door.
  4. Motor: The motor is the heart of the garage door opener. It is an electrically powered device that converts electrical energy into mechanical energy. Most modern garage door openers use either an alternating current (AC) motor or a direct current (DC) motor. The motor provides the necessary force to move the garage door along the tracks.
  5. Drive Mechanism: The drive mechanism is responsible for translating the rotational motion of the motor into the linear motion required to open or close the garage door. There are three common types of drive mechanisms used in garage door openers:
  • Chain Drive: This type of mechanism uses a metal chain to connect the motor to a trolley, which moves along a rail. As the motor rotates, the chain pulls or pushes the trolley, causing the garage door to open or close.
  • Belt Drive: In a belt drive mechanism, a reinforced rubber belt is used instead of a chain. The belt connects the motor to the trolley and operates in a similar fashion to the chain drive. Belt drives are known for their quiet operation compared to chain drives.
  • Screw Drive: This mechanism uses a threaded steel rod to drive the trolley. As the motor rotates, the rod rotates, causing the trolley to move along the track. Screw drives are durable and require less maintenance compared to chain or belt drives.
  1. Safety Sensors: To ensure safety during operation, garage door openers are equipped with safety sensors. These sensors are usually mounted near the bottom of the garage door tracks and emit an invisible beam of light. When the beam is interrupted, such as by an object or a person, the sensors send a signal to the power unit, causing the garage door to stop or reverse its movement. This feature prevents accidents or damage that could occur if the door were to close on an object or person.
  2. Control Panel: Many garage door openers have a control panel mounted on the wall inside the garage. The control panel allows users to operate the garage door opener without using a remote control. It typically includes buttons for opening and closing the door, as well as controls for programming and adjusting settings.
  3. Backup Power and Security Features: Some garage door openers come with backup power options, such as battery packs or battery backup systems. These features ensure that the garage door opener can still function during a power outage.

Additionally, garage door openers often include security features to prevent unauthorized access. Rolling code technology, for example, generates a new code each time the remote control is used, making it difficult for potential intruders to intercept and copy the code.

In conclusion, a Garage Door Repair opener is a complex device that combines electrical and mechanical components to automate the opening and closing of garage doors. The power unit, remote control, motor, drive mechanism, safety sensors, and control panel all play crucial roles in the smooth and safe operation of a garage door opener. With these components working in harmony, homeowners can enjoy the convenience and security provided by automatic garage door openers.

Affordable Garage Door

Indianapolis, IN

1-317-372-5337

Powered by WordPress & Theme by Anders Norén