Local Businesses Blog in Texas

Tag: garage door repair Wise County TX

How to Fix a Squeaky Garage Door-Wise County Door Company

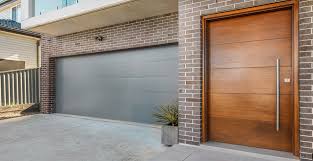
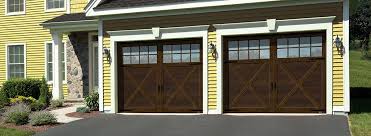
A squeaky Garage Door Repair Wise County TX can be an annoying problem, disturbing both you and your neighbors. Fortunately, it’s a common issue that can be resolved with a few simple steps.

In this guide, we will walk you through the process of fixing a squeaky garage door. By following these steps, you’ll be able to restore peace and quiet to your garage in no time.

Step 1: Identify the Source of the Noise Before you begin fixing the squeaky garage door, it’s important to identify the source of the noise. The most common causes of squeaks are worn-out rollers, hinges, or springs. Take a moment to inspect the door and determine which component is causing the problem.

Step 2: Lubricate the Rollers and Hinges Once you’ve identified the source of the squeak, the next step is to lubricate the affected components. Start by cleaning the rollers and hinges to remove any dirt or debris that may have accumulated. Next, apply a generous amount of silicone-based lubricant to the rollers, hinges, and tracks. Avoid using oil-based lubricants as they can attract more dirt and debris over time.

Step 3: Tighten Loose Hardware Squeaks can also be caused by loose hardware, such as screws, nuts, and bolts. Inspect the entire garage door system and tighten any loose hardware you find. Use a wrench or screwdriver to secure all the screws, paying close attention to the hinges, brackets, and tracks. Be careful not to overtighten, as this may cause additional issues.

Step 4: Replace Worn-out Rollers If lubrication and tightening the hardware didn’t solve the squeak, it’s possible that your rollers are worn-out and need replacement. Rollers can become damaged or worn over time, resulting in a noisy operation. To replace the rollers, open the door and secure it in place with locking pliers. Then, remove the old rollers and install the new ones, making sure they are properly aligned and seated in the tracks.

Step 5: Check and Adjust the Springs Another common cause of garage door squeaks is the springs. Inspect the springs for any signs of wear, such as rust or deformation. If you notice any damage, it’s recommended to call a professional for assistance, as working with springs can be dangerous. However, if the springs appear to be in good condition, you can try adjusting the tension. Follow the manufacturer’s instructions or seek professional guidance to ensure proper adjustment.

Step 6: Inspect and Lubricate the Opener Chain or Belt In some cases, the squeak may originate from the garage door opener’s chain or belt. Inspect the chain or belt for signs of wear or damage. If necessary, consult the opener’s manual for instructions on how to properly tension or replace the chain or belt. Additionally, apply lubricant to the opener’s moving parts according to the manufacturer’s recommendations.

Step 7: Test and Fine-tune Once you’ve completed the previous steps, it’s time to test the garage door’s operation. Open and close the door a few times to ensure that the squeak has been eliminated. If you still hear any noise, go back and inspect the components again, paying extra attention to the areas that were previously problematic.

Conclusion: Fixing a squeaky Garage Door Repair Wise County TX is a straightforward process that can be accomplished with a few basic tools and some patience. By identifying the source of the noise, lubricating the components, tightening loose hardware, and replacing worn-out parts if necessary, you can eliminate the annoying squeak and restore smooth and quiet operation to your garage door. Remember to always follow safety precautions and consult professionals when dealing with complex repairs

Wise County Door Company

1-940-304-0821

How to Reset Toyota Garage Door Opener? – Wise County Door and Gate

As a Toyota owner who has recently reset my garage door opener, I can share my personal experience and offer guidance on how to complete this task effectively.

Here’s a step-by-step account from Garage Door Repair Wise County TX of how I reset my Toyota garage door opener:

  1. Clearing Existing Programming: I began by clearing any existing programming on my Toyota’s garage door opener system. This step ensures a fresh start for reprogramming.
    • I located the buttons on the overhead console or rearview mirror that were associated with the garage door opener. These buttons were typically labeled with icons or symbols representing a garage door.
    • Holding down the appropriate buttons, I waited until the indicator light on the console or mirror started flashing rapidly. This confirmed that the existing programming had been cleared.
  2. Activating Programming Mode: After clearing the programming, I needed to activate the programming mode on the garage door opener. The specific steps may vary depending on the Toyota model and the type of garage door opener.
    • I referred to my Toyota vehicle’s owner’s manual to find the specific instructions for entering programming mode. The manual had a dedicated section on programming the garage door opener.
    • Following the instructions provided, I pressed a combination of buttons on the overhead console or rearview mirror to activate the programming mode.
  3. Setting Up the Garage Door Opener: With the garage door opener in programming mode, I proceeded to set it up and link it to my Toyota vehicle.
    • I located the “Learn” or “Program” button on the garage door opener motor unit. This button was typically found on the back or side of the motor unit, near the antenna.
    • Pressing and releasing the “Learn” or “Program” button on the garage door opener, I ensured that the indicator light on the motor unit illuminated or blinked, indicating that it was ready to receive the signal from my Toyota vehicle.
  4. Programming the Garage Door Opener to the Toyota Vehicle:
    • Returning to my Toyota vehicle, I pressed the desired garage door opener button on the overhead console or rearview mirror. I held down the button until the indicator light started flashing rapidly.
    • Aiming the remote control transmitter of the garage door opener towards the motor unit, I pressed the button on the remote control that I wanted to use to operate the garage door. I held the button down until the indicator light on the motor unit blinked or turned off.
    • To test the programmed button, I pressed it to activate the garage door. I observed the door opening or closing in response.
  5. Repeating for Additional Buttons (if applicable): If my Toyota vehicle had multiple garage door opener buttons, I repeated the previous step to program each additional button to a different garage door or gate opener.
  6. Exiting Programming Mode: Once I finished programming all the desired buttons, I exited the programming mode to complete the process.
    • I followed the instructions in my Toyota vehicle’s owner’s manual to exit the programming mode. Typically, this involved pressing a specific combination of buttons on the overhead console or rearview mirror.
  7. Testing the Garage Door Opener: After completing the programming process, it was important to test the garage door opener to ensure that it functioned properly.
    • I parked my Toyota vehicle within range of the garage door or gate opener.
    • Pressing the programmed button on the overhead console or rearview mirror, I activated the garage door. I observed the door opening or closing in response.

By following these steps from Garage Door Repair Wise County TX and referring to the Toyota vehicle’s owner’s manual for specific instructions, I successfully reset and programmed the garage door opener system for my Toyota vehicle. It was satisfying to experience the convenience of operating my garage door directly from my car’s console or rearview mirror.

Wise County Door and Gate

Wise County, TX

940-304-0821

Can a Genie Garage Door Opener be Reprogrammed-Wise County Automatic Gates LLC

Yes, a Genie Garage Door Repair Wise County TX opener can be reprogrammed. Genie is a well-known brand that offers a range of garage door openers designed to provide convenience and security for homeowners. These openers can be reprogrammed to adjust various settings and functionalities based on individual preferences and requirements.

Reprogramming a Genie garage door opener typically involves a series of steps that are relatively straightforward. However, it is important to consult the specific instructions provided by the manufacturer for the particular model you own, as the process may vary slightly depending on the model.

To begin reprogramming a Genie garage door opener, you will usually need to access the opener’s control panel or remote. This can typically be done by removing the cover of the remote or the control panel located on the garage wall. Once you have gained access to the control panel, you can follow these general steps:

  1. Locate the “Learn” or “Program” button: This button is usually found on the control panel or the opener itself. It may be labeled as “Learn,” “Program,” or feature an icon representing programming mode.
  2. Press and hold the “Learn” or “Program” button: This step initiates the programming mode and allows you to configure new settings.
  3. Release the button: After holding the button for a few seconds, release it. This action indicates that the opener is ready to receive new programming instructions.
  4. Activate the programming mode on the remote or keypad: This step involves pressing a specific combination of buttons on the remote or keypad that you want to program. The combination may vary depending on the model and the desired function (e.g., opening the door, activating the lights, etc.).
  5. Test the new programming: Once you have completed the programming steps, you can verify if the changes were successful. Test the remote or keypad by pressing the programmed button to ensure it performs the intended action, such as opening or closing the garage door.

It is essential to note that the exact process and steps may differ based on the model and features of your Genie garage door opener. Therefore, it is crucial to refer to the user manual or instructions provided by Genie for accurate guidance. The user manual typically contains detailed instructions, diagrams, and troubleshooting tips to assist you throughout the reprogramming process.

Reprogramming a Genie garage door opener provides several benefits. For instance, it allows you to sync multiple remotes or keypads with the opener, providing convenience for multiple users or additional entry points. Additionally, reprogramming allows you to change the security codes or PINs associated with the opener, enhancing the security of your garage.

Moreover, some Genie models offer advanced features such as smart home integration or compatibility with smartphone apps. Reprogramming may enable you to connect your opener to your home automation system or configure it to work with voice control assistants, providing enhanced functionality and control.

In conclusion, Genie Garage Door Repair Wise County TX openers can be reprogrammed to adjust settings, synchronize remotes or keypads, change security codes, and enable advanced features. The process typically involves accessing the control panel, pressing the programming button, and configuring new settings using the remote or keypad. It is crucial to consult the user manual or instructions specific to your Genie model for accurate guidance. Reprogramming offers increased convenience, security, and functionality, making it a valuable feature of Genie garage door openers.

Wise County Automatic Gates LLC

200 W Main St, Decatur, TX 76234

1-970-703-0776

How to Align Genie Garage Door Sensors-Wise County Garage & Overhead Doors

Genie Garage Door Repair Wise County TX sensors play a crucial role in ensuring the safe and efficient operation of your garage door. These sensors are designed to detect objects or obstructions in the path of the door, preventing accidents or damage. However, if the sensors are misaligned, they may not function properly, leading to issues such as the door not closing or reversing unexpectedly.

In this guide, we will provide you with step-by-step instructions on how to align Genie garage door sensors effectively.

Tools Required:

  1. Tape measure
  2. Stepladder
  3. Screwdriver (if necessary)
  4. Level (optional)

Step 1: Understand the Sensor System: Before starting the alignment process, it is important to familiarize yourself with the sensor system on your Genie garage door opener. Typically, Genie sensors consist of two components: the sending sensor and the receiving sensor. The sending sensor emits an invisible beam, while the receiving sensor detects the beam. If the beam is interrupted, the garage door will not close or will reverse.

Step 2: Check for Obstructions: Inspect the area around the sensors for any obstructions that might be blocking the sensor beam. Remove any objects such as dirt, cobwebs, or debris that may be obstructing the sensors. Ensure that the lens on each sensor is clean and free from dirt or smudges.

Step 3: Verify Sensor Alignment: Stand inside your garage and look at the sensors. The sending sensor is usually positioned on the left side of the garage door, while the receiving sensor is on the right side. Check if the indicator lights on both sensors are lit and solid. If one or both lights are blinking, it indicates misalignment.

Step 4: Adjust the Receiving Sensor: Start with the receiving sensor as it is the one that detects the beam. Gently loosen the screws securing the sensor to the mounting bracket or track. Move the sensor slightly until the indicator light becomes solid. Use a tape measure to ensure that both sensors are at the same height from the ground. Tighten the screws once the sensor is properly aligned.

Step 5: Align the Sending Sensor: Next, adjust the sending sensor to align it with the receiving sensor. Repeat the same process of loosening the screws, moving the sensor, and checking the indicator light. Make sure that the beam from the sending sensor is hitting the center of the receiving sensor. Use a level to ensure that both sensors are parallel to each other. Once aligned, tighten the screws to secure the sending sensor.

Step 6: Test the Alignment: After aligning the sensors, perform a test to ensure they are working correctly. Close the garage door using the wall button or remote control. If the sensors are properly aligned, the door should close smoothly without any issues. If the door does not close or reverses, it indicates that further adjustment is needed.

Step 7: Fine-tune the Alignment: If the door does not close properly or reverses, fine-tune the sensor alignment. Make minor adjustments by moving the sensors slightly in small increments. Test the door after each adjustment until it closes without any problems. Continue this process until the door operates smoothly and consistently.

Step 8: Regular Maintenance: To maintain the proper functioning of your Genie garage door sensors, periodically clean the lenses and ensure there are no obstructions blocking the sensor beam. Additionally, inspect the wires and connections for any damage or loose connections. Taking these steps regularly will help prevent future alignment issues.

Conclusion: Proper alignment of Genie Garage Door Repair Wise County TX sensors is essential for the safe and efficient operation of your garage door. By following the steps outlined in this guide, you can easily align the sensors to ensure they work optimally. Remember to perform regular maintenance to keep the sensors in good condition. If you encounter persistent issues or difficulties in aligning the sensors, consult the Genie garage door opener’s user manual or contact a professional for assistance.

Wise County Garage & Overhead Doors

Briar, TX

940-360-3638

How to Fix Garage Door Spring – Wise County Door and Gate

Fixing a garage door spring can be a daunting task, but with the right tools and knowledge, it can be done safely and efficiently. Garage Door Repair Wise County TX springs are responsible for counterbalancing the weight of the door, making it easier to open and close.

There are two types of garage door springs: Torsion and Extension.

Torsion springs are mounted above the door and are wound tightly to store energy, while extension springs are mounted on either side of the door and extend when the door is opened.

Before attempting to fix a garage door spring, it is important to take proper safety precautions. Garage door springs are under a lot of tension and can be dangerous if they are not handled properly.

Follow these steps to fix a Garage Door Repair Wise County TX spring safely and efficiently:

Step 1: Identify the Problem

The first step in fixing a garage door spring is to identify the problem. If the door is not opening or closing properly, the spring may be broken or damaged. If you hear a loud bang when the door is opening or closing, the spring may have snapped. It is important to inspect the spring to determine the extent of the damage.

Step 2: Gather the Necessary Tools

To fix a garage door spring, you will need the following tools:

  • Winding bars
  • Socket wrench
  • Safety glasses
  • Leather gloves
  • Ladder
  • Tape measure
  • Replacement spring (if necessary)

Step 3: Release the Tension on the Spring

Before attempting to fix a garage door spring, you must release the tension on the spring. This can be done by placing a winding bar into the winding cone on the spring and turning it counterclockwise until the tension is released. Be sure to keep a firm grip on the winding bar and keep your face and body away from the spring.

Step 4: Remove the Old Spring

Once the tension is released, you can remove the old spring. Use a socket wrench to loosen the bolts on the stationary cone and slide the cone off the shaft. Slide the old spring off the shaft and remove it from the garage door.

Step 5: Measure the New Spring

Before installing a new spring, you must measure the old spring to determine the correct size replacement. Measure the length of the spring, the inside diameter, and the wire size.

Step 6: Install the New Spring

Install the new spring by sliding it onto the shaft and positioning it in place. Slide the stationary cone onto the shaft and tighten the bolts with a socket wrench. Use a winding bar to wind the spring clockwise until it reaches the appropriate tension.

Step 7: Test the Door

Once the new spring is installed, test the door to ensure it is opening and closing properly. If the door is still not functioning correctly, you may need to adjust the tension on the spring.

Step 8: Make Adjustments

If the door is not opening and closing properly, you may need to adjust the tension on the spring. This can be done by winding the spring either tighter or looser with the winding bars. Be sure to make small adjustments and test the door after each adjustment.

Step 9: Secure the Spring

Once the tension is adjusted to the correct level, secure the spring by tightening the bolts on the stationary cone with a socket wrench.

Step 10: Perform Regular Maintenance

To ensure your garage door springs continue to function properly, it is important to perform regular maintenance. This includes lubricating the springs and rollers and inspecting the door for any signs of wear or damage.

In conclusion, fixing a garage door spring can be a challenging task, but with the right tools and knowledge, it can be done safely and efficiently. Remember to take proper safety precautions and follow the steps outlined above to fix your garage door spring.

Wise County Door and Gate

1-940-304-0821

Powered by WordPress & Theme by Anders Norén