Local Businesses Blog in Texas

Tag: garage door repair livonia mi

How Do I Adjust My Chamberlain Garage Door Opener – Brothers Garage Door Service

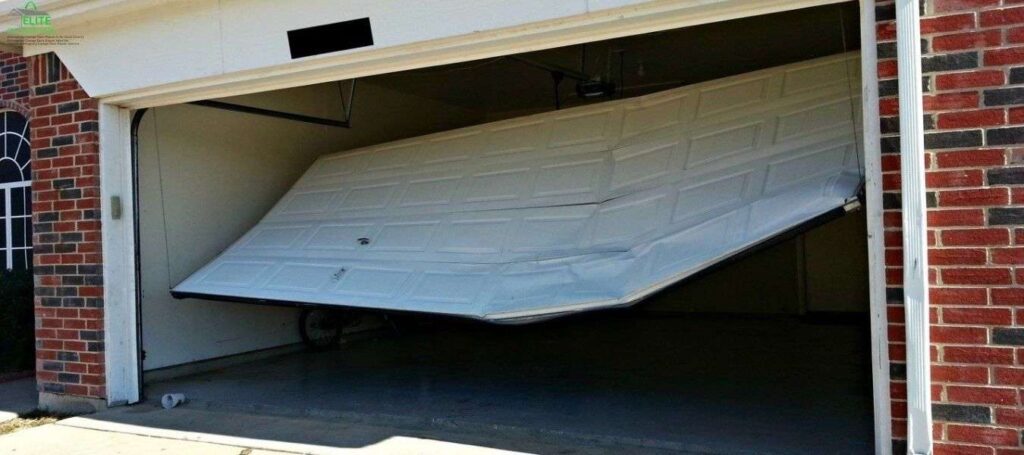
Garage Door Repair Livonia MI is a fundamental aspect of maintaining its optimal performance and ensuring the smooth operation of your garage door.

From setting the travel limits to adjusting the force and sensitivity settings, understanding how to properly adjust your Chamberlain garage door opener is essential for safe and efficient operation. In this comprehensive guide, we’ll walk you through the steps to adjust your Chamberlain garage door opener, covering key adjustments, safety considerations, and troubleshooting tips to address common issues.

Understanding Your Chamberlain Garage Door Opener

Before diving into the adjustment process, it’s crucial to familiarize yourself with the main components of your Chamberlain garage door opener:

1. Motor Unit:

The motor unit is the central component of the garage door opener, containing the motor, control circuitry, and other essential parts. It is typically mounted on the ceiling of your garage, near the center of the door.

2. Remote Controls:

Chamberlain garage door openers come with remote controls that allow you to operate the door from a distance. These handheld devices transmit signals to the opener, triggering the opening and closing functions.

3. Wall Control Panel:

The wall control panel is installed inside the garage and provides a convenient way to operate the garage door opener from within the garage. It usually features buttons for opening, closing, and controlling additional functions such as turning on lights.

4. Safety Sensors:

Safety sensors are crucial safety features that detect obstructions in the path of the closing garage door. They consist of a transmitter and receiver mounted near the bottom of the door tracks and automatically reverse the door if an obstruction is detected.

Adjusting Your Chamberlain Garage Door Opener

Now, let’s walk through the steps to adjust your Chamberlain garage door opener:

1. Adjusting Travel Limits:

To adjust the travel limits of your garage door opener, locate the adjustment screws on the motor unit. These screws control the distance the door travels when opening and closing. Use a flat-head screwdriver to turn the adjustment screws clockwise to decrease the travel distance and counterclockwise to increase it. Adjust the travel limits incrementally until the door closes and opens fully without excessive force.

2. Setting Force and Sensitivity:

Chamberlain garage door openers feature force and sensitivity adjustment controls to regulate the amount of force exerted by the opener and the sensitivity of the safety sensors. Use the controls on the motor unit or wall control panel to adjust the force and sensitivity settings according to the manufacturer’s instructions. Start with the default settings and make adjustments as needed to achieve smooth and consistent operation.

3. Testing:

After making adjustments to your Chamberlain garage door opener, it’s essential to test the door’s operation to ensure that it opens and closes smoothly and without hesitation. Use both the remote controls and the wall control panel to operate the door and verify that it responds correctly to commands. Additionally, test the safety sensors by placing an object in the path of the closing door to ensure that it reverses automatically.

Safety Considerations and Troubleshooting Tips

When adjusting your Chamberlain garage door opener, always prioritize safety and follow these important guidelines:

  1. Power Off: Before making any adjustments, disconnect power to the garage door opener to prevent accidental activation.
  2. Read the Manual: Refer to the manufacturer’s instructions and user manual for specific guidance on adjusting your Chamberlain garage door opener.
  3. Work Carefully: Use caution when working with moving parts and electrical components to avoid injury or damage to the opener.
  4. Professional Assistance: If you’re unsure about how to adjust your garage door opener or encounter any issues, seek assistance from a qualified technician or installer.

If you experience any problems with your Chamberlain garage door opener, consider the following troubleshooting tips:

  • Check Power Supply: Ensure that the opener is receiving power from the electrical outlet and that the circuit breaker or fuse is not tripped.
  • Inspect Remote Batteries: If the remote controls are not working, replace the batteries and ensure that they are installed correctly.
  • Clean Sensors: If the safety sensors are not functioning correctly, clean the lenses with a soft cloth and check for any obstructions blocking the sensor beam.
  • Reset Opener: If the opener is not responding to commands, try resetting it by unplugging it from the power source for a few minutes and then plugging it back in.

By following these adjustment procedures, safety considerations, and troubleshooting tips, you can ensure that your Chamberlain garage door opener operates smoothly and reliably for years to come. If you encounter any difficulties or have questions about adjusting your garage door opener, don’t hesitate to seek assistance from a professional technician or contact Chamberlain customer support for further guidance.

Brothers Garage Door Service

29522 Wentworth St, Livonia, MI 48154, United States

1-734-292-0971

How To Fix Dented Garage Door Panel – Brothers Garage Door Service


Garage Door Repair Livonia MI Whether the dent is minor or significant, repairing it can improve the appearance and functionality of your garage door.

Here’s a detailed guide on how to fix a dented garage door panel:

1. Assess the Damage: Before attempting any repairs, carefully assess the extent of the dent in the garage door panel. Determine the size, depth, and location of the dent to determine the best course of action. Minor dents may be easily repairable using DIY methods, while larger or more severe dents may require professional assistance or panel replacement.

2. Gather Materials and Tools: Depending on the size and severity of the dent, you may require the following materials and tools for the repair:

  • Rubber mallet or hammer
  • Wooden block or dowel
  • Heat source (hair dryer or heat gun)
  • Dry ice or compressed air (for small dents)
  • Aluminum foil (for heating method)
  • Putty knife or scraper
  • Sandpaper or sanding block
  • Body filler or auto body repair kit
  • Primer and paint matching the garage door color
  • Safety gloves and goggles

3. Apply Heat or Cold: For small dents, you can try using heat or cold to pop the dent back into place. If using heat, carefully heat the dented area using a hair dryer or heat gun. Be sure to keep the heat source moving to avoid damaging the paint or causing uneven heating. Once the area is heated, quickly apply dry ice or compressed air to the dent to cool and contract the metal, causing it to pop back into shape. Alternatively, you can try using a heat source to warm the dent and then apply pressure from the inside with a wooden block or dowel to push the dent out.

4. Use a Dent Removal Kit: Dent removal kits are available for purchase at auto supply stores and online retailers. These kits typically include specialized tools and accessories designed to remove dents from metal surfaces. Follow the instructions provided with the kit to apply the appropriate techniques and tools to pop the dent back into place. Be sure to use caution and follow safety precautions when using dent removal tools to avoid damaging the garage door or injuring yourself.

5. Hammer Out the Dent: For larger or more stubborn dents, you may need to use a rubber mallet or hammer to gently tap the dent back into place. Place a wooden block or dowel behind the dent to provide support and distribute the force of the hammer blows. Use light, even taps to gradually work the dent out from the inside. Avoid using excessive force or striking the door directly with the hammer, as this could cause further damage or deformations.

6. Fill and Sand the Area: Once the dent has been popped out as much as possible, use a putty knife or scraper to apply a thin layer of body filler to the dented area. Smooth the filler over the surface of the dent, filling in any remaining imperfections or low spots. Allow the filler to dry completely according to the manufacturer’s instructions. Once dry, use sandpaper or a sanding block to smooth and blend the repaired area with the surrounding surface of the garage door.

7. Prime and Paint: After sanding the repaired area, apply a coat of primer to the entire panel to promote adhesion and protect against rust. Once the primer is dry, apply multiple thin coats of paint matching the color of the garage door. Be sure to allow each coat to dry completely before applying the next one. Follow the manufacturer’s instructions for proper application and drying times. Once the paint has dried, inspect the repaired area for any imperfections and touch up as needed.

8. Maintain and Protect: To prevent future dents and maintain the appearance of your garage door, take proactive measures to protect it from damage. Avoid parking too close to the door or allowing children to play near it, as this can increase the risk of dents and scratches. Consider installing protective padding or bumpers on the interior of the garage to cushion the impact of accidental collisions. Regularly inspect the door for signs of damage or wear and address any issues promptly to prevent further damage.


Garage Door Repair Livonia MI  By following these steps and taking the necessary precautions, you can repair the dent and restore the appearance and functionality of your garage door. If you’re unsure about how to repair a dent or if the damage is extensive, it’s best to seek professional assistance to ensure a proper and lasting repair.

Brothers Garage Door Service

29522 Wentworth St, Livonia, MI 48154, United States

1-734-292-0971

How To Reset Chamberlain Garage Door Keypad – Brothers Garage Door Service


Resetting a Chamberlain Garage Door Repair Livonia MI is a straightforward process that involves a few key steps.

This comprehensive guide will walk you through the procedure in detail, ensuring a successful reset. Before you begin, gather the necessary materials, including the user manual for your specific Chamberlain garage door opener model.

1. Locate the “Learn” Button:

  • Begin by finding the motor unit of your Chamberlain garage door opener. The “Learn” button is typically located on the back or side of this unit.
  • Note that the color of the “Learn” button may vary; it is commonly yellow, red, or purple.

2. Prepare the Keypad:

  • Stand within a few feet of the garage door opener motor unit to ensure a strong and reliable signal.
  • Ensure that the keypad is in good condition, without any physical damage, and that the batteries are functioning correctly.

3. Press the “Learn” Button:

  • Press and release the “Learn” button on the garage door opener motor unit. This action puts the opener into programming mode.
  • Observe the indicator light on the motor unit; it should start blinking, indicating that the opener is ready to learn a new code.

4. Enter a New PIN on the Keypad:

  • Within 30 seconds of pressing the “Learn” button, go to the keypad.
  • Enter a new four-digit PIN of your choice. Ensure that you press the “Enter” key on the keypad after inputting the new code.

5. Test the New PIN:

  • Wait for the indicator light on the garage door opener motor unit to stop blinking.
  • Test the new PIN by entering it on the keypad and pressing the “Enter” key.
  • Observe the garage door’s response – it should either open or close.

6. Troubleshooting:

  • If the garage door doesn’t respond, double-check that you are within the specified range and that there are no obstructions hindering the signal.
  • Repeat the entire process, making sure to follow each step meticulously.

7. Refer to the User Manual:

  • If you encounter difficulties or if your Chamberlain garage door opener model has specific instructions, consult the user manual.
  • The manual contains valuable model-specific information, troubleshooting tips, and any variations in the reset process.

8. Final Checks:

  • Once the keypad is successfully reset, conduct additional tests to ensure consistent functionality.
  • Consider changing the batteries in the keypad periodically to maintain reliable performance.

9. Additional Security Measures:

  • For enhanced security, update your garage door opener access codes periodically.
  • Avoid sharing access codes with unauthorized individuals to mitigate potential security risks.

10. Document the Changes:

  • Record the new PIN in a secure location for future reference.
  • Keep the user manual and any additional documentation in an easily accessible place.

By following these detailed steps, you should be able to reset your Chamberlain Garage Door Repair Livonia MI effectively. Always refer to your specific model’s user manual for precise instructions and any model-specific details.

Brothers Garage Door Service

29522 Wentworth St, Livonia, MI 48154, United States

1-734-292-0971

How to Reset Chamberlain Garage Door Opener – Brother’s Garage Door

Here’s my personal experience and step-by-step account of how I reset my Chamberlain garage door opener according to Garage Door Repair:

  1. Disconnecting the power:
    • I started by ensuring my safety and disconnecting the power to the garage door opener. I located the power cord and unplugged it from the outlet or turned off the power switch connected to the opener unit.
  2. Locating the “Learn” button:
    • Next, I located the “Learn” button on the garage door opener unit. It was situated near the antenna wire or on the back panel of the unit. The button was clearly labeled as “Learn” or had a similar designation.
  3. Pressing and holding the “Learn” button:
    • With the power disconnected, I pressed and held down the “Learn” button using my finger. This action activated the reset mode on the garage door opener.
  4. Reconnecting the power:
    • While continuing to hold down the “Learn” button, I reconnected the power to the garage door opener. I plugged the power cord back into the outlet or turned on the power switch. I made sure to keep holding the “Learn” button throughout this step.
  5. Releasing the “Learn” button:
    • After a few seconds, I released the “Learn” button. I noticed that the garage door opener unit emitted a beep sound or its indicator lights started flashing, indicating that the reset process had started.
  6. Waiting for the indicators to stop flashing:
    • I patiently waited for the indicator lights on the garage door opener to stop flashing. It usually took around 30 seconds to a minute for the lights to stabilize, signifying that the reset process was complete.
  7. Reprogramming the remote control:
    • To restore the functionality of my remote control, I followed the specific instructions provided by Chamberlain. This typically involved pressing the “Learn” button on the opener unit and then pressing the desired button on the remote control. The opener unit acknowledged the programming by flashing its indicator lights or emitting a beep sound.
  8. Testing the programming:
    • Once I had reprogrammed the remote control, I tested it by pressing the programmed button. I observed whether the garage door opened or closed as expected. If it didn’t work, I double-checked the programming steps and made sure I followed them correctly.
  9. Repeating for additional remotes or keypads:
    • If I had additional remotes or keypads that needed to be programmed, I repeated the previous step for each device. I referred to the specific instructions provided by Chamberlain for each device to ensure proper programming.
  10. Finalizing the reset process:
    • To complete the reset process, I referred to the user manual or visited the Chamberlain website for any additional steps or settings that needed to be adjusted. This included reprogramming any keypad access codes, adjusting travel limits, or setting other preferences specific to my Chamberlain garage door opener model.

Remember, as stated in Garage Door Repair, the steps I described are based on my personal experience, and the specific instructions may vary depending on your Chamberlain garage door opener model. Always consult the user manual or visit the Chamberlain website for detailed, model-specific instructions on how to reset your particular garage door opener.

Brother’s Garage Door

29522 Wentworth St. Livonia, MI 48154

734-292-0971

Powered by WordPress & Theme by Anders Norén