Local Businesses Blog in Texas

Category: general Page 1 of 2

Repairing a Kitchen Sink Drain: DIY Solutions for a Smooth Flow – Corinth’s Best Plumbing & Hydro Jetting

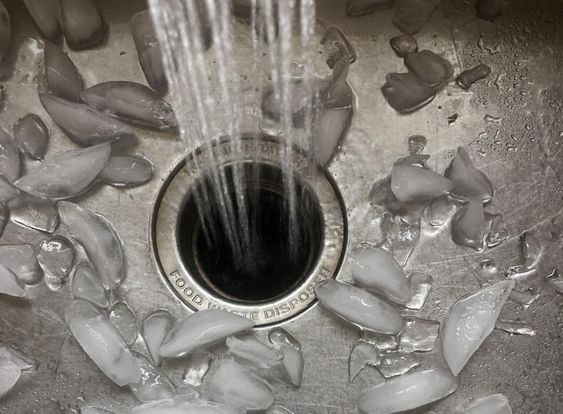
As a dedicated DIY enthusiast, I’ve always believed in the power of taking matters into my own hands. So, when a clogged kitchen sink drain reared its ugly head in my home, I saw it as an opportunity to roll up my sleeves and put my DIY skills to good use.

By following Plumbing Corinth TX, I’ll share my experience and guide you through the process of repairing a kitchen sink drain, offering DIY solutions to ensure a smooth flow in your sink.

Identifying the Problem

Before we dive into the DIY solutions, it’s crucial to identify the problem with your kitchen sink drain. Common issues include slow drainage, gurgling sounds, and complete blockage. Once you’ve pinpointed the problem, you can proceed with the appropriate repair.

Tools and Materials You’ll Need

To get started, gather the necessary tools and materials:

  1. Plunger: An essential tool for dislodging clogs.
  2. Pipe Wrench: Used for tightening and loosening pipe connections.
  3. Bucket and Towels: To catch water and prevent spills.
  4. Plumbers Snake or Auger: A long, flexible cable for reaching deep into the drain to break up and remove clogs.
  5. Baking Soda and Vinegar: A natural, chemical-free option for breaking down grease and organic clogs.
  6. Boiling Water: To flush out clogs and clean the drain.
  7. Rubber Gloves and Safety Glasses: To protect your hands and eyes from potential splashes.

DIY Solutions for a Clogged Kitchen Sink Drain

Now, let’s explore some DIY solutions to address common kitchen sink drain issues:

  1. Plunge It: If you’re dealing with a minor clog, start with a plunger. Place the plunger over the drain, ensuring a tight seal. Push and pull the plunger several times to create pressure that dislodges the clog.
  2. Baking Soda and Vinegar: For organic clogs, pour half a cup of baking soda down the drain, followed by half a cup of vinegar. Cover the drain and let it sit for at least 30 minutes. Then, flush it with boiling water.
  3. The Boiling Water Method: Boil a kettle of water and pour it directly down the drain. This can help dissolve grease and dislodge minor clogs.
  4. Use a Plumbers Snake or Auger: If plunging and chemical methods don’t work, it’s time to use a plumbers snake. Insert the snake into the drain and crank the handle to break up and remove the clog.
  5. Check the P-Trap: The P-trap is the U-shaped pipe beneath the sink. Place a bucket under it to catch any water that may spill out. Unscrew the P-trap and inspect it for clogs. Clean it thoroughly and reassemble.
  6. Vent Pipe Inspection: If your kitchen sink shares a vent pipe with another fixture (like a bathroom sink), the problem may be in the vent pipe. Climbing onto the roof and using a snake or auger, you can try to clear the vent pipe of any debris.

Safety Precautions

While tackling a clogged kitchen sink drain is a DIY-friendly project, it’s essential to take safety precautions:

  1. Wear Gloves and Safety Glasses: Protect your hands and eyes from potential splashes, especially when using chemicals.
  2. Never Mix Chemicals: If you’ve used a chemical drain cleaner, do not switch to a different one. Mixing chemicals can be dangerous.
  3. Be Cautious with the Snake: When using a plumbers snake or auger, be careful not to scratch or damage the interior of the drain pipe. Slow, deliberate movements are key.
  4. Ventilation: Ensure adequate ventilation when using chemical drain cleaners.

Preventive Maintenance

Preventing future kitchen sink drain issues is just as important as knowing how to address them. Here are some tips for preventive maintenance:

  1. Dispose of Grease Properly: Avoid pouring cooking grease down the drain. Instead, collect it in a container and dispose of it in the trash.
  2. Use a Strainer: Place a strainer in your sink drain to catch food scraps and debris, preventing them from entering the pipes.
  3. Regular Cleaning: Routinely clean the sink and drain with a mixture of baking soda and vinegar to help prevent clogs.
  4. Hot Water Flush: Run hot water through the sink regularly to keep pipes clear.
  5. Avoid Chemical Cleaners: Limit the use of chemical drain cleaners, as they can damage pipes over time.

When to Call a Professional

While many clogged sink drains can be successfully cleared with DIY methods, there are cases where it’s best to call a professional plumber:

  1. Persistent Clogs: If your sink drain repeatedly clogs, there may be an underlying issue that requires professional assessment.
  2. Foul Odors: Persistent foul odors emanating from the drain could indicate a more significant problem.
  3. Water Backup: If water is backing up into other fixtures in your home, it’s a sign of a more extensive plumbing issue.
  4. Older Plumbing: In older homes with deteriorating pipes, it’s wise to consult a professional to assess the overall plumbing system.

Conclusion

Based from Plumbing Corinth TX, repairing a clogged kitchen sink drain can be a satisfying and cost-effective DIY project. With the right tools, materials, and a little know-how, you can take on this common household issue and restore the smooth flow of water in your sink. Remember to take safety precautions and consider calling a professional if you encounter persistent or more complex plumbing issues. Happy DIY plumbing!

Corinth’s Best Plumbing & Hydro Jetting

2705 Meadowview Dr, Corinth, TX 76210, United States

940-286-3137

Hydro Jetting vs. Traditional Drain Cleaning: Which is Right for You? – Addison’s Best Plumbing & Hydro Jetting

As a homeowner who has experienced my fair share of drain clogs, I understand the frustration and inconvenience they can bring. When faced with a stubborn blockage, the decision to choose between hydro jetting and traditional drain cleaning methods can be challenging. Both methods have their merits, and making the right choice depends on the nature of the clog and your specific needs.

I’ll share my experiences with both hydro jetting and traditional drain cleaning, offering insights to help you decide which is the right solution for your situation as stated in Hydro Jetting.

The Battle Against Drain Clogs

One sunny afternoon, I found myself in the midst of a kitchen sink crisis. The water in the sink was draining at a snail’s pace, and there was an unpleasant odor in the air. I was dealing with a clog, and it was time to take action. The question was, which method should I choose?

Understanding Traditional Drain Cleaning

Traditional drain cleaning methods have been around for a long time and are often the first choice for homeowners dealing with common clogs. These methods include:

  1. Plunging: The trusty plunger is a go-to tool for many homeowners. It’s effective for minor clogs and can create enough pressure to dislodge blockages.
  2. Chemical Drain Cleaners: Chemical drain cleaners contain powerful chemicals that can dissolve clogs. They are readily available and can be a quick fix for simple clogs.
  3. Drain Snakes or Augers: Drain snakes are long, flexible tools that can be used to physically break up and remove blockages in the pipes.
  4. DIY Methods: DIY remedies like baking soda and vinegar or boiling water are often employed to tackle minor clogs.

The Benefits of Traditional Drain Cleaning:

  • Cost-Effective: Traditional methods are usually budget-friendly, making them an attractive option for minor clogs.
  • Accessibility: Many traditional tools and products are readily available at local stores.
  • Speed: Some traditional methods, such as plunging, can provide quick results for minor clogs.

The Limitations of Traditional Drain Cleaning:

  • Superficial Cleaning: Traditional methods may not fully remove all debris from the pipes, potentially leaving residue that can lead to future clogs.
  • Harsh Chemicals: Chemical drain cleaners can be harmful to your pipes and the environment, and they may not be effective for all types of clogs.
  • Limited for Complex Clogs: For stubborn, deep-seated clogs or those caused by tree roots or mineral buildup, traditional methods may fall short.

My Experience with Traditional Drain Cleaning

In my case, I tried both plunging and using a chemical drain cleaner to address the kitchen sink clog. While these methods offered temporary relief, the clog persisted, indicating a more significant issue deeper within the pipes. It was clear that I needed a more powerful solution.

Exploring the Power of Hydro Jetting

Hydro jetting is a relatively modern approach to drain cleaning that employs the force of high-pressure water to clear clogs and clean the interior of the pipes. This method is performed by professionals using specialized equipment.

How Hydro Jetting Works:

  1. Assessment: A professional will assess the clog and determine the appropriate pressure level for hydro jetting.
  2. High-Pressure Water: A hose with a specialized nozzle is inserted into the drain. The equipment delivers a powerful stream of high-pressure water, which can range from 7,000 to 60,000 PSI (pounds per square inch).
  3. Clog Removal: The force of the water can break up and dislodge even the most stubborn clogs, including grease, mineral deposits, tree roots, and debris.
  4. Pipe Cleaning: Hydro jetting not only clears clogs but also scours the interior of the pipes, removing built-up residue and improving overall drainage.

The Benefits of Hydro Jetting:

  • Thorough Cleaning: Hydro jetting is exceptionally effective at completely clearing clogs and cleaning the pipes’ interior, reducing the likelihood of future blockages.
  • Versatility: It can tackle a wide range of clogs, from minor obstructions to severe, deep-seated blockages.
  • Environmental Friendliness: Hydro jetting uses only water, making it an eco-friendly option without the use of harsh chemicals.
  • Long-Term Solution: Hydro jetting provides a longer-lasting solution, reducing the need for frequent maintenance.

The Limitations of Hydro Jetting:

  • Professional Service: Hydro jetting requires the expertise of a professional and specialized equipment, which may be costlier than traditional methods.
  • Potentially Damaging to Old Pipes: In some cases, hydro jetting can damage older or fragile pipes. A professional will assess the condition of your plumbing before proceeding.

My Experience with Hydro Jetting

Given the persistent clog in my kitchen sink, I decided to seek the expertise of a professional plumbing service that offered hydro jetting. The results were impressive. The powerful stream of water effortlessly removed the clog and cleaned the pipes, leaving them in a pristine condition. It was evident that the issue was resolved at its core, and I could enjoy the peace of mind that the problem wouldn’t return anytime soon.

Choosing the Right Method for Your Situation

The decision to use hydro jetting or traditional drain cleaning methods depends on the nature and severity of the clog, as well as your budget and environmental considerations.

  1. Traditional Drain Cleaning: For minor clogs or those that are easily accessible, traditional methods like plunging or chemical cleaners can be a cost-effective and quick solution. These methods are suitable for routine maintenance or occasional minor clogs.
  2. Hydro Jetting: When faced with persistent, deep-seated clogs, or if you want a thorough cleaning of your pipes, hydro jetting is the ideal choice. It provides a long-term solution and prevents future clogs by cleaning the pipes’ interior.

Preventive Maintenance and Best Practices

Regardless of the method you choose, preventive maintenance is essential to keep your drains free of clogs. Here are some best practices to consider:

  • Use drain strainers to catch debris and prevent it from entering the pipes.
  • Avoid pouring grease, oils, or coffee grounds down the drain.
  • Run hot water down the drain regularly to help clear any buildup.
  • Schedule routine professional drain cleaning, especially if you have older pipes or live in an area prone to tree root intrusion.

Conclusion: Finding the Right Solution

According to Hydro Jetting, in the battle against drain clogs, the right solution depends on the nature and severity of the problem. Traditional drain cleaning methods are effective for minor issues, while hydro jetting offers a comprehensive and long-term solution for more stubborn clogs and preventive maintenance. The choice between the two methods should be based on your specific needs and the assessment of a professional plumber. In my case, hydro jetting proved to be the key to a clog-free and smoothly running kitchen sink, providing me with peace of mind and a hassle-free cooking experience.

Addison’s Best Plumbing & Hydro Jetting

4900 Airport Pkwy #1884, Addison, TX 75001, United States

469-703-8531

Preparing Your Home for Winter Cleaning: A Checklist – Coppell’s Best Maid Services

As the days grow shorter, and a chill creeps into the air, I find myself reflecting on the approaching winter season. While I enjoy the coziness of winter, I also recognize that it’s a time when our homes need some extra attention to ensure they are clean, comfortable, and ready to face the challenges of colder weather.

I’ll take you through a comprehensive checklist to prepare your home for winter cleaning, making it a welcoming and cozy haven during the coldest months of the year based from House Cleaning Coppell TX.

1. Declutter and Organize

Before diving into the deep cleaning tasks, it’s essential to declutter and organize your living spaces. Remove unnecessary items that have accumulated over the year to create a more open and inviting atmosphere. Focus on the following areas:

  • Closets: Donate or store summer clothing and make space for winter attire.
  • Pantry and Fridge: Check for expired items and organize your kitchen supplies for holiday cooking.
  • Living Spaces: Put away outdoor furniture, summer decorations, and anything that doesn’t belong in your winter home.
  • Garage and Basement: Tidy up storage areas to accommodate winter gear and holiday decorations.

2. Deep Clean the Floors

Clean floors are a must for the winter season, as they’ll be subjected to the most wear and tear. Focus on:

  • Carpet Cleaning: If you have carpets, consider a professional deep clean to remove summer dust and grime. Alternatively, rent a carpet cleaner for a DIY approach.
  • Hardwood and Tile Floors: Sweep and mop thoroughly to remove dirt and grime. Consider applying a protective wax or finish to keep them in top shape.
  • Entry Mats: Place sturdy entry mats at the front door to prevent dirt and moisture from being tracked into the house.

3. Windows and Doors: Weatherproofing

Winter can be harsh on your home, and drafts can make your living spaces feel chilly. Take the time to weatherproof your windows and doors:

  • Seal Gaps: Check for gaps around windows and doors and seal them with weatherstripping or caulk. This will help keep your home warm and reduce heating costs.
  • Storm Windows: If you have storm windows, install them to provide an extra layer of insulation.
  • Window Cleaning: Clean your windows inside and out to maximize the natural light that filters into your home during the darker winter months.

4. Heating System Maintenance

A well-maintained heating system is crucial for a warm and cozy winter. Schedule a professional inspection and servicing for your:

  • Furnace: Ensure that your furnace is clean and in good working order. Change the air filters regularly throughout the winter.
  • Fireplace: If you have a fireplace, have it professionally cleaned and inspected. Stock up on firewood and make sure your fireplace tools are easily accessible.
  • Space Heaters: If you use space heaters, clean them, and inspect the cords for any wear and tear. Make sure they are placed safely away from flammable materials.

5. Kitchen and Appliances

With the winter season comes holiday cooking and gatherings. Prepare your kitchen and appliances for the extra use:

  • Oven and Stovetop: Deep clean your oven, stovetop, and range hood to ensure they’re ready for holiday feasts. Check that all burners and heating elements are working correctly.
  • Refrigerator and Freezer: Clean out expired food, defrost the freezer if necessary, and organize your fridge to accommodate holiday ingredients.
  • Dishwasher: Run a cleaning cycle with a dishwasher cleaner to remove mineral deposits and built-up grime. Clean the filter and check for any clogs.

6. Bathroom Deep Clean

A clean and well-maintained bathroom is a must, especially during the winter months when more time is spent indoors. Focus on:

  • Grout and Tiles: Scrub the grout and tiles to remove mold and mildew. Consider applying a grout sealer to prevent future staining.
  • Toilet and Sink: Thoroughly clean and disinfect these high-touch areas. Replace any worn-out toilet seats or fixtures.
  • Exhaust Fan: Check that the exhaust fan is in working order to help reduce humidity and prevent mold growth.

7. Bedroom Comfort

Winter is the time to make your bedroom a warm and comfortable retreat. Consider these steps:

  • Bedding: Swap out lightweight summer bedding for warm and cozy winter options. Freshly launder all bedding.
  • Closet Organization: Rotate seasonal clothing and ensure you have easy access to winter items like blankets and extra bedding.
  • Mattress Cleaning: Vacuum and clean your mattress to remove dust mites and allergens.

8. Clean and Inspect the Chimney

If you have a chimney, it’s crucial to ensure it’s clean and safe to use during the winter. Schedule a professional chimney sweep to remove creosote and debris, which can pose a fire hazard. Ensure the damper and flue are functioning correctly.

9. Stock Up on Winter Supplies

Before winter arrives, stock up on essential winter supplies to make sure you’re well-prepared. This includes:

  • Rock Salt: Have rock salt on hand for de-icing walkways and driveways.
  • Winter Gear: Ensure you have snow shovels, ice scrapers, and any necessary winter clothing and accessories.
  • Emergency Supplies: Prepare an emergency kit with essentials like flashlights, batteries, blankets, and non-perishable food items in case of power outages.

10. Exterior Maintenance

Lastly, don’t forget the exterior of your home, which takes a beating during the winter months. Consider these tasks:

  • Gutter Cleaning: Clear out gutters and downspouts to prevent ice dams and water damage.
  • Roof Inspection: Examine your roof for loose or damaged shingles and repair as needed to prevent leaks.
  • Lawn Care: Trim trees and bushes away from your home to prevent damage from heavy snow and ice.
  • Outdoor Furniture: Store or cover outdoor furniture to protect it from winter weather.

In conclusion, preparing your home for winter cleaning is a comprehensive task that involves decluttering, deep cleaning, maintenance, and stocking up on essential supplies. By following this checklist, you can ensure your home is not only clean but also well-prepared for the challenges and joys of the winter season. As you cozy up inside, you’ll be able to enjoy the winter wonderland outside, knowing that your home is a warm and inviting retreat.

As the days grow shorter, and a chill creeps into the air, I find myself reflecting on the approaching winter season. While I enjoy the coziness of winter, I also recognize that it’s a time when our homes need some extra attention to ensure they are clean, comfortable, and ready to face the challenges of colder weather. In this article, I’ll take you through a comprehensive checklist to prepare your home for winter cleaning, making it a welcoming and cozy haven during the coldest months of the year.

1. Declutter and Organize

Before diving into the deep cleaning tasks, it’s essential to declutter and organize your living spaces. Remove unnecessary items that have accumulated over the year to create a more open and inviting atmosphere. Focus on the following areas:

  • Closets: Donate or store summer clothing and make space for winter attire.
  • Pantry and Fridge: Check for expired items and organize your kitchen supplies for holiday cooking.
  • Living Spaces: Put away outdoor furniture, summer decorations, and anything that doesn’t belong in your winter home.
  • Garage and Basement: Tidy up storage areas to accommodate winter gear and holiday decorations.

2. Deep Clean the Floors

Clean floors are a must for the winter season, as they’ll be subjected to the most wear and tear. Focus on:

  • Carpet Cleaning: If you have carpets, consider a professional deep clean to remove summer dust and grime. Alternatively, rent a carpet cleaner for a DIY approach.
  • Hardwood and Tile Floors: Sweep and mop thoroughly to remove dirt and grime. Consider applying a protective wax or finish to keep them in top shape.
  • Entry Mats: Place sturdy entry mats at the front door to prevent dirt and moisture from being tracked into the house.

3. Windows and Doors: Weatherproofing

Winter can be harsh on your home, and drafts can make your living spaces feel chilly. Take the time to weatherproof your windows and doors:

  • Seal Gaps: Check for gaps around windows and doors and seal them with weatherstripping or caulk. This will help keep your home warm and reduce heating costs.
  • Storm Windows: If you have storm windows, install them to provide an extra layer of insulation.
  • Window Cleaning: Clean your windows inside and out to maximize the natural light that filters into your home during the darker winter months.

4. Heating System Maintenance

A well-maintained heating system is crucial for a warm and cozy winter. Schedule a professional inspection and servicing for your:

  • Furnace: Ensure that your furnace is clean and in good working order. Change the air filters regularly throughout the winter.
  • Fireplace: If you have a fireplace, have it professionally cleaned and inspected. Stock up on firewood and make sure your fireplace tools are easily accessible.
  • Space Heaters: If you use space heaters, clean them, and inspect the cords for any wear and tear. Make sure they are placed safely away from flammable materials.

5. Kitchen and Appliances

With the winter season comes holiday cooking and gatherings. Prepare your kitchen and appliances for the extra use:

  • Oven and Stovetop: Deep clean your oven, stovetop, and range hood to ensure they’re ready for holiday feasts. Check that all burners and heating elements are working correctly.
  • Refrigerator and Freezer: Clean out expired food, defrost the freezer if necessary, and organize your fridge to accommodate holiday ingredients.
  • Dishwasher: Run a cleaning cycle with a dishwasher cleaner to remove mineral deposits and built-up grime. Clean the filter and check for any clogs.

6. Bathroom Deep Clean

A clean and well-maintained bathroom is a must, especially during the winter months when more time is spent indoors. Focus on:

  • Grout and Tiles: Scrub the grout and tiles to remove mold and mildew. Consider applying a grout sealer to prevent future staining.
  • Toilet and Sink: Thoroughly clean and disinfect these high-touch areas. Replace any worn-out toilet seats or fixtures.
  • Exhaust Fan: Check that the exhaust fan is in working order to help reduce humidity and prevent mold growth.

7. Bedroom Comfort

Winter is the time to make your bedroom a warm and comfortable retreat. Consider these steps:

  • Bedding: Swap out lightweight summer bedding for warm and cozy winter options. Freshly launder all bedding.
  • Closet Organization: Rotate seasonal clothing and ensure you have easy access to winter items like blankets and extra bedding.
  • Mattress Cleaning: Vacuum and clean your mattress to remove dust mites and allergens.

8. Clean and Inspect the Chimney

If you have a chimney, it’s crucial to ensure it’s clean and safe to use during the winter. Schedule a professional chimney sweep to remove creosote and debris, which can pose a fire hazard. Ensure the damper and flue are functioning correctly.

9. Stock Up on Winter Supplies

Before winter arrives, stock up on essential winter supplies to make sure you’re well-prepared. This includes:

  • Rock Salt: Have rock salt on hand for de-icing walkways and driveways.
  • Winter Gear: Ensure you have snow shovels, ice scrapers, and any necessary winter clothing and accessories.
  • Emergency Supplies: Prepare an emergency kit with essentials like flashlights, batteries, blankets, and non-perishable food items in case of power outages.

10. Exterior Maintenance

Lastly, don’t forget the exterior of your home, which takes a beating during the winter months. Consider these tasks:

  • Gutter Cleaning: Clear out gutters and downspouts to prevent ice dams and water damage.
  • Roof Inspection: Examine your roof for loose or damaged shingles and repair as needed to prevent leaks.
  • Lawn Care: Trim trees and bushes away from your home to prevent damage from heavy snow and ice.
  • Outdoor Furniture: Store or cover outdoor furniture to protect it from winter weather.

In conclusion, according to House Cleaning Coppell TX, preparing your home for winter cleaning is a comprehensive task that involves decluttering, deep cleaning, maintenance, and stocking up on essential supplies. By following this checklist, you can ensure your home is not only clean but also well-prepared for the challenges and joys of the winter season. As you cozy up inside, you’ll be able to enjoy the winter wonderland outside, knowing that your home is a warm and inviting retreat.

Coppell’s Best Maid Services

440 Shadowcrest Ln, Coppell, TX 75019, United States

469-437-7286

Cleaning Residential Windows for Improved Indoor Air Quality – DFW Window Cleaning of Irving

As a homeowner, I’ve always believed that a clean and healthy living space is the cornerstone of a happy home. While we often focus on dusting, vacuuming, and purifying the air, we tend to overlook a crucial aspect that can significantly impact the indoor air quality – our windows. Clean windows not only bring in natural light and beautiful views but also play a vital role in maintaining a fresh and pollutant-free environment.

In this article, I’ll share my experiences and insights on how cleaning residential windows can lead to improved indoor air quality according to Window Cleaning Irving TX.

The Connection Between Windows and Indoor Air Quality

The air we breathe inside our homes can be filled with various pollutants and allergens, from dust and pet dander to volatile organic compounds (VOCs) released by cleaning products and off-gassing furniture. These contaminants can lead to a range of health issues, including allergies, respiratory problems, and general discomfort. What’s surprising is that your windows can be both a source of and a solution to this problem.

Here’s how your windows and their cleanliness are connected to indoor air quality:

1. Pollutant Accumulation: Windows are exposed to the outdoor environment, which means they can accumulate dust, dirt, and pollutants from the outside. Over time, these particles can stick to your windows and affect the air quality inside your home.

2. Allergen Traps: Pollen, mold spores, and other allergens can attach themselves to window screens and frames. When these allergens are disturbed, they can become airborne, triggering allergies and respiratory issues.

3. Indoor Pollutant Release: The surfaces around your windows, including window sills and frames, can harbor indoor pollutants. When you open your windows, these contaminants can be released into your living space.

4. Reduced Airflow: Dirty windows can hinder the proper functioning of your windows. If you can’t open them fully, you’re missing out on the natural ventilation that helps remove indoor air pollutants.

5. Natural Light: Clean windows allow more natural light to enter your home, reducing the need for artificial lighting and making your living space brighter and more comfortable.

Signs It’s Time for Window Cleaning

Knowing when it’s time to clean your residential windows is essential for maintaining a healthy indoor environment. Here are some signs that suggest it’s time for a thorough window cleaning:

1. Visible Dirt and Grime: If you can see dust, dirt, or stains on your windows, it’s a clear sign that cleaning is needed.

2. Reduced Natural Light: When your windows are so dirty that they obstruct the passage of natural light, it’s time to clean them.

3. Allergy Symptoms: If you or your family members experience increased allergy symptoms when windows are open or during certain seasons, it could be due to allergens trapped in your window screens and frames.

4. Difficulty Opening Windows: If your windows are challenging to open or close due to dirt buildup, it’s an indication that cleaning is overdue.

5. Seasonal Maintenance: It’s a good practice to clean your residential windows at least once or twice a year, typically in the spring and fall, to prepare for the changing seasons and remove accumulated debris.

The Benefits of Clean Residential Windows

Maintaining clean residential windows provides a range of benefits that contribute to improved indoor air quality and overall well-being:

1. Improved Indoor Air Quality: By removing dust, pollen, and other contaminants from your windows, you reduce the potential sources of indoor air pollutants.

2. Better Ventilation: Clean windows allow you to fully open your windows, improving natural ventilation and helping to circulate fresh air throughout your home.

3. Enhanced Natural Light: Clean windows bring in more natural light, reducing the need for artificial lighting and creating a brighter, more inviting living space.

4. Allergen Reduction: By cleaning window screens and frames, you can reduce the presence of allergens like pollen, dust, and pet dander, leading to fewer allergy symptoms.

5. Increased Comfort: A clean and well-maintained living space contributes to a higher level of comfort and overall well-being for you and your family.

6. Energy Efficiency: Well-maintained windows provide better insulation, helping to regulate indoor temperature and reduce energy costs.

How to Clean Residential Windows for Improved Indoor Air Quality

Cleaning your residential windows is a simple yet effective way to enhance indoor air quality and the overall comfort of your home. Here’s a step-by-step guide to help you get started:

Step 1: Gather Your Supplies

Collect the necessary cleaning supplies, including a bucket, a squeegee, a soft-bristle brush or sponge, a microfiber cloth, and a homemade or commercial window cleaning solution.

Step 2: Dry Dusting

Before applying any cleaning solution, use a dry cloth or a duster to remove loose dirt, dust, and cobwebs from the window frames, sills, and screens.

Step 3: Prepare the Cleaning Solution

Mix your cleaning solution in a bucket. You can create a homemade solution by mixing equal parts water and white vinegar or by using a commercial window cleaning product. Avoid using harsh chemicals or abrasive cleaners.

Step 4: Wet the Windows

Dip the soft-bristle brush or sponge into the cleaning solution and wet the entire window surface. Pay extra attention to areas with stubborn stains or buildup.

Step 5: Scrub Gently

Use a gentle, circular motion to scrub the window surface. Start at one corner and work your way across the window, covering the entire area. Make sure to clean the frames and sills as well.

Step 6: Squeegee Technique

After scrubbing, use a squeegee to remove the cleaning solution. Starting from the top, pull the squeegee down in a single, continuous motion. Wipe the blade with a clean, dry cloth after each pass to prevent streaks.

Step 7: Wipe Down the Frames and Sills

Use a microfiber cloth to wipe down the frames and sills. This helps prevent the release of indoor pollutants when you open your windows.

Step 8: Check for Streaks

Inspect the windows for streaks or spots. If you notice any, use a clean microfiber cloth to wipe them away. Ensure that your windows are spotless and streak-free.

Step 9: Reinstall Screens and Open Windows

Once the windows are clean and dry, reinstall the screens and open your windows to enjoy the benefits of improved ventilation and natural light.

Step 10: Regular Maintenance

Implement a regular window cleaning schedule to maintain clean and pollutant-free windows. This helps prevent the buildup of allergens and contaminants that can affect indoor air quality.

Tips for Effective Window Cleaning

Here are some additional tips to make your window cleaning process more efficient and effective:

1. Use a Squeegee: Invest in a high-quality squeegee with a rubber blade for streak-free windows. It’s an essential tool for effective window cleaning.

2. Avoid Direct Sunlight: Clean your windows on overcast or cooler days to prevent the cleaning solution from drying too quickly, which can lead to streaks.

3. Label Screens: If you have multiple screens, label them to ensure you know which one goes where when it’s time for reinstallation.

4. Safety First: When working on upper-story windows, prioritize safety. Use ladders and tools safely, and consider professional help when necessary.

5. Seasonal Cleaning: Seasonal cleaning is an excellent practice to remove accumulated debris and prepare for changing weather conditions.

6. Vacuum Window Tracks: Don’t forget to clean window tracks using a vacuum or brush to remove dirt and debris that can affect indoor air quality.

Conclusion

Cleaning residential windows is a simple yet effective way to improve indoor air quality and create a healthy, comfortable living environment. By removing dirt, allergens, and pollutants from your windows, you not only enjoy clearer views and better natural light but also prevent the release of indoor contaminants when you open your windows.

Overall, based from Window Cleaning Irving TX, regular window cleaning and maintenance ensure that your windows contribute positively to the quality of the air you breathe inside your home. So, take the initiative to clean your windows regularly and reap the benefits of a cleaner, healthier living space for you and your family.

DFW Window Cleaning of Irving

600 Burnwood Dr, Irving, TX 75062, United States

972-476-2947

Exterior Cladding Options for Your Replacement Windows – NTHE Window Replacement Euless

As a homeowner who recently embarked on the journey of window replacement, I quickly realized that it’s not just about choosing the right window style and glass type. The exterior cladding of replacement windows is a critical consideration, as it not only influences the aesthetics of your home but also affects durability, energy efficiency, and maintenance.

I’ll share my insights and explore the various exterior cladding options available for replacement windows to help you make an informed decision according to Window Replacement Euless TX.

The Role of Exterior Cladding

Exterior cladding serves as the protective shell of your replacement windows. It’s the layer that faces the elements, including sunlight, rain, snow, and temperature fluctuations. Cladding plays a significant role in maintaining the integrity and performance of your windows over time. It’s essential to choose the right cladding material that suits your home’s architectural style and environmental conditions.

Common Exterior Cladding Materials

Let’s delve into the most common exterior cladding materials for replacement windows and examine their advantages and disadvantages.

1. Vinyl Cladding

Pros:

  • Affordability: Vinyl cladding is one of the most budget-friendly options for replacement windows.
  • Low Maintenance: It doesn’t require painting or sealing, making it easy to care for.
  • Durability: Vinyl is resistant to rot, insects, and moisture.
  • Energy Efficiency: It provides good insulation, contributing to energy savings.

Cons:

  • Limited Color Options: While there is a range of color choices, you may have fewer options for customization.
  • Not Suitable for High-End Homes: Vinyl may not be the best choice for luxury homes or those with unique architectural styles.

2. Aluminum Cladding

Pros:

  • Durability: Aluminum is highly resistant to corrosion and weathering, making it suitable for various climates.
  • Low Maintenance: It’s easy to clean and doesn’t require frequent painting.
  • Slim Profiles: Aluminum cladding allows for narrower window frames, which can maximize the glass area and natural light.
  • Customization: It can be powder-coated to match specific color preferences.

Cons:

  • Thermal Conductivity: Aluminum is an excellent conductor of heat, which can lead to energy loss without proper insulation.
  • Limited Insulation: Aluminum-clad windows may require additional insulation to meet energy efficiency standards.
  • Higher Cost: Aluminum-clad windows can be more expensive than vinyl.

3. Wood Cladding

Pros:

  • Aesthetics: Wood cladding provides a timeless and classic look that complements various architectural styles.
  • Natural Insulation: Wood is a natural insulator, offering energy efficiency and thermal comfort.
  • Customization: It can be painted or stained to match your home’s exterior and interior decor.
  • Environmental Appeal: Wood is a renewable and sustainable resource.

Cons:

  • Maintenance: Wood requires regular maintenance, including painting or staining, to protect against moisture and pests.
  • Cost: Wood-clad windows are typically more expensive than vinyl or aluminum.
  • Susceptibility to Rot: Without proper maintenance, wood can be susceptible to rot, especially in high-moisture environments.

4. Fiberglass Cladding

Pros:

  • Durability: Fiberglass is highly durable and can withstand extreme weather conditions.
  • Low Maintenance: It’s resistant to warping, rot, and corrosion, reducing maintenance needs.
  • Energy Efficiency: Fiberglass is an excellent insulator, helping reduce energy costs.
  • Customization: It can be painted to match your home’s color scheme.

Cons:

  • Cost: Fiberglass-clad windows tend to be more expensive than vinyl options.
  • Limited Availability: They might not be as readily available as other materials.
  • Installation Complexity: The installation process for fiberglass-clad windows can be more complicated.

5. Composite Cladding

Pros:

  • Durability: Composite cladding combines the durability of materials like fiberglass and the aesthetic appeal of wood.
  • Low Maintenance: It is resistant to moisture, pests, and rot, requiring minimal upkeep.
  • Energy Efficiency: Composite windows offer good insulation properties.
  • Customization: They can be painted and have various finishes.

Cons:

  • Cost: Composite-clad windows are generally more expensive than vinyl.
  • Limited Availability: They might not be as widely available as other materials.

Choosing the Right Exterior Cladding

The decision on which exterior cladding to choose for your replacement windows should consider several key factors:

  1. Aesthetic Preferences: The exterior cladding material should complement your home’s architectural style and your personal design preferences. Consider how it will look from both the inside and outside.
  2. Environmental Conditions: Your local climate, exposure to sunlight, and proximity to water bodies can impact the choice of exterior cladding material. Some materials are better suited to specific environmental conditions.
  3. Maintenance Commitment: Think about the level of maintenance you’re willing to undertake. Wood requires more maintenance, while vinyl and fiberglass are relatively low-maintenance.
  4. Budget: Consider your budget for replacement windows. Keep in mind that while some materials may have a higher upfront cost, they can provide long-term savings in energy efficiency and durability.
  5. Energy Efficiency: Energy efficiency is a significant consideration for many homeowners. Look for cladding materials that offer good insulation properties and contribute to reduced heating and cooling costs.
  6. Longevity: The longevity of the cladding material is essential for ensuring the value of your investment. Materials that are resistant to rot, corrosion, and pests tend to last longer.
  7. Local Availability: Check with local suppliers and contractors to see which cladding materials are readily available in your area. Availability can impact your choices.

Conclusion

Choosing the right exterior cladding for your replacement windows is a significant decision that will influence the aesthetics, functionality, and maintenance requirements of your home. Each cladding material comes with its own set of advantages and disadvantages, and your choice should align with your specific needs and priorities.

In my own experience, I found that the combination of aesthetics, durability, and energy efficiency led me to select fiberglass-clad replacement windows. This material offered the timeless look of wood with the low maintenance and energy efficiency that I desired.

Ultimately, as per Window Replacement Euless TX, whether you opt for vinyl, aluminum, wood, fiberglass, or composite cladding, the goal is to enhance your home’s comfort, aesthetics, and long-term value. With the right exterior cladding material, your replacement windows can be a wise investment that transforms your living space into a more attractive and energy-efficient environment.

NTHE Window Replacement Euless

3752 Trinity Hills Ln, Euless, TX 76040, United States

817-402-3539

Professional Window Leak Detection and Repair Services – NTHE Window Replacement Trophy Club

As a homeowner, I’ve always cherished the idea of a cozy, leak-free home where rainstorms are best enjoyed from the comfort of my living room, rather than through a dripping window frame. Unfortunately, like many homeowners, I’ve faced the challenge of dealing with window leaks.

I’ll share my experiences with professional window leak detection and repair services, shedding light on the importance of addressing this common issue by following Window Replacement Trophy Club TX.

The Troubling Discovery of Window Leaks

It was during a heavy downpour that I first noticed water trickling down the inside of my window frame. The sight was both frustrating and concerning. Recognizing the potential damage that water leaks could cause, I decided to seek professional help to tackle this issue.

The Importance of Professional Window Leak Detection

I quickly realized that window leaks are not something to be taken lightly. If left unattended, they can lead to a host of problems:

  1. Structural Damage: Water infiltration can cause structural damage to your home, weakening walls and compromising the integrity of the building.
  2. Mold and Mildew Growth: Moisture provides the ideal environment for mold and mildew to thrive. This can lead to health issues for you and your family.
  3. Energy Loss: Leaky windows allow air to escape, increasing energy consumption and utility bills.
  4. Aesthetic Damage: Water damage can mar the appearance of your home, leading to unsightly stains and peeling paint.

My Experience with Professional Window Leak Detection

My journey to address the issue of window leaks began with a professional window leak detection service. Here’s how it unfolded:

  1. Research and Selection: I researched local companies specializing in window leak detection and repair. Reading reviews and seeking recommendations helped me narrow down my choices.
  2. Initial Assessment: The selected professional arrived at my home for an initial assessment. They carefully inspected all windows to identify areas of concern and determine the extent of the damage.
  3. Leak Detection Methods: The professionals used various methods, including water tests and infrared thermography, to pinpoint the exact sources of leaks.
  4. Report and Solutions: After a comprehensive assessment, I received a detailed report outlining the findings. The report included photographs and recommended solutions to address the leaks.
  5. Repair Plan: I worked with the professionals to develop a repair plan that included sealing, caulking, and, in some cases, window replacement. The plan was customized to suit the specific needs of each window.
  6. Repairs in Action: The repair process commenced, and it was fascinating to see how meticulously the professionals addressed each leak. They sealed gaps, replaced damaged sealants, and ensured that water would no longer find its way into my home.
  7. Quality Assurance: A crucial aspect of professional window leak detection services is the assurance of quality. The professionals conducted thorough post-repair tests to confirm that the leaks were effectively resolved.

The Benefits of Professional Window Leak Detection and Repair

The experience taught me several valuable lessons about the significance of professional services in addressing window leaks:

  1. Accurate Detection: Professionals use advanced tools and techniques to accurately identify the source of leaks, ensuring that the root of the problem is addressed.
  2. Custom Solutions: Repair plans are tailored to the unique requirements of each window. This approach ensures that leaks are effectively sealed, and the structural integrity of the window is preserved.
  3. Cost-Effective: Addressing window leaks promptly can save you money in the long run by preventing further damage and reducing energy costs.
  4. Peace of Mind: Knowing that your home is protected from water damage and the subsequent issues it can cause offers priceless peace of mind.

Preventative Measures for the Future

Having successfully resolved my window leaks, I also learned the importance of preventative measures to avoid similar issues in the future:

  1. Regular Maintenance: Routine inspection and maintenance of window seals, caulking, and weatherstripping are essential to prevent leaks.
  2. Landscaping Management: Keeping tree branches and shrubs away from windows can prevent physical damage and blockages that may lead to leaks.
  3. Upgraded Windows: Consider upgrading to energy-efficient and water-resistant windows to reduce the risk of future leaks.

Conclusion: A Dry and Cozy Home

As stated in Window Replacement Trophy Club TX and based on my experience with professional window leak detection and repair services has transformed my home. It’s no longer a place where rainy days bring worries of water damage, but a haven of comfort and security. The investment in professional expertise to address window leaks was a wise decision, ensuring that my home remains dry, damage-free, and ready to withstand any weather that comes its way.

NTHE Window Replacement Trophy Club

2220 McLean Ave, Trophy Club, TX 76262, United States

817-592-8450

Best UV-Resistant Window Options – NTHE Window Replacement Mansfield

As a homeowner who values both the comfort and longevity of my living space, I have always been intrigued by the impact of ultraviolet (UV) radiation on interiors. Over time, I’ve learned that the right choice of windows can play a significant role in protecting my home from the sun’s harmful rays while ensuring a comfortable and energy-efficient environment.

By following Window Replacement Mansfield TX, I’ll share my personal experiences and insights into the world of UV-resistant window options, helping you make informed decisions for your home.

Understanding the Effects of UV Radiation

UV radiation from the sun is invisible to the naked eye, but its effects are far from inconspicuous. Over time, exposure to UV rays can lead to a range of issues in your home, including:

  1. Fading: UV rays can cause significant fading of furniture, flooring, artwork, and fabrics. This is particularly noticeable in areas with intense sun exposure.
  2. Overheating: Solar heat gain through windows can result in uncomfortably warm indoor temperatures, increased energy costs, and excessive use of air conditioning.
  3. Glare: Sunlight can create glare on screens and surfaces, making it challenging to work, relax, or enjoy indoor activities.
  4. Health Concerns: Prolonged exposure to UV radiation indoors can lead to health concerns, including skin damage and an increased risk of skin cancer.

The Importance of UV-Resistant Windows

To combat these issues, UV-resistant windows have become a crucial element in modern home design. These windows are specially designed to filter out a significant portion of harmful UV rays while still allowing visible light to enter. The benefits of UV-resistant windows are numerous:

  1. Furniture and Artwork Preservation: UV-resistant windows can significantly reduce the fading of your valuable possessions, ensuring that your furniture, flooring, and artwork retain their original colors and quality.
  2. Energy Efficiency: By blocking a portion of solar heat, these windows help maintain a more comfortable indoor environment. This, in turn, reduces the need for air conditioning and lowers energy costs.
  3. Reduced Glare: UV-resistant windows minimize glare, providing a more comfortable and visually pleasing atmosphere for indoor activities.
  4. Health Protection: Protecting your skin from UV radiation indoors contributes to your overall well-being, reducing the risk of sun-related health issues.

Best UV-Resistant Window Options

Several window options are designed to provide UV protection and enhance the overall comfort of your home. Here are some of the best choices to consider:

  1. Low-E Coatings: Low-emissivity (Low-E) coatings are thin, virtually invisible layers applied to window glass. These coatings can significantly reduce UV radiation while allowing visible light to pass through.
  2. Double-Glazed Windows: Double-glazed windows consist of two layers of glass with a space in between. This space can be filled with inert gas, which enhances the window’s insulation properties, blocking UV radiation and reducing heat transfer.
  3. Triple-Glazed Windows: Similar to double-glazed windows, triple-glazed windows have three layers of glass and provide even higher UV protection and insulation.
  4. Tinted Glass: Tinted glass, either applied as a film or integrated into the window structure, can reduce UV transmission. Tinted windows come in various shades and colors to match your home’s aesthetics.
  5. Laminated Glass: Laminated glass consists of multiple layers of glass bonded together with a layer of plastic. This construction not only improves UV resistance but also provides enhanced security and noise reduction.
  6. Window Films: UV-resistant window films can be applied to existing windows, transforming them into UV-protective barriers. These films are available in a variety of tints and levels of UV protection.
  7. Impact-Resistant Windows: Impact-resistant windows are designed to withstand extreme weather conditions. These windows often feature laminated glass, which provides UV resistance in addition to impact protection.

Considerations for UV-Resistant Windows

When choosing UV-resistant windows, there are several important considerations to keep in mind:

  1. Climate: The level of UV protection required may vary depending on your climate. Areas with intense sunlight may necessitate higher UV resistance.
  2. Window Orientation: The direction your windows face can affect the amount of UV radiation they receive. South- and west-facing windows generally receive more direct sunlight.
  3. Aesthetics: Choose UV-resistant windows that complement your home’s style and architecture. Tinted windows or low-E coatings can be customized to suit your design preferences.
  4. Energy Efficiency: UV-resistant windows often provide better insulation, contributing to energy savings. Consider the overall energy efficiency of the windows you select.
  5. Professional Installation: To ensure the optimal performance of UV-resistant windows, professional installation is essential. Proper installation ensures that windows are airtight and well-sealed.

The Endless Benefits of UV Protection

In summary, as per Window Replacement Mansfield TX, incorporating UV-resistant windows into your home not only shields your interior from fading and overheating but also contributes to a healthier and more comfortable living environment. As someone who values both the aesthetics and functionality of my living space, I can attest to the transformative impact of these windows. The sense of security in knowing that your home is shielded from harmful UV radiation is immeasurable. Moreover, the energy savings and preservation of your cherished belongings are added bonuses. By exploring the best UV-resistant window options and considering your specific needs, you can create a home that is not only beautiful but also protected from the sun’s powerful rays.

NTHE Window Replacement Mansfield

1771 Calender Rd, Mansfield, TX 76063, United States

817-592-8450

Top Safety Precautions in Window Installation – Window Replacement Experts Mckinney

As a homeowner who has tackled various home improvement projects, I’ve come to understand that safety should always be a top priority, especially when it comes to window installation. While installing windows can be a rewarding endeavor, it can also pose certain risks if proper safety precautions are not taken.

I’ll share the safety measures I’ve learned to prioritize during window installation based from Window Replacement McKinney TX.

1. Protective Gear: The Foundation of Safety

Wearing appropriate protective gear is the first and foremost safety precaution. This gear includes:

  • Safety Glasses: Protecting your eyes from debris, dust, and potential glass shards is essential. Safety glasses with side shields provide the best protection.
  • Work Gloves: Gloves shield your hands from sharp edges, splinters, and other potential injuries while handling window frames and glass.
  • Work Boots: Sturdy work boots with slip-resistant soles offer good traction and protect your feet from falling objects.
  • Dust Mask: When cutting, sanding, or working with insulation, a dust mask helps filter out airborne particles, preserving your respiratory health.

2. Ladder Safety: Stable Support

For window installation on elevated levels, a ladder is often necessary. I’ve learned the importance of ladder safety to prevent falls and injuries:

  • Use the Right Ladder: Ensure your ladder is the right height for the job and is in good condition.
  • Position Carefully: Set up the ladder on a level surface, and make sure it’s stable before climbing.
  • Maintain Three Points of Contact: Always have two hands and one foot, or two feet and one hand, in contact with the ladder when ascending or descending.
  • Don’t Overreach: Move the ladder as needed to avoid overreaching, which can lead to a fall.

3. Handling Glass: Fragile Caution

Glass can be particularly tricky to work with during window installation. To safely handle glass:

  • Wear Gloves: Gloves provide a secure grip on the glass and protect against cuts.
  • Lift with Care: When moving glass, lift it using your legs, not your back, to prevent strain or injury.
  • Secure Glass Sheets: Always ensure that glass sheets are firmly secured in their frames to prevent accidents or breakage.

4. Proper Tools and Equipment: The Right Setup

Using the appropriate tools and equipment is another crucial aspect of safety:

  • Sturdy Sawhorses: When working on windows, I use sawhorses to provide a stable platform for window frames and glass.
  • Caulking Gun and Sealant: A caulking gun with high-quality sealant is essential to create a secure and weatherproof seal around the window frame.
  • Drill and Screws: Properly securing the window frame requires a drill and suitable screws.
  • Level and Measuring Tools: Accurate measurements and level positioning are crucial for a successful installation. Utilize a level, tape measure, and square to ensure precise alignment.

5. Teamwork: Extra Hands for Safety

When handling larger window units or working at heights, I’ve found that it’s safer to have a partner or a team of professionals. They can help with heavy lifting, provide stability on ladders, and enhance overall safety.

6. Weather Considerations: Plan Accordingly

Weather conditions can impact window installation safety. Rain, strong winds, or extreme temperatures can make the job more challenging and potentially hazardous. I’ve learned to plan window installation on days with favorable weather or to take additional precautions when working under adverse conditions.

7. Electrical Safety: Disconnect Power

For homes with electrical outlets or fixtures near the window installation area, it’s essential to disconnect power to prevent electrical hazards. Turning off circuit breakers or power sources ensures a safer work environment.

8. Prioritize Fall Protection: Harnesses and Guardrails

For installations at elevated levels or on multi-story buildings, fall protection measures are critical. Properly installed guardrails or safety harnesses can prevent falls and their potentially severe consequences.

9. Avoid Distractions: Focus on the Task

Window installation requires concentration and attention to detail. I’ve learned that minimizing distractions is vital to safety. Staying focused on the task at hand helps prevent accidents and mistakes.

10. Cleanup: Tidiness Matters

After completing the window installation, I always clean up the work area. Removing debris, tools, and any hazardous materials reduces the risk of tripping or falling and creates a safer environment for everyone.

11. Quality Over Speed: Avoid Rushing

Rushing through window installation can lead to mistakes and safety hazards. I prioritize quality work over speed to ensure that every step is completed correctly and safely.

12. Professional Help: When in Doubt

For complex window installations or those involving challenging conditions, I’ve learned that seeking professional help is the safest approach. Experienced window installers have the training and expertise to handle installations safely and efficiently.

In conclusion, as stated in Window Replacement McKinney TX, safety should always be at the forefront of any home improvement project, especially window installation. By wearing protective gear, practicing ladder safety, using the right tools, working with a team when needed, and following the other safety precautions I’ve mentioned, I’ve successfully completed window installations while keeping safety a top priority. Remember that when it comes to safety, it’s better to be overly cautious than to take unnecessary risks.

Window Replacement Experts Mckinney

9932 Prairie Dog Ln, McKinney, TX 75071, United States

972-895-8221

Understanding the Impact of UV Rays on Siding – NTHE Window Replacement Euless

As a homeowner who takes great pride in maintaining the curb appeal and structural integrity of my house, I’ve come to realize that the elements can take a toll on the exterior of our homes. Among these elements, the relentless assault of ultraviolet (UV) rays from the sun stands out as a major factor affecting the condition and appearance of our siding.

I’ll share my understanding of the impact of UV rays on siding, shedding light on the causes, consequences, and preventative measures based from Window Replacement Euless TX.

1. The Sun’s Harmful Radiation

Before delving into the specifics of UV rays, it’s essential to understand the broader context. The sun emits a spectrum of electromagnetic radiation, including visible light, infrared rays, and UV rays. While visible light is the part of the spectrum that we can see, UV rays are invisible and fall just beyond our perception.

UV rays are classified into three main categories:

  • UVA: These are long-wave rays that are primarily responsible for premature aging and skin damage.
  • UVB: These are medium-wave rays that cause sunburn and contribute to the development of skin cancer.
  • UVC: These are short-wave rays that are absorbed by the Earth’s atmosphere and do not reach us.

Of particular concern when it comes to the impact on siding is the combination of UVA and UVB rays. These are the rays that, over time, can significantly affect the appearance and condition of your siding.

2. The Impact of UV Rays on Siding

UV rays can wreak havoc on siding in various ways, and it’s essential to understand the potential consequences:

a. Fading: One of the most noticeable effects of UV exposure on siding is fading. Over time, the vibrant colors of your siding can become dull and washed out. This is particularly concerning for homeowners who have chosen bold or rich colors to enhance their home’s aesthetics.

b. Deterioration: UV rays can lead to the breakdown of the chemical bonds in the materials used for siding. This can result in a weakening of the siding’s structure and may make it more susceptible to cracks, peeling, and chalking.

c. Warping and Distortion: The excessive heat generated by UV rays can cause siding materials to expand and contract. This continual cycle of expansion and contraction can lead to warping, distortion, and a loss of the siding’s original shape.

d. Dryness and Brittleness: UV exposure can also strip siding materials of their natural oils and moisture. As a result, siding can become dry and brittle, increasing the likelihood of cracks and fractures.

e. Mold and Algae Growth: Surprisingly, UV rays can create conditions that promote the growth of mold, mildew, and algae on siding. The heat generated by the sun can create a warm and moist environment, which is ideal for the development of these unwanted intruders.

f. Reduced Lifespan: All of these factors, when combined, can lead to a significantly reduced lifespan for your siding. Premature aging and degradation may necessitate the replacement of your siding sooner than expected, which can be a costly and time-consuming endeavor.

3. Types of Siding and UV Resistance

The impact of UV rays on siding varies depending on the type of siding material used. Different siding materials offer varying degrees of UV resistance. Here are some of the most common siding materials and how they fare under UV exposure:

a. Vinyl Siding: Vinyl siding is known for its relatively good resistance to UV rays. Modern vinyl siding is designed with UV stabilizers that help protect against fading and deterioration. However, lighter colors tend to be more resistant to UV damage than darker shades.

b. Fiber Cement Siding: Fiber cement siding offers excellent UV resistance. Its durable composition is naturally resistant to UV damage, making it a great choice for homeowners looking to minimize the impact of the sun’s rays.

c. Wood Siding: Natural wood siding, while visually appealing, is more susceptible to UV damage. It may require more frequent maintenance, such as staining or painting, to protect it from fading and deterioration.

d. Engineered Wood Siding: Engineered wood siding, like vinyl, is designed to resist UV damage effectively. It’s made with UV-resistant materials and is available in a wide range of colors and styles.

e. Metal Siding: Metal siding is generally resistant to UV rays. However, it can heat up in direct sunlight, potentially causing the siding to become hot to the touch. This may not affect the siding’s durability but can be a consideration for those in sunny climates.

4. Preventative Measures to Protect Your Siding

Given the potential consequences of UV exposure on siding, it’s wise to take preventative measures to protect and maintain the condition of your home’s exterior. Here are some strategies that I’ve found to be effective:

a. Use UV-Resistant Siding: When choosing siding materials for your home, opt for those that are explicitly designed to resist UV damage. Look for products with UV stabilizers and warranties that cover fading and deterioration.

b. Select Lighter Colors: If you prefer a siding material that may be more susceptible to UV damage, consider selecting lighter colors. Light-colored siding reflects more UV rays and is less likely to show fading.

c. Apply Protective Coatings: Some siding materials, like wood and metal, benefit from the application of protective coatings, such as paint or sealants. These coatings can act as a barrier against UV rays and moisture, extending the life of the siding.

d. Regular Cleaning and Maintenance: Proper cleaning and maintenance play a crucial role in preventing UV damage. Regularly clean your siding to remove dirt, debris, and organic matter that can foster mold and algae growth. Additionally, inspect your siding for signs of damage and address any issues promptly.

e. Consider Shade and Landscaping: If possible, provide shade to your siding through natural or man-made means. Trees, shrubs, and architectural features like overhangs can help reduce direct sun exposure. Effective landscaping can protect your siding from harsh UV rays.

f. Window Film and Awnings: When it comes to UV damage prevention, don’t forget about your windows. Window films and awnings can help reduce the amount of UV rays that penetrate your home’s interior, protecting both your siding and your indoor furnishings.

5. The Importance of Regular Inspection

In addition to taking preventative measures, I’ve found that regular inspection of your siding is crucial. By inspecting your siding at least once a year, you can identify signs of UV damage early and address them before they become more significant issues.

Look for signs of fading, discoloration, cracks, warping, or distortion. If you notice any of these issues, take action promptly. If the damage is severe or widespread, it may be time to consider siding replacement to ensure the continued integrity and aesthetics of your home’s exterior.

In conclusion, based from Window Replacement Euless TX, understanding the impact of UV rays on siding is crucial for homeowners who want to protect their investment and maintain their home’s beauty and structure. By selecting UV-resistant materials, taking preventative measures, and conducting regular inspections, you can minimize the effects of UV exposure and enjoy a beautiful and well-maintained home for years to come. Protecting your siding from UV damage is not only an investment in your home’s exterior but also a way to ensure its long-lasting value and appeal.

NTHE Window Replacement Euless

3752 Trinity Hills Ln, Euless, TX 76040, United States

817-402-3539

Restaurant Vent Hood Cleaning: Meeting the Highest Hygiene Standards – Dallas Vent-Hood & Conveyer Oven Cleaning

As a restaurant owner, I’ve always understood the critical role that cleanliness plays in our establishment’s success. Among the many areas that demand our attention, one that often goes overlooked by diners but is paramount to our operations is the restaurant’s vent hood system.

Based from Oven Cleaning Dallas TX, I’ll provide the importance of restaurant vent hood cleaning, the standards we must meet, and the benefits of ensuring the highest levels of hygiene in our kitchen.

The Significance of Vent Hood Cleaning

Restaurant vent hood systems, often called exhaust hoods or range hoods, are a lifeline in commercial kitchens. They serve the crucial function of removing heat, smoke, grease, and odors generated during cooking. However, these systems can also become magnets for grease buildup, posing significant risks and challenges:

  1. Fire Hazard: Accumulated grease in the vent hood and ducts is highly flammable, making it a leading cause of kitchen fires.
  2. Air Quality: Grease-laden air can affect the kitchen’s overall air quality, creating an unpleasant working environment for staff and impacting customer comfort.
  3. Efficiency: A clogged vent hood can impede the system’s performance, resulting in ineffective ventilation and slower cooking times.
  4. Health Inspection: Regular restaurant inspections include checks for cleanliness and hygiene standards. Failure to meet these standards can lead to fines or even the closure of the establishment.

Meeting Hygiene Standards

Restaurant vent hood cleaning isn’t just about aesthetics; it’s about meeting and exceeding stringent hygiene standards. Here’s how we ensure that our vent hood system adheres to the highest standards:

  1. Regular Cleaning Schedule: We follow a strict cleaning schedule that includes daily, weekly, and monthly cleaning tasks. Daily cleaning focuses on removing visible grease, while weekly and monthly tasks address more thorough cleaning.
  2. Professional Services: While daily cleaning is performed by our kitchen staff, we enlist professional vent hood cleaning services at least twice a year. These experts have the knowledge and equipment to reach inaccessible areas and ensure a thorough cleaning.
  3. Documentation: We maintain meticulous records of all cleaning activities. This documentation not only helps us stay organized but also serves as evidence of our commitment to hygiene standards during inspections.
  4. Education and Training: Our kitchen staff receives training on proper cleaning procedures and the importance of vent hood hygiene. This empowers them to take ownership of daily cleaning tasks.

The Benefits of a Clean Vent Hood

Maintaining a clean vent hood system isn’t just about compliance; it offers several significant benefits for our restaurant:

  1. Fire Safety: Regular cleaning significantly reduces the risk of grease fires, protecting our staff, customers, and property.
  2. Air Quality: A clean vent hood system ensures better air quality in the kitchen, creating a more comfortable and productive working environment for our staff.
  3. Efficiency: Properly cleaned vent hoods operate more efficiently, ensuring effective ventilation and reducing cooking times.
  4. Cost Savings: Investing in vent hood cleaning services is cost-effective in the long run, as it extends the lifespan of the system and reduces the risk of costly repairs or replacements.
  5. Customer Confidence: A clean restaurant kitchen instills confidence in our customers. They are more likely to return and recommend our establishment to others when they know we prioritize hygiene.

The Vent Hood Cleaning Process

Our approach to vent hood cleaning involves a detailed process to ensure thorough and effective results:

  1. Assessment: Before beginning the cleaning process, we assess the condition of the vent hood system to identify areas that require special attention.
  2. Preparation: We take precautions to protect the kitchen area and equipment from cleaning agents and debris. This includes covering surfaces and removing any items that could be affected.
  3. Cleaning Agents: We use specialized cleaning agents designed to break down and remove grease and grime. These cleaning agents are safe and effective, ensuring that no harmful residues remain.
  4. Scrubbing and Scrapping: Our team scrubs all accessible surfaces within the vent hood, including the baffles, filters, and interior ductwork. Stubborn buildup is carefully scraped away without causing damage.
  5. Exhaust Fan Cleaning: The exhaust fan, often overlooked, is thoroughly cleaned to ensure proper ventilation.
  6. Reassembly: After cleaning, all components are reassembled, and the system is restored to its original configuration.
  7. Inspection: A final inspection is conducted to ensure that all residues have been removed, and the vent hood system is in optimal working condition.

Frequency of Vent Hood Cleaning

The frequency of restaurant vent hood cleaning depends on various factors:

  • Kitchen Usage: The volume of cooking and frying in the kitchen affects how quickly grease accumulates and dictates cleaning frequency.
  • Menu Items: The types of dishes prepared impact grease production. Items with high grease content may necessitate more frequent cleaning.
  • Local Regulations: Complying with local health and safety regulations is crucial, as they often stipulate cleaning frequency.

Conclusion

As a restaurant owner, I’ve learned that maintaining the highest hygiene standards, especially when it comes to the vent hood system, is non-negotiable. Clean vent hoods not only ensure a safe working environment but also contribute to the efficiency and success of our restaurant.

Overall, based from Oven Cleaning Dallas TX, meeting and exceeding hygiene standards through regular cleaning, professional services, documentation, and staff training is an investment that pays off in numerous ways. It enhances fire safety, air quality, and operational efficiency, leading to cost savings and increased customer confidence. Ultimately, a clean vent hood system is an integral part of providing a safe, enjoyable dining experience for our valued patrons.

Dallas Vent-Hood & Conveyer Oven Cleaning

2627 Lewiston Ave, Dallas, TX 75227, United States

972-645-2861

Page 1 of 2

Powered by WordPress & Theme by Anders Norén